The New York State Paid Prenatal Leave Law contains directives related to eligibility, number of hours of leave granted, allowed increments, and rate of pay. These configurations can be made in Time Off, although earnings code setup may be required in UKG Pro depending on your organization's preferences.
Refer to Create Time Off Policies for more information on these settings.
The legislation allows for an employee to use up to 20 hours per 52 weeks, beginning on the first day they use the leave. Unused benefit hours do not carry over to the following 52-week period. For details on this law, refer to Information for Employers. To remain compliant with this law, you must set up the policy, create a new policy group that includes the prenatal leave policy, and then assign the policy group to the employee.
Note:
These instructions provide a recommended best approach to remain compliant.
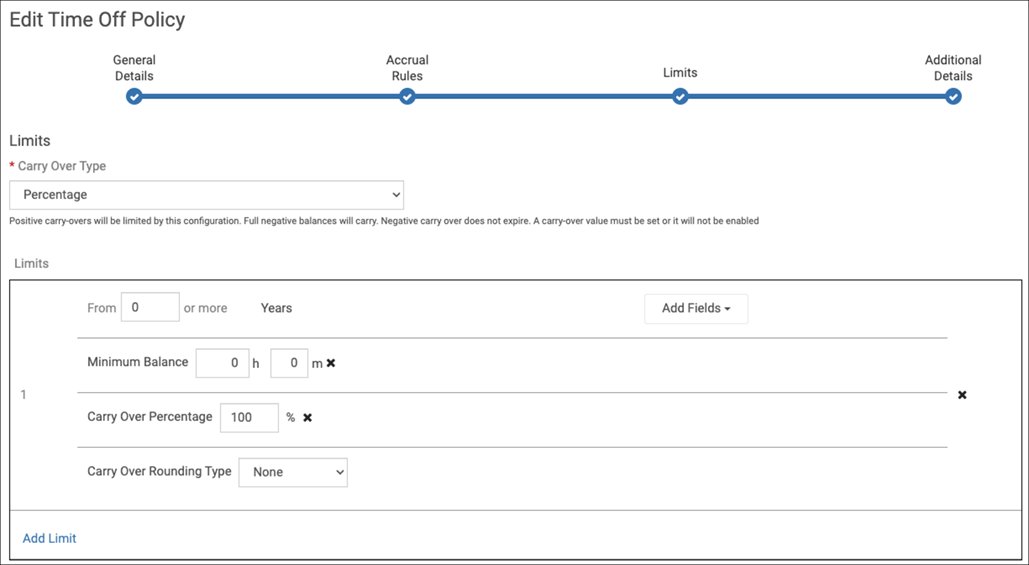
- Complete the Limits page.
- At the Carry Over Percentage field, enter 100 percent. This setting allows the employee's initial grant to carry over through accrual years, as it must be valid for 52 weeks from the employee's first use rather than from a fixed date.
- At the Carry Over Percentage field, enter 100 percent. This setting allows the employee's initial grant to carry over through accrual years, as it must be valid for 52 weeks from the employee's first use rather than from a fixed date.
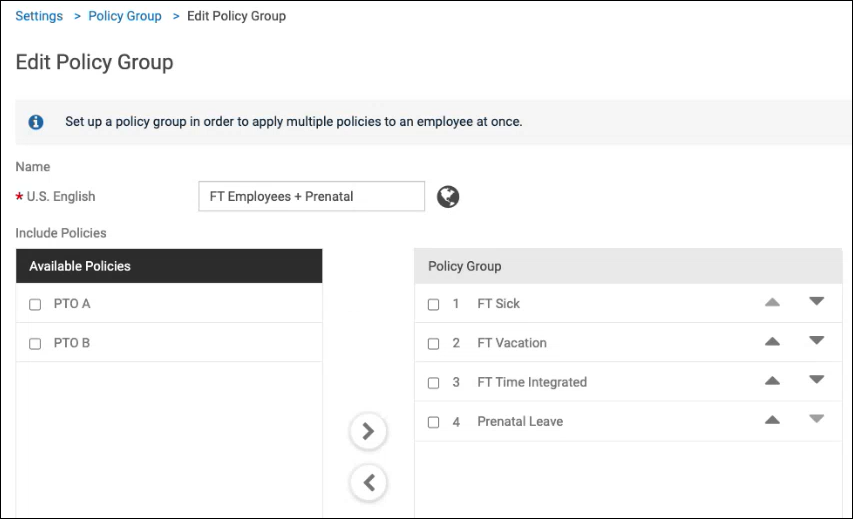
- Create a new policy group that includes the prenatal leave policy (for example, FT Employee + Prenatal) (Time Off > Settings > Time Off Policy).
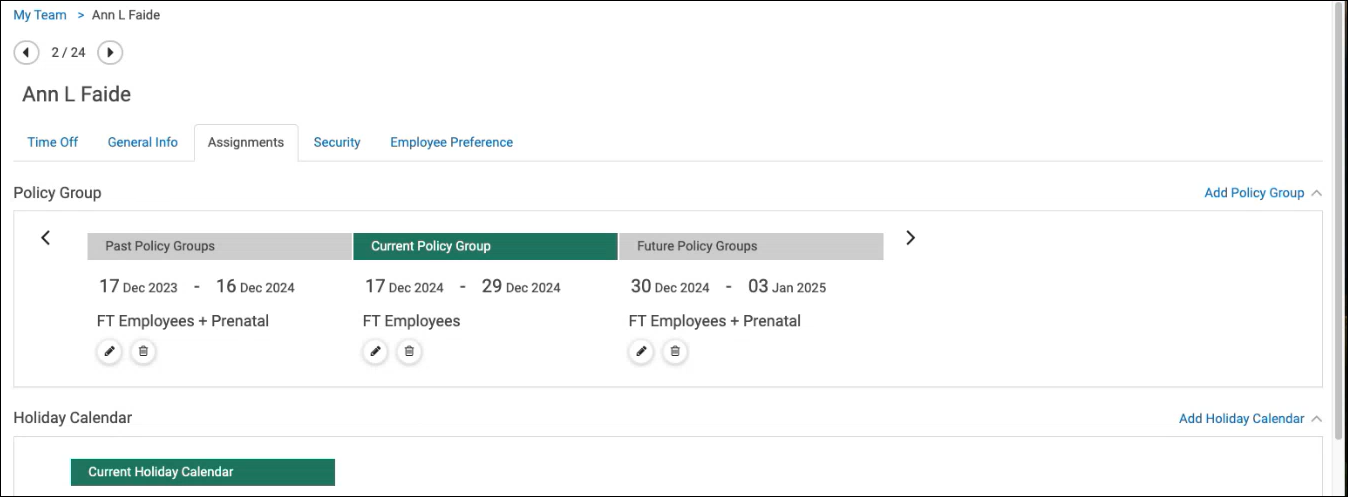
- Assign the new time off policy group to an employee.
- Assign the policy group to the employee for 52 weeks, ensuring no gaps between the employee's standard policy group on the start or end of the new assignment. An employee can be assigned to prenatal leave multiple times.
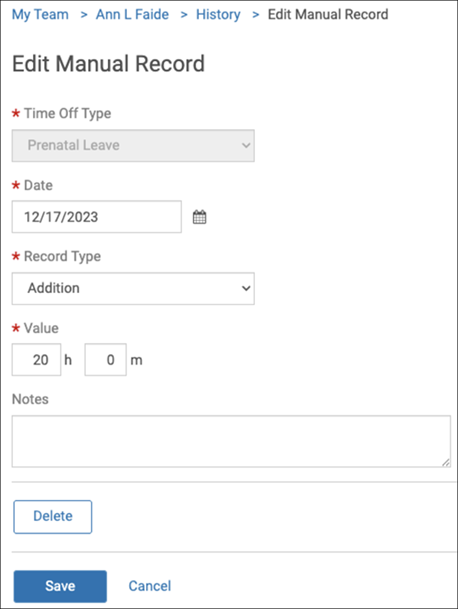
- Grant the required number of hours via a manual transaction on the start day of the Prenatal Leave policy group (My Team > select employee > History > Edit Manual Record).
 The employee can now use their allotted number of hours for the duration of the new policy group assignment. As the policy group assignments have no gaps, the employee's other policies' balances will continue forward.Because the prenatal leave policy would have a gap between its assignment and its possible future assignment, its balance is reset.
Note:
Contact the Support team for any assistance with this setup.
- Assign the policy group to the employee for 52 weeks, ensuring no gaps between the employee's standard policy group on the start or end of the new assignment. An employee can be assigned to prenatal leave multiple times.