Create PDF Templates
PDF Templates for Processes
PDF templates are required for Fill out a PDF and Sign a document tasks. Depending on the complexity of a process you may need more than one PDF template.
- If you want to collect information, create a fillable PDF and the corresponding web form.Note
To learn how to create a fillable PDF, please review the Create Fillable PDFs job aid.
To learn how to create a web form, please review the Create Forms job aid.
- Configure process template settings.
- Select a PDF file.
- For Fill out a PDF tasks, select the web form to be linked to the fillable PDF. Then map the web form and fillable PDF fields.
- For Sign a focument tasks, add electronic signature fields.
Create PDF Templates
Create PDF templates to manage electronic signatures and PDF documents in processes. PDF templates link a web form to a fillable PDF. This enables the employee to fill out a web form, which automatically generates a PDF document. The PDF can be sent for signature, archived for record keeping, or both.
- Link the fillable PDF fields from the PDF document to the web form fields by selecting and matching each field in the drop-down menu.Important Even if by default fields seem to be matched, you must select each field from the drop-down list for the mapping to save correctly. An "X" symbol next to a field indicates that the web form and PDF form fields have been succesfully mapped.

Determine Electronic Signature Field Coordinates
To add electronic signature fields to a PDF template, you must determine the signature field coordinates. To determine the electronic signature settings, you can use a ruler o a program (such as Adobe Acrobat Pro DC) to locate the X and Y coordinates of a point on a PDF.
Print the PDF
For the X coordinate value: Measure distance in inches from the left side of the page to left side the signature field. Convert inches to points by multiplying by 72. Round to nearest whole number.
For the Y coordinate value: Measure distance in inches from the bottom of the page to the top or the signature field. Convert inches to points by multiplying by 72. Round to nearest whole number.
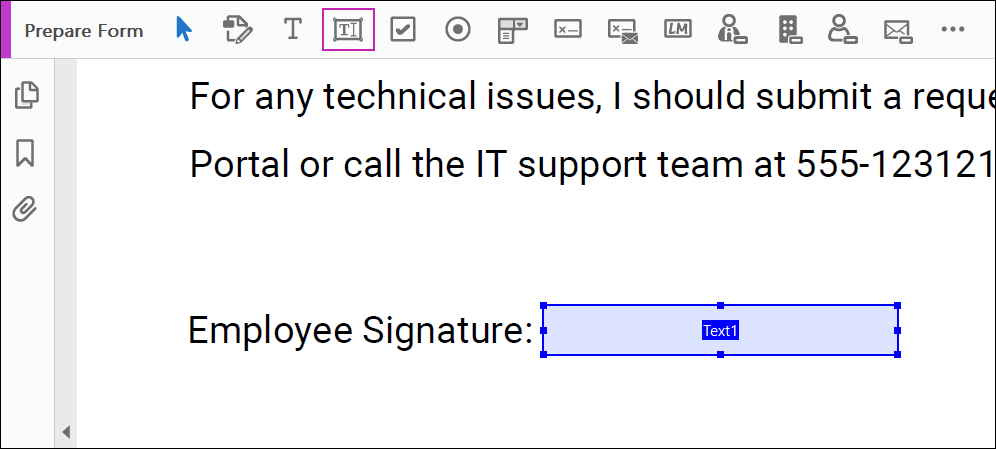
- In Prepare Form mode, insert a text box where you want the
eSignature to appear in the form.
- Select the position tab and on the Units drop-down list, select
Points.
- The number on the field Left corresponds to the X coordinate.
- The number on the field Bottom corresponds to the Y coordinate.
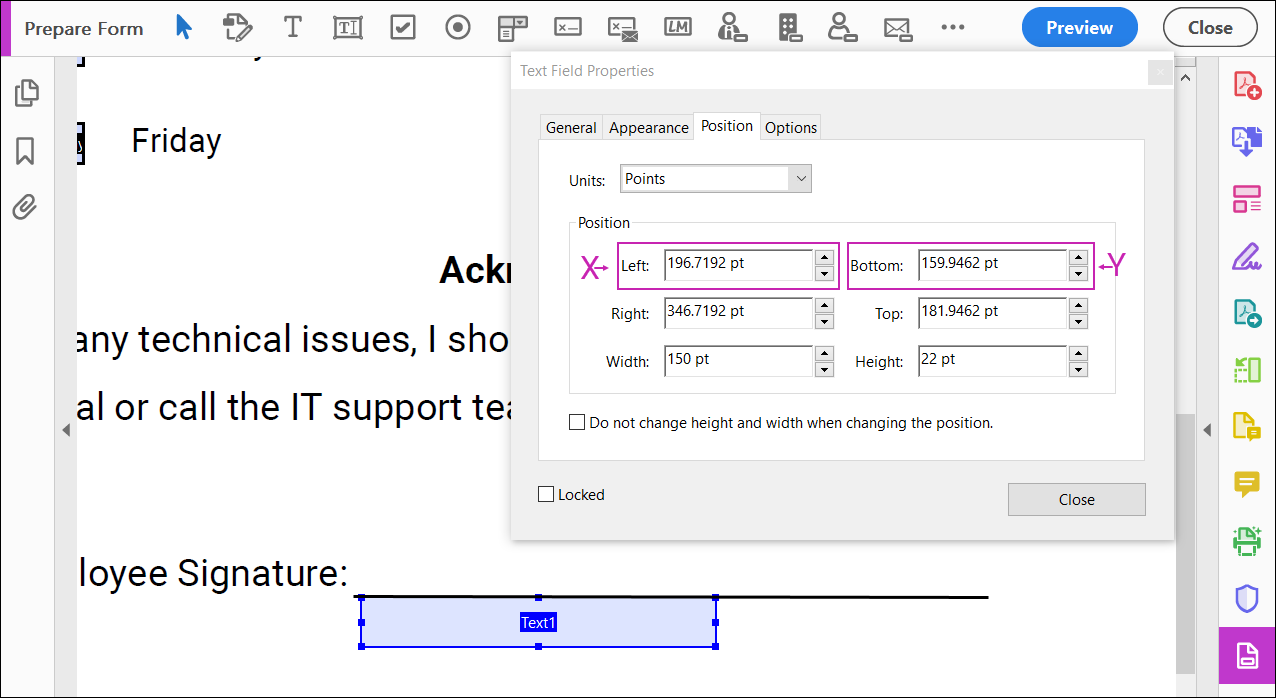 Important The eSignature coordinates must be whole numbers. For better results, round down the coordinate values in the Left and Bottom fields to the nearest ten and deduct ten points.In this example:
For the x-coordinate:
Use the value in the Left field: 196.7192 points
Round down to the nearest ten: 190
Deduct ten: 180. The X coordinate value should be 180.
For the y-coordinate:
Use the value in the Bottom field: 159.9462.
Round down to the nearest ten: 150
Deduct ten: 140. You should use 140 for the Y coordinate value.
Add Electronic Signature Fields
After determining the electronic signature field coordinates, you can add signature fields to a PDF template. Repeat the process for each signature required in the document.
employee signature page 1
manager signature page 3
payroll signature page 3
© 2023 UKG Inc. All rights reserved. For a full list of UKG trademarks, visit https://www.ukg.com/trademarks. All other trademarks, if any, are the property of their respective owners.
This document and all information contained herein are provided to you "AS IS" and UKG Inc. and its affiliates (collectively "UKG") make no representation or warranties with respect to the accuracy, reliability, or completeness of this document, and UKG specifically disclaims all warranties, including, but not limited to, implied warranties of merchantability and fitness for a particular purpose. The information in this document is subject to change without notice. The document and its content are confidential information of UKG and may not be disseminated to any third party. No part of this document or its content may be reproduced in any form or by any means or stored in a database or retrieval system without the prior written authorization of UKG. Nothing herein constitutes legal, tax, or other professional advice. All legal, tax, or other questions or concerns should be directed to your legal counsel, tax consultant, or other professional advisor. All company, organization, person, and event references are fictional. Any resemblance to actual companies, organizations, persons, and events is entirely coincidental.