Manage Pay Groups
Pay Groups
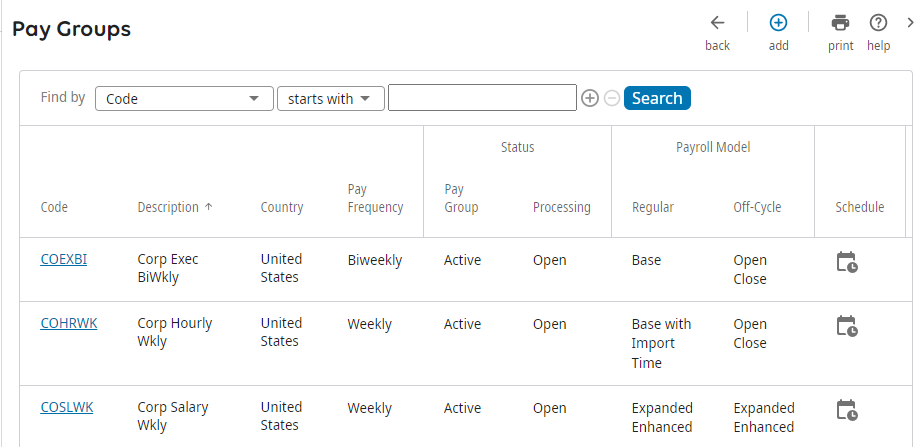
Manage pay groups that you created for your company on the Pay Groups page.
- View high level information about all pay groups in your company such as the following:
- Code, description, and country
- Pay frequency (biweekly, weekly, or monthly)
- Status (active/inactive or closed/processing payroll)
- Payroll models for regular and off-cycle payrolls
- Pay calendar schedule (current and next) and payroll calendar extension option
- Add or change pay group information (for example, code and description) and general information (for example, pay frequency and payroll processing model)
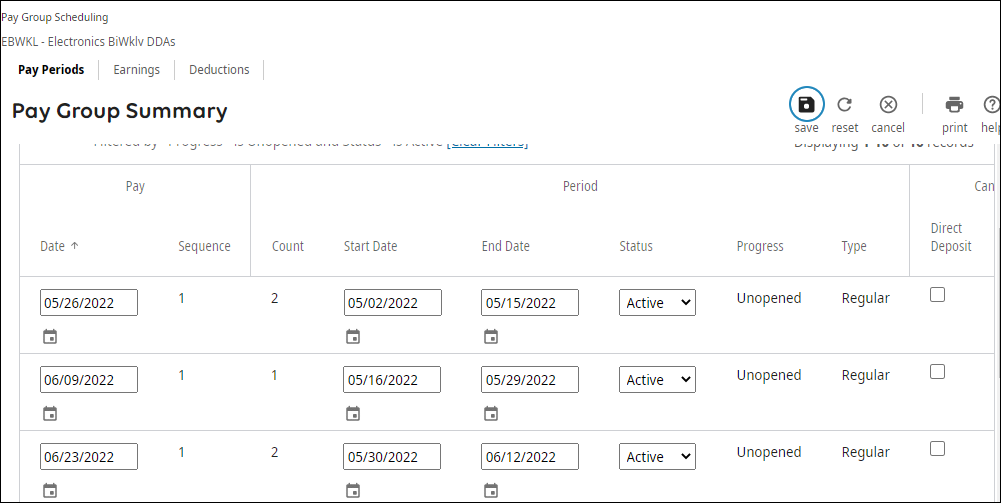
- Review a pay group pay period schedule
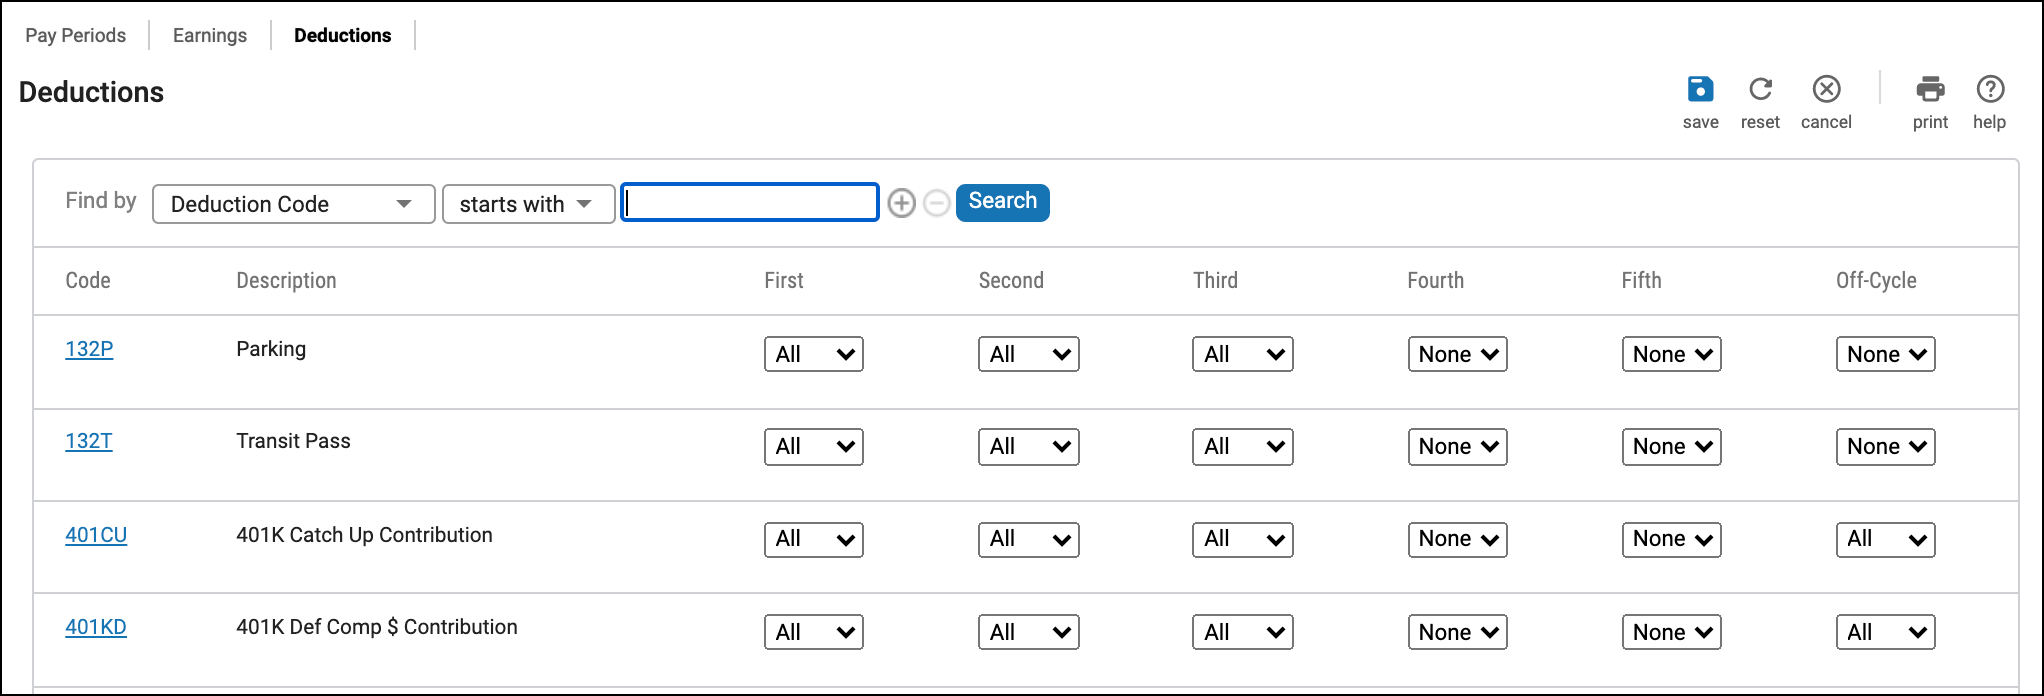
- Change a pay group deduction schedule
- Change a pay group earnings schedule
- Extend or view a pay group pay calendar

Add or Change Pay Groups
Add or change pay groups used in payroll processing on the Pay Groups page.
Customers using UKG ProPayment Services for Tax Filing, must create a case in the UKG Ultimate Community after adding a new pay group and specify if the new pay group should be added to existing bank files.
Modify Pay Group Pay Periods
After a pay group is added, you can review the pay periods of a pay group on the Pay Periods page.
Administrators extend the pay calendar for the upcoming year and these pay dates appear on the Pay Periods page.
Change Pay Group Deduction Schedules
If the deduction is configured to display in pay data entry, the change reflects on those employee pay checks in which the deduction is assigned.
Change Pay Group Earnings Schedules
If the earnings are configured to display in pay data entry, the change reflects on those employee pay checks in which the earnings is assigned.
Extend the Pay Calendar
After company and employee information is verified and updated, you can extend the pay calendar for each active pay group from the Pay Groups business rule page. The last payroll of the year cannot be processed until the calendar has been extended for the following year.
The following steps demonstrate how to extend the pay calendar and specify rules for calendar dates for the upcoming year.
Configure holidays for the next year on the Holidays page before extending the pay calendar. Pay dates that fall on holidays change based on selections. You cannot skip a year or month when extending a pay calendar.
- From the Pay Groups page, in the Pay Calendar Current column, select Extend for a pay group.
- From the Extend Pay Calendar page, enter the first period end date and the first period pay date.
- Select an alternate pay date when pay dates fall on a Saturday, Sunday, or holiday.
- Select Save. The Pay Groups page appears with the new information after refreshing the page.
© 2022 UKG Inc. All rights reserved.
For a full list of UKG trademarks, visit www.ukg.com/trademarks. All other trademarks, if any, are the property of their respective owners. No part of this document or its content may be reproduced in any form or by any means or stored in a database or retrieval system without the prior written authorization of UKG Inc. (“UKG”). Information in this document is subject to change without notice. The document and its content are confidential information of UKG and may not be disseminated to any third party. Nothing herein constitutes legal advice, tax advice, or any other advice. All legal or tax questions or concerns should be directed to your legal counsel or tax consultant.
Liability/Disclaimer
UKG makes no representation or warranties with respect to the accuracy or completeness of the document or its content and specifically disclaims any responsibility or representation for other vendors’ software. The terms and conditions of your agreement with us regarding the software or services provided by us, which is the subject of the documentation contained herein, govern this document or content. All company, organization, person, and event references are fictional. Any resemblance to actual companies, organizations, persons, and events is entirely coincidental.
Links to Other Materials: The linked sites and embedded links are not under the control of UKG. We reserve the right to terminate any link or linking program at any time. UKG does not endorse companies or products to which it links. If you decide to access any of the third-party sites linked to the site, you do so entirely at your own risk.


