Install the TouchBase Relay Module
TouchBase Relay Module
The UKG ProTouchBase Relay Module enables the TouchBase clock to unlock doors equipped with electronic locks and ring bells or buzzers to signal shift times.
Install the TouchBase Relay Module
These instructions guide you through the process of installing all the components provided in the UKG ProTouchBase Relay Module kit.
-
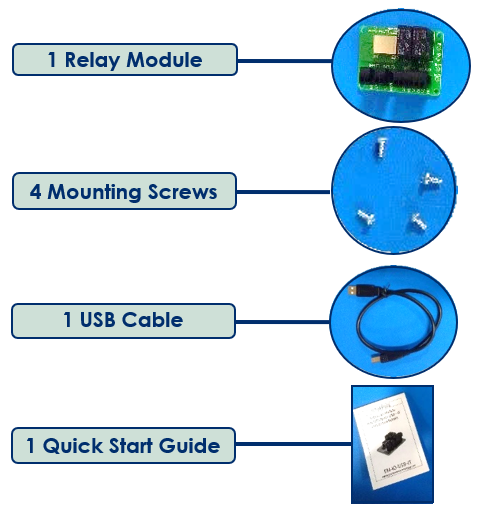
Verify TouchBase Relay Module package contents.
The TouchBase Relay Module includes specific package components for installation.
-
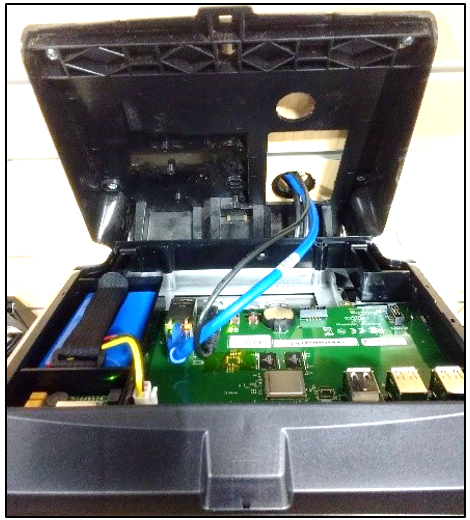
Remove the clock body gently from the backplate.
-
Pull the clock carefully away from the wall, far enough to disconnect any power and
network cables from the clock.
-
Pull the clock carefully away from the wall, far enough to disconnect any power and
network cables from the clock.
-
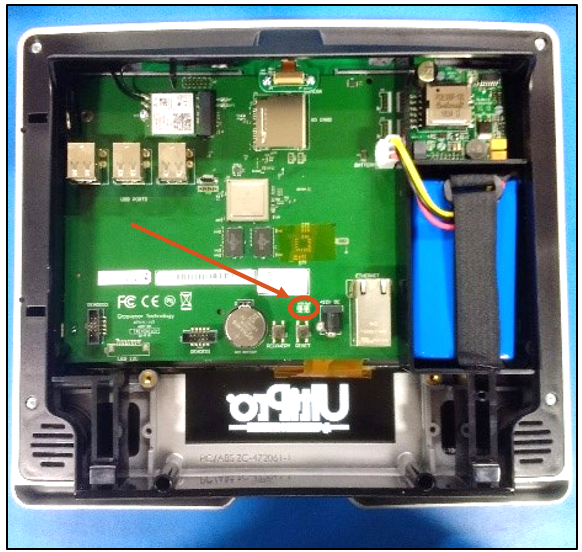
Press the RESET button on the motherboard to shut down the device.
-
Take care not to scratch the screen or front plastic.
-
Take care not to scratch the screen or front plastic.
-
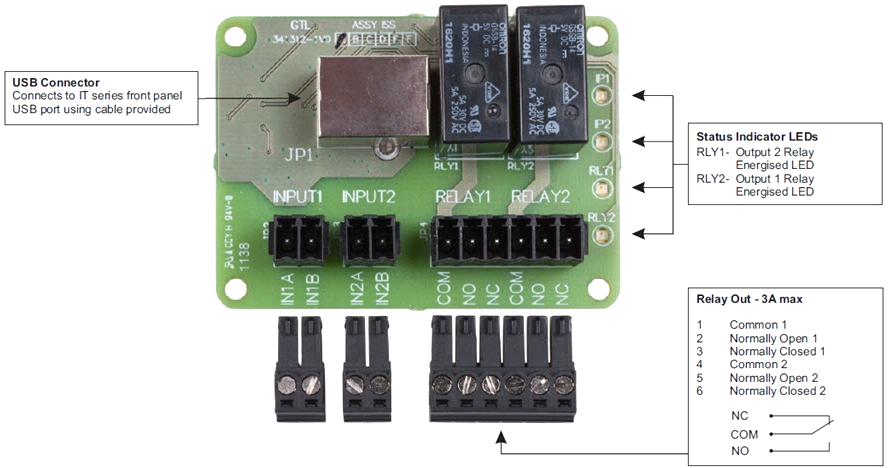
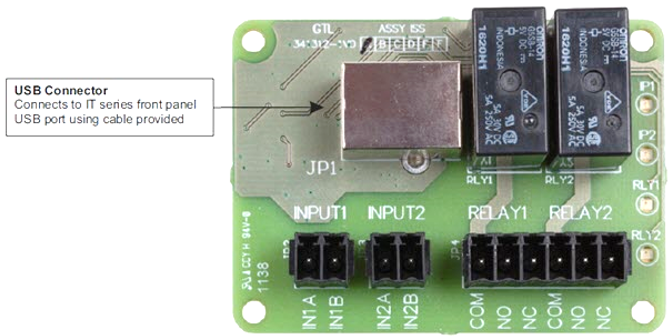
Connect up to two external circuits using 3A relay outputs.
-
You must provide a common source/sink for each relay.
Note The TouchBase clock does not provide power to any external devices. Please refer to the instructions of the target device (bell or door lock) to determine whether to use the NO or the NC connection.The relay module has several outputs as shown in the diagram below:
- RELAY1 is for a bell schedule that can be set on the UTC Host.
- RELAY2 is used to trigger a door lock through the time clock application.
- INPUT1 and INPUT2, the auxiliary inputs, are currently not used.
-
You must provide a common source/sink for each relay.
-
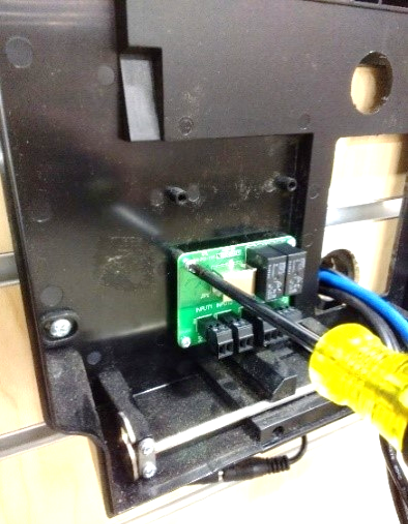
Secure the module to the clock backplate using the four points on the backplate.
Note Depending on which wire routing holes have been punched out, the backplate may appear different than the image shown.
-
Remove the USB cable from the relay module.
-
Use the screws included in the relay mounting kit to secure the reader in the
orientation shown below.
Important Do not over tighten the screws.
-
Use the screws included in the relay mounting kit to secure the reader in the
orientation shown below.
-
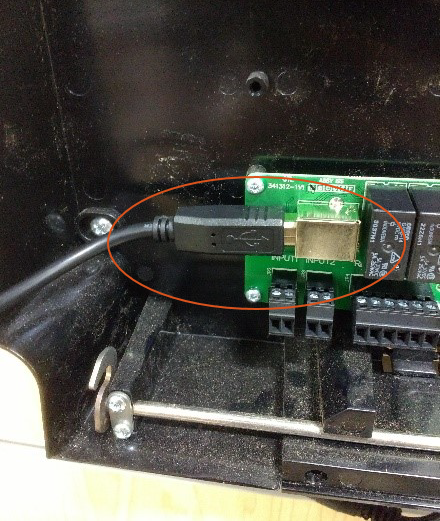
Plug the larger B-Male side of the included USB cable into the relay module..
-
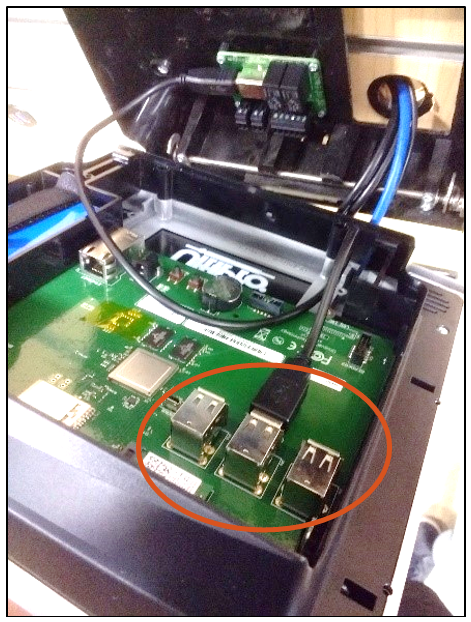
Connect the relay board USB cable into any free USB port on the clock.
-
Set up relay schedules from the TouchBase Host (Time Clocks > select the clock > Bell
Relay Schedule tab).
Relay Schedule for TouchBase Clocks
Once you connect the relay to your bell or buzzer, you must enter the scheduled times for the devices to ring or signal. These schedules are maintained in the UKG ProTime Collection (UTC) Host, the clock server for UKG ProTouchBase. To access the UTC Host, you need the URL and credentials. Contact your system administrator responsible for time keeping or open a support case for assistance.
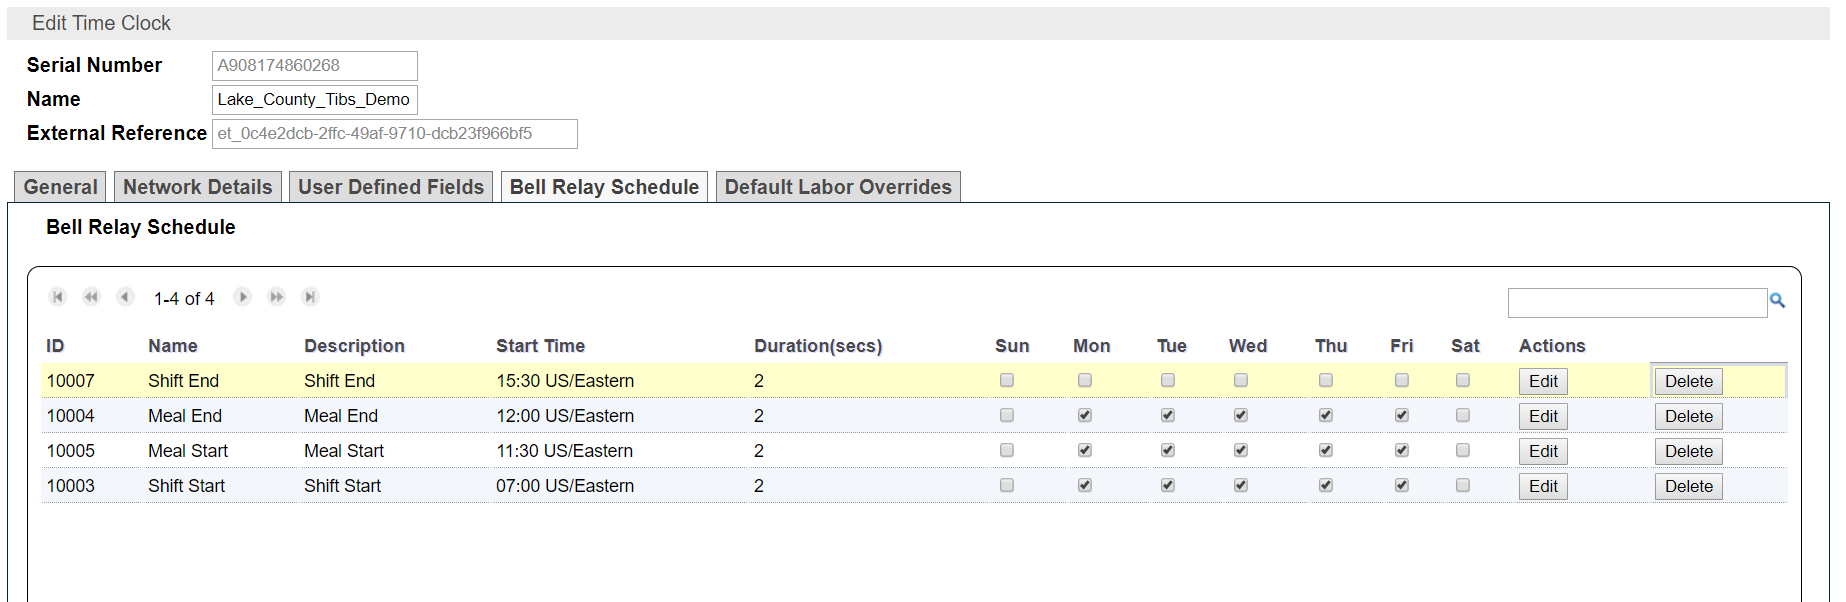
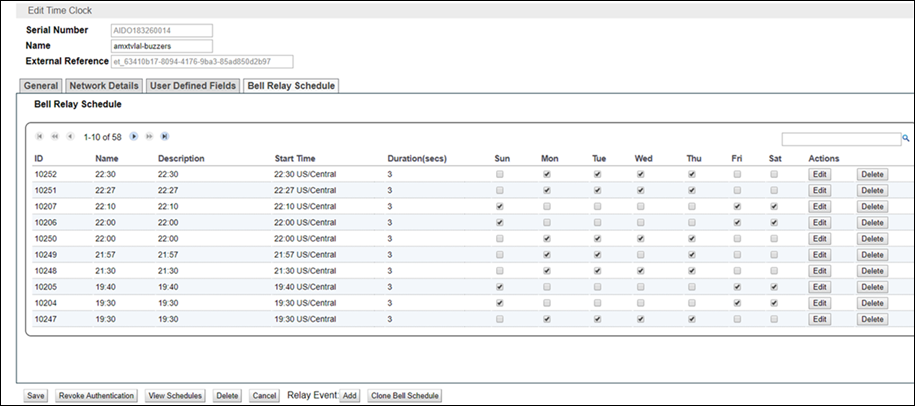
Bell Relay Schedule
The Bell Relay Schedule tab enables you to set schedules for relays (Time Clocks > Edit Time Clock > Bell Relay Schedule tab), and the schedules are created in the local clock time.
The tab displays a list of relays and their scheduled actions. For example, you can wire the clock to third-party devices such as bells or buzzers to signify shift changes or meal/break start and end times. The relays trigger at set times during the day for a set duration.
| Column Name | Description |
|---|---|
| ID | Internal ID number of the relay event. |
| Name | Name of the relay event. |
| Description | Description of the event. |
| Start Time | Start time of the event, in 24-hour format. |
| Duration (secs) | Duration for which the relay should be triggered, in seconds. |
| Sun-Sat | Days of the week which this event is triggered. Select days using the corresponding check boxes. |
| Actions | Edit modifies an existing relay event, and Delete removes the event. |
Select Add to add a new relay event.
Select the Clone Bell Schedule button to copy a relay schedule to other clocks without having to manually set up the same schedule on each device. This button opens a dialog window that lists the clock devices, and the schedule can be copied to the selected devices.
© UKG Inc. All rights reserved. For a full list of UKG trademarks, visit www.ukg.com/trademarks. All other trademarks, if any, are the property of their respective owners. No part of this document or its content may be reproduced in any form or by any means or stored in a database or retrieval system without the prior written authorization of UKG Inc. (“UKG”). Information in this document is subject to change without notice. The document and its content are confidential information of UKG and may not be disseminated to any third party. Nothing herein constitutes legal advice, tax advice, or any other advice. All legal or tax questions or concerns should be directed to your legal counsel or tax consultant.
Liability/Disclaimer
UKG makes no representation or warranties with respect to the accuracy or completeness of the document or its content and specifically disclaims any responsibility or representation for other vendors’ software. The terms and conditions of your agreement with us regarding the software or services provided by us, which is the subject of the documentation contained herein, govern this document or content. All company, organization, person, and event references are fictional. Any resemblance to actual companies, organizations, persons, and events is entirely coincidental.
Links to Other Materials: The linked sites and embedded links are not under the control of UKG. We reserve the right to terminate any link or linking program at any time. UKG does not endorse companies or products to which it links. If you decide to access any of the third-party sites linked to the site, you do so entirely at your own risk.