Personalize the Home Page
UKG Pro Home Page
UKG Pro has two home page options, the Classic Dashboard and the Smart Dashboard.
The Classic Dashboard has gadgets that are arranged by a system administrator.
Different sections and widgets appear depending on your organization's UKG solutions. For example, the UKG Talk What's Happening section displays if your organization enabled UKG Talk.
From the My Shortcuts section, you can add shortcuts to pages you want to easily access.
Switch Between the Classic and Smart Dashboards
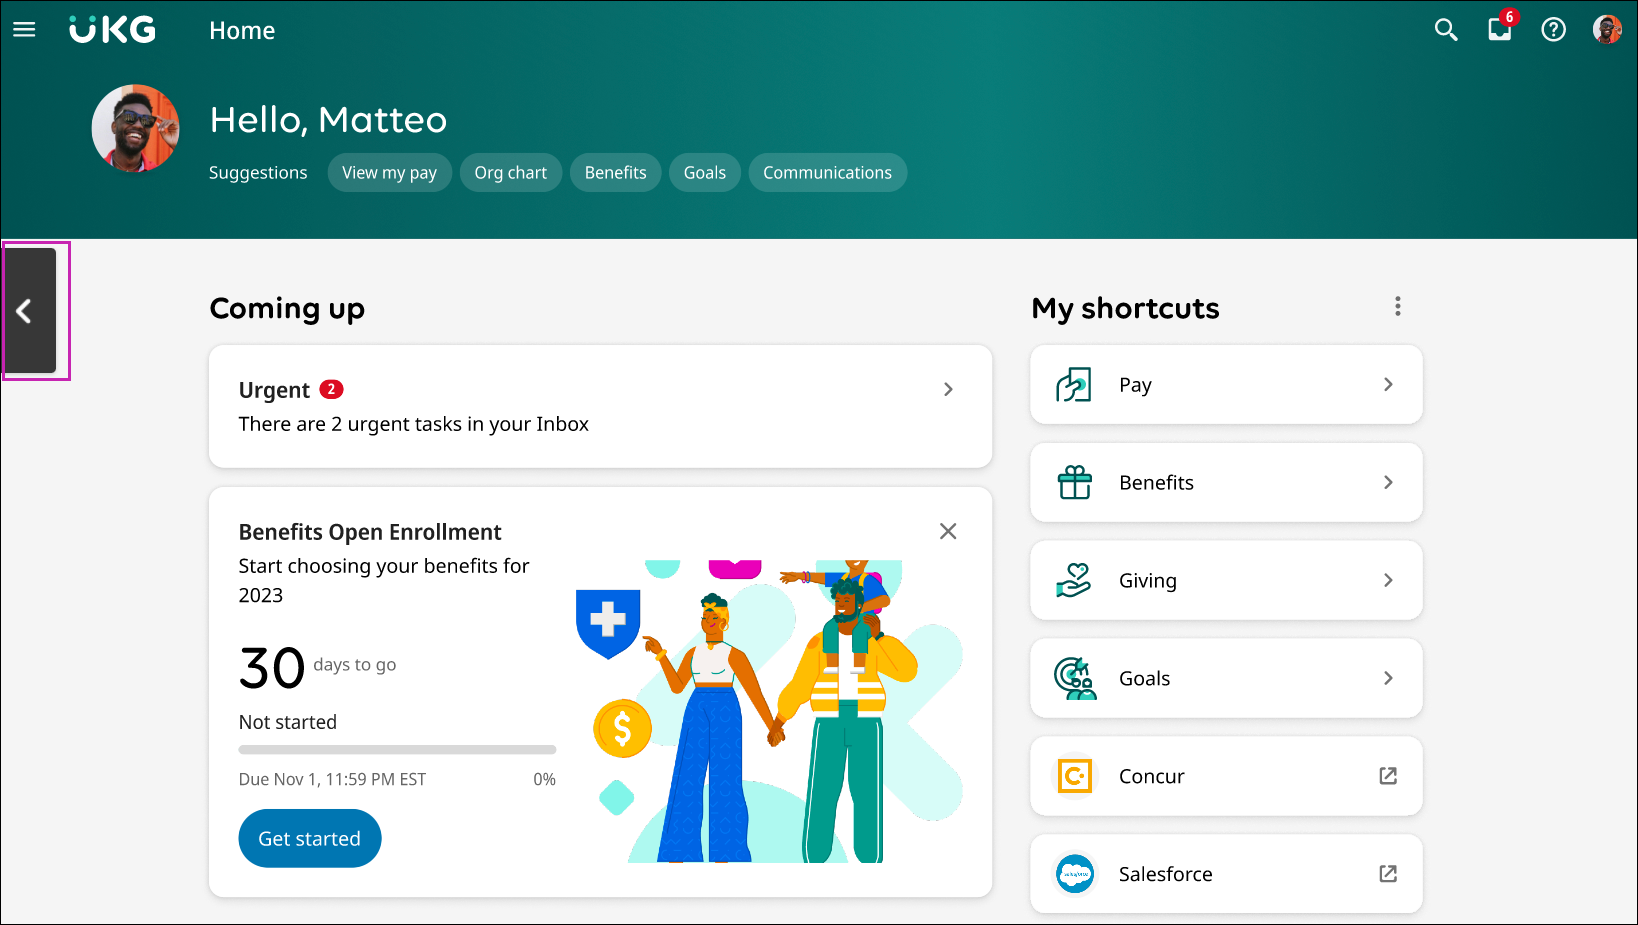
Switch between the Classic and Smart Dashboards on the home page.
Both dashboards must be enabled by a system administrator; if only one dashboard is enabled, you cannot switch to the other dashboard.
- From either dashboard, hover over the vertical bar on either side of the page. The navigation arrow appears.
Edit Your Smart Dashboard Shortcuts
From the Smart Dashboard, you can select shortcuts. Shortcut options can include UKG Pro pages, UKG Pro WFM pages, and external shortcuts added by a system administrator.
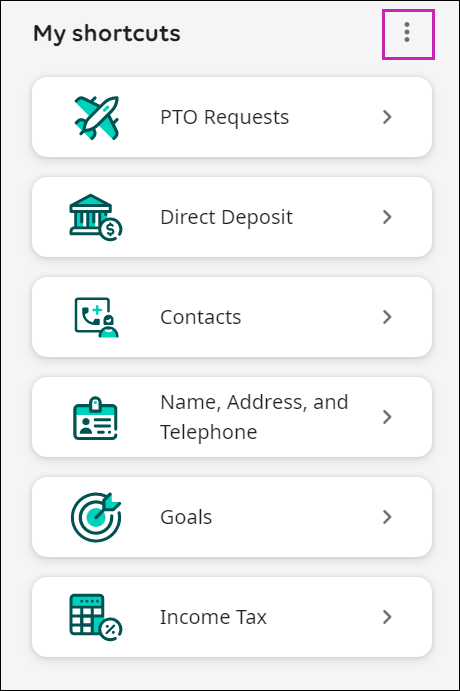
- From the Smart Dashboard, at the My shortcuts section, select the Edit shortcuts icon. The Manage shortcuts window appears.
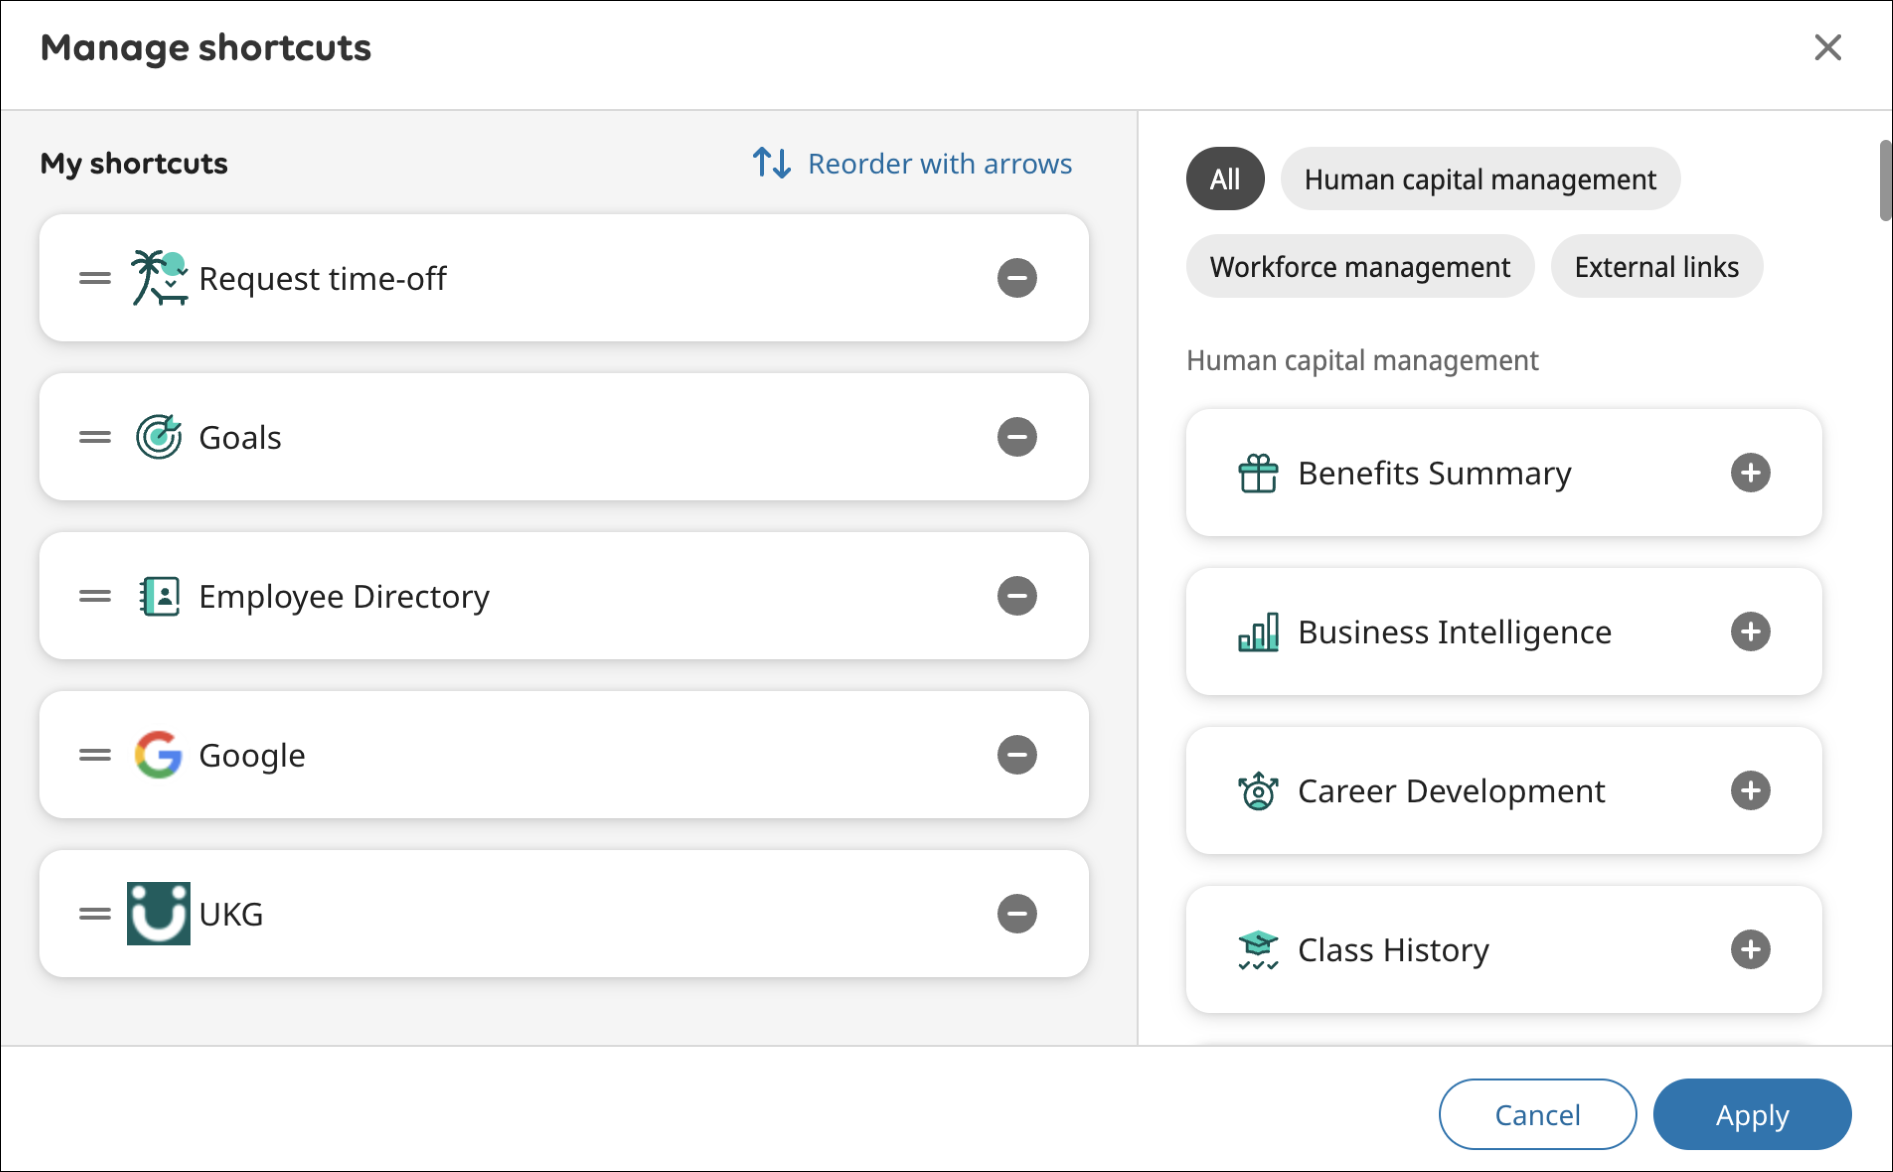
- From the Manage shortcuts window, you can:
Remove shortcuts
Reorder shortcuts
Search for available shortcuts
Add shortcuts
UKG Pro Workforce Management Widgets
When they actively display on your UKG Pro WFM Home page, these UKG Pro WFM widgets display on the UKG Pro Smart Dashboard.
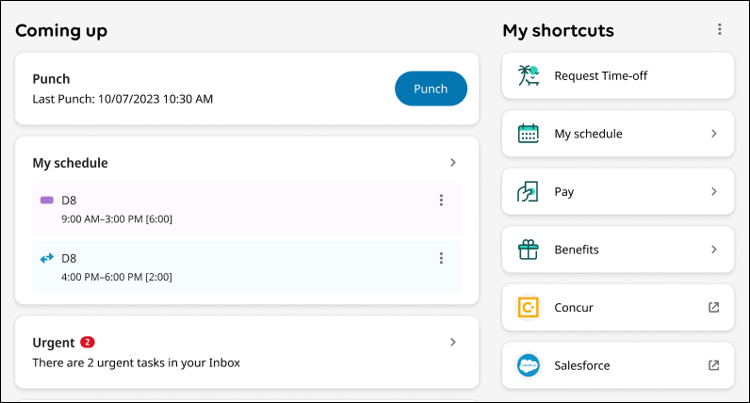
My Schedule - Displays the schedule for the current day and the following day. Selecting the My Schedule widget displays the UKG Pro WFM My Schedule page.
Punch - Users without attestation can punch in directly from the Smart Dashboard by selecting Punch. Users with attestation are redirected to UKG Pro WFM.
Dashboard Management for Administrators
For the Classic Dashboard, system administrators can rearrange the layout of gadgets.
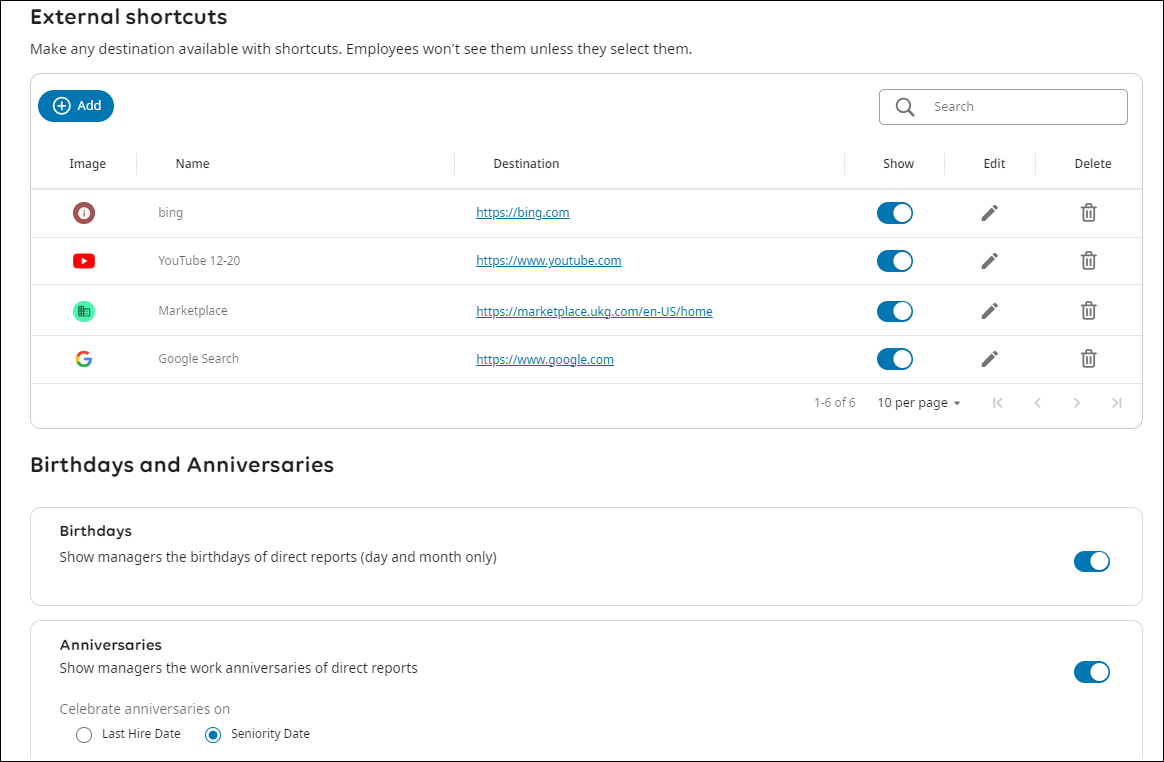
Add external links to the shortcuts section
Configure the sections and widgets that appear (depending on your organization's UKG solutions)
For example, if Punch and My Schedule are enabled in UKG Pro WFM, those widgets appear on the UKG Pro Smart Dashboard
Change the Layout of Content Gadgets on the Classic Dashboard
Change the layout of content gadgets on the Classic Dashboard.
The location of certain system-delivered gadgets cannot be changed.
If the location of a gadget is changed and that gadget is later removed by a system administrator, the gadget will no longer appear on the Classic Dashboard.
New gadgets added by a system administrator appear at the bottom of the appropriate content page zones in an order defined by the system administrator.
This feature must be enabled by a system administrator (Menu > System Configuration > Display > Content Management).
-
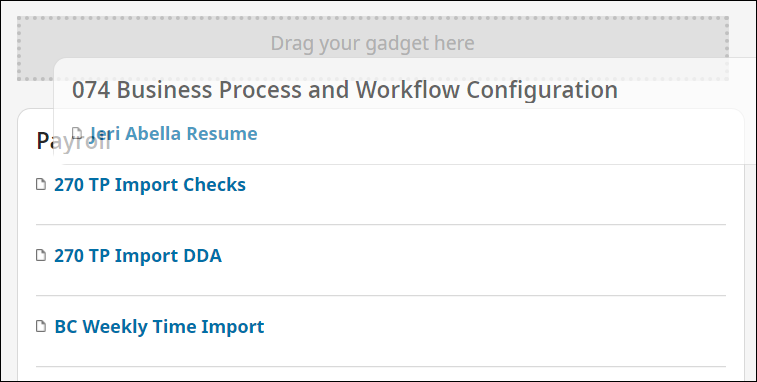
From the Classic Dashboard, select a gadget by its title bar and drag it to the desired location. Gadget outlines appear for suggested drop locations.
Configure the Smart Dashboard
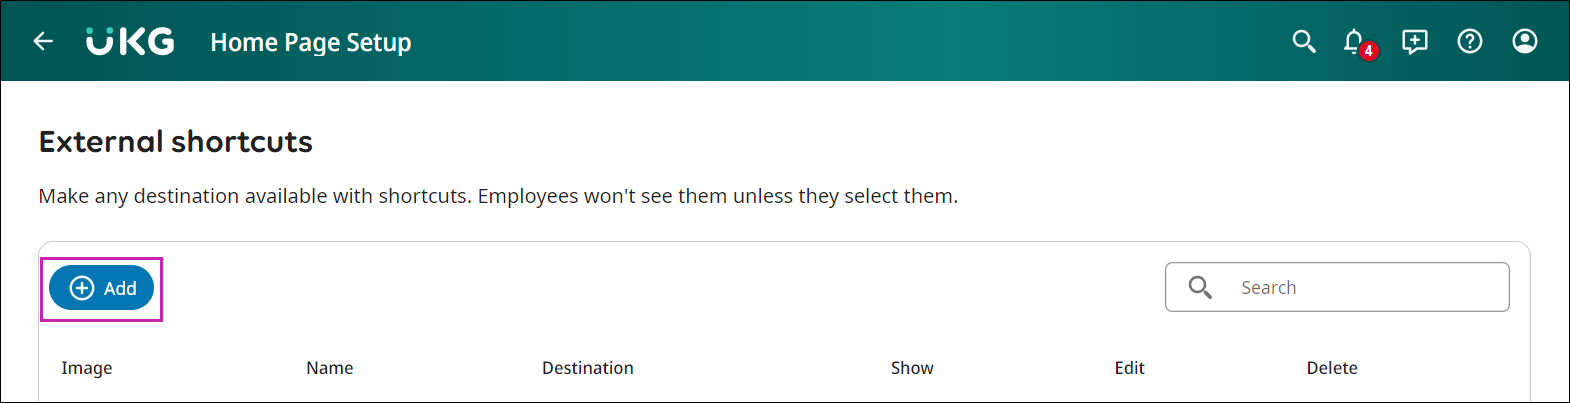
System administrators can add external pages to the list of shortcuts available on the Smart Dashboard. By default, employees already have shortcuts to UKG Pro and UKG Pro WFM pages.
- From the Home Page Setup page, select Add. The Add shortcut window appears.
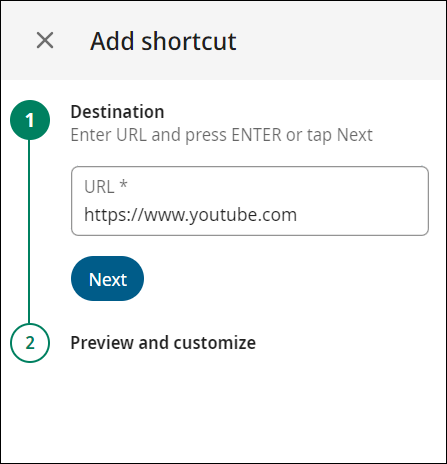
- From the Add shortcut window, at the Destination step, enter a URL. You must enter a valid HTTP or HTTPS URL.
- At the Preview and customize step, from the Image drop-down, select Automatic or Custom. If you select Automatic, the image for the shortcut is automatically generated from the linked page.
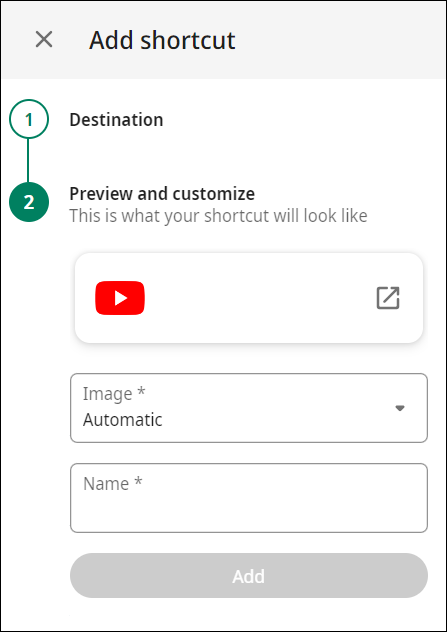 If you select Custom, you can select an icon and a color.
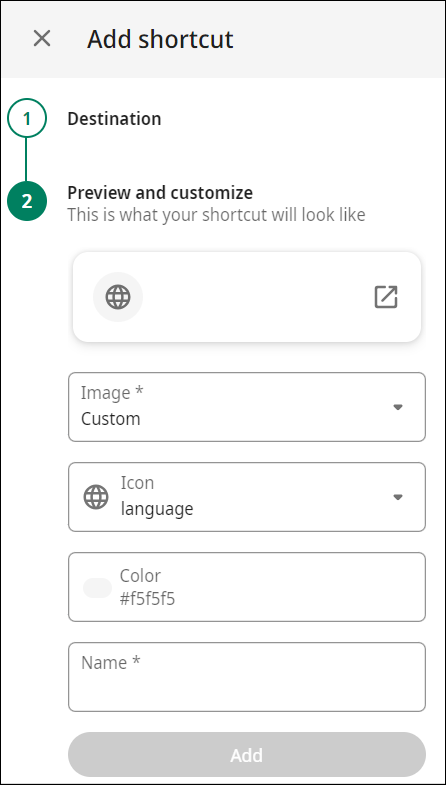
- Select Add. The shortcut is now available for employees.
© 2024 UKG Inc. All rights reserved. For a full list of UKG trademarks, visit https://www.ukg.com/trademarks. All other trademarks, if any, are the property of their respective owners.
This document and all information contained herein are provided to you "AS IS" and UKG Inc. and its affiliates (collectively "UKG") make no representation or warranties with respect to the accuracy, reliability, or completeness of this document, and UKG specifically disclaims all warranties, including, but not limited to, implied warranties of merchantability and fitness for a particular purpose. The information in this document is subject to change without notice. The document and its content are confidential information of UKG and may not be disseminated to any third party. No part of this document or its content may be reproduced in any form or by any means or stored in a database or retrieval system without the prior written authorization of UKG. Nothing herein constitutes legal, tax, or other professional advice. All legal, tax, or other questions or concerns should be directed to your legal counsel, tax consultant, or other professional advisor. All company, organization, person, and event references are fictional. Any resemblance to actual companies, organizations, persons, and events is entirely coincidental.