Run Open Enrollment Integrations
Run Open Enrollment Integrations
You can run your Open Enrollment integration files from within the Integrations Dashboard.
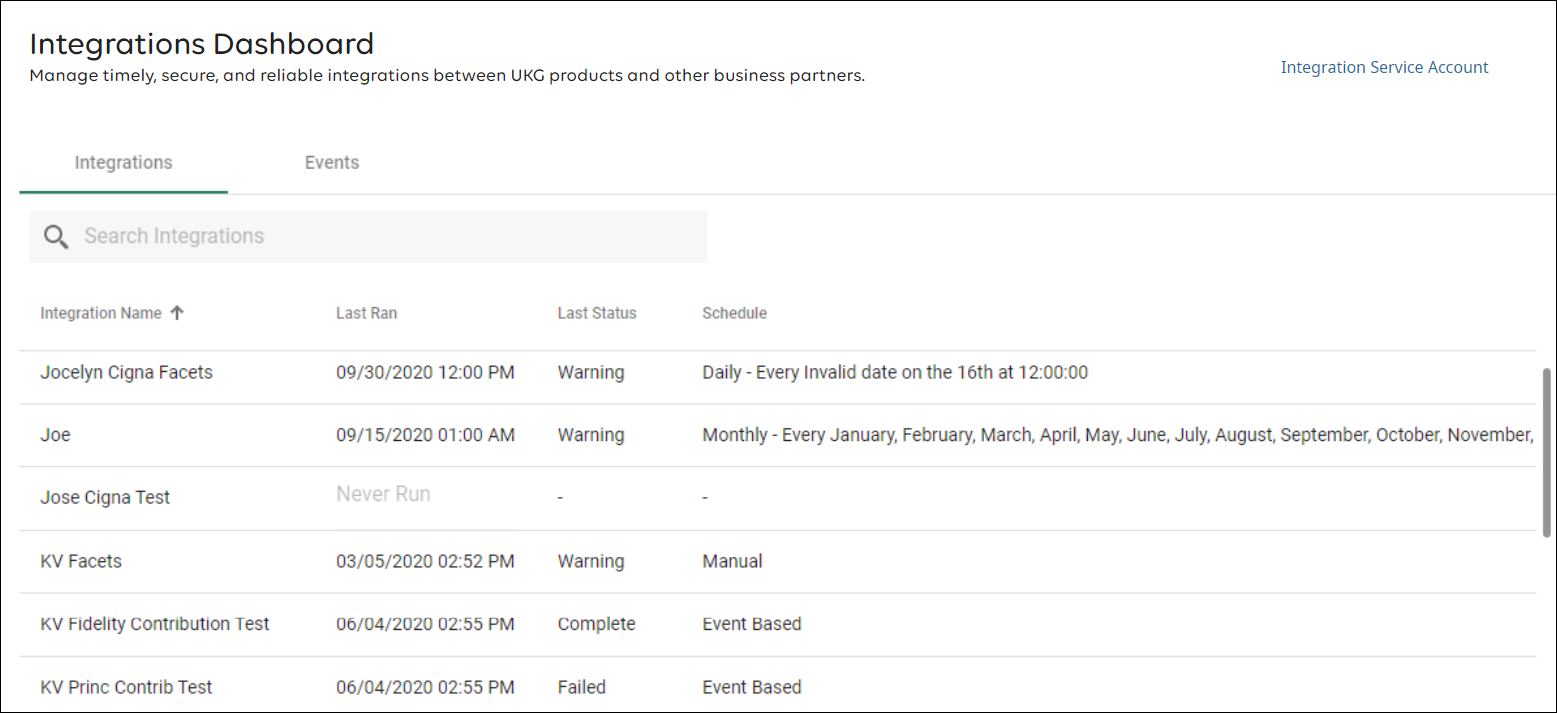
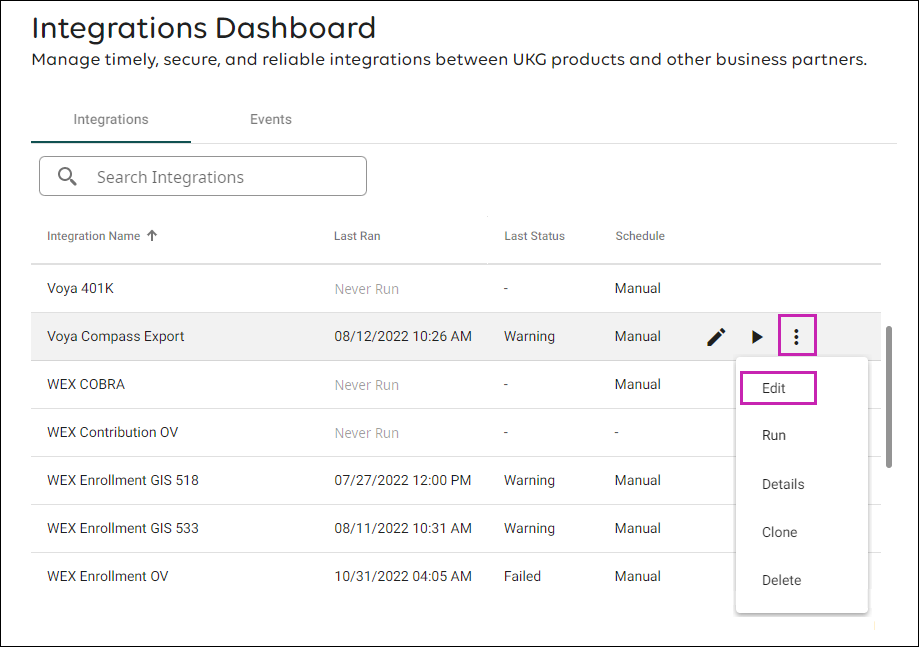
The Integrations Dashboard enables you to run and view the results of integrations between UKG Pro products and other business partners. The Integrations dashboard is the first page that appears when you log in to the Integration Platform. There are two main components to the Integrations Dashboard, the Integrations and Events pages.
Prepare to Run Open Enrollment Integrations
Prior to running your Open Enrollment integration, you must:
Pause your scheduled integrations.
Run the Open Enrollment file.
Work directly with your carrier to manage all Open Enrollment changes.
After your carrier has notified you that it is ok to do so, restart any existing ongoing integrations that were previously scheduled.
Access the Integrations Dashboard
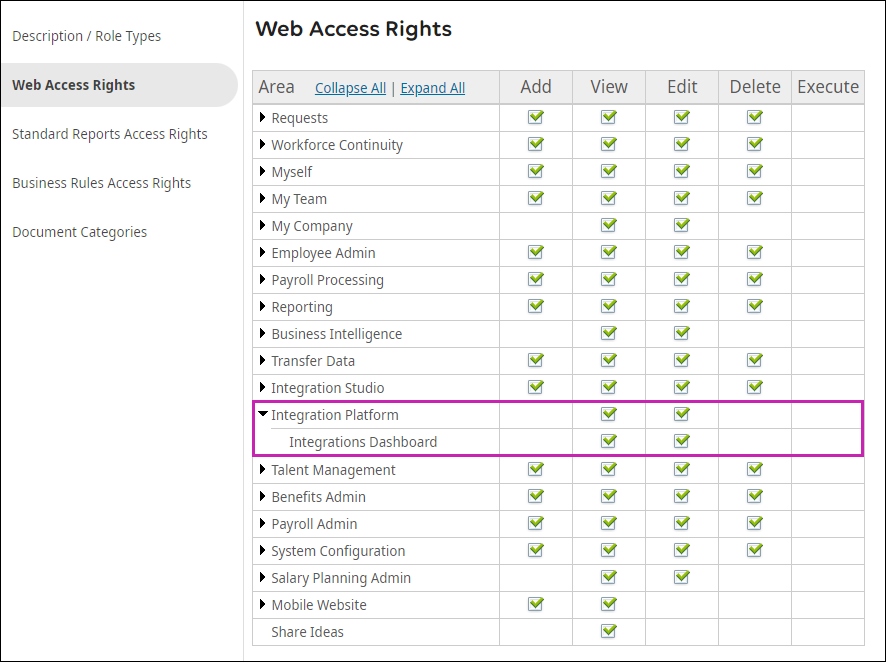
From within Role Administration, you must first assign web access rights to the appropriate user roles in UKG Pro (Menu > System Configuration > Security > Role Administration > Select a Role > Web Access Rights > Integration Platform). Check the View and Edit access boxes so that users assigned to the role can run and edit the Open Enrollment integration.
To Access the Integrations Dashboard:
https://integrations.ultipro.com/
At the Sign In page, enter your Company Access Code or Customer API Key. You can locate this information in UKG Pro > System Configuration > Security > Service Account Administration.
Check the I Agree to Terms and Conditions (Required) box.
Select Continue.
Note Multi-factor authentication (MFA) is required the first time you log in.Complete the multi-factor authentication steps, as applicable.
Enter your UKG Pro credentials.
Select Sign In. The Integrations Dashboard displays.
Run an Open Enrollment Integration
The Integrations Dashboard allows you to run an integration manually, monitor the status of the integration, and view the integration status.
- Hover your mouse over the integration to display additional action item icons.
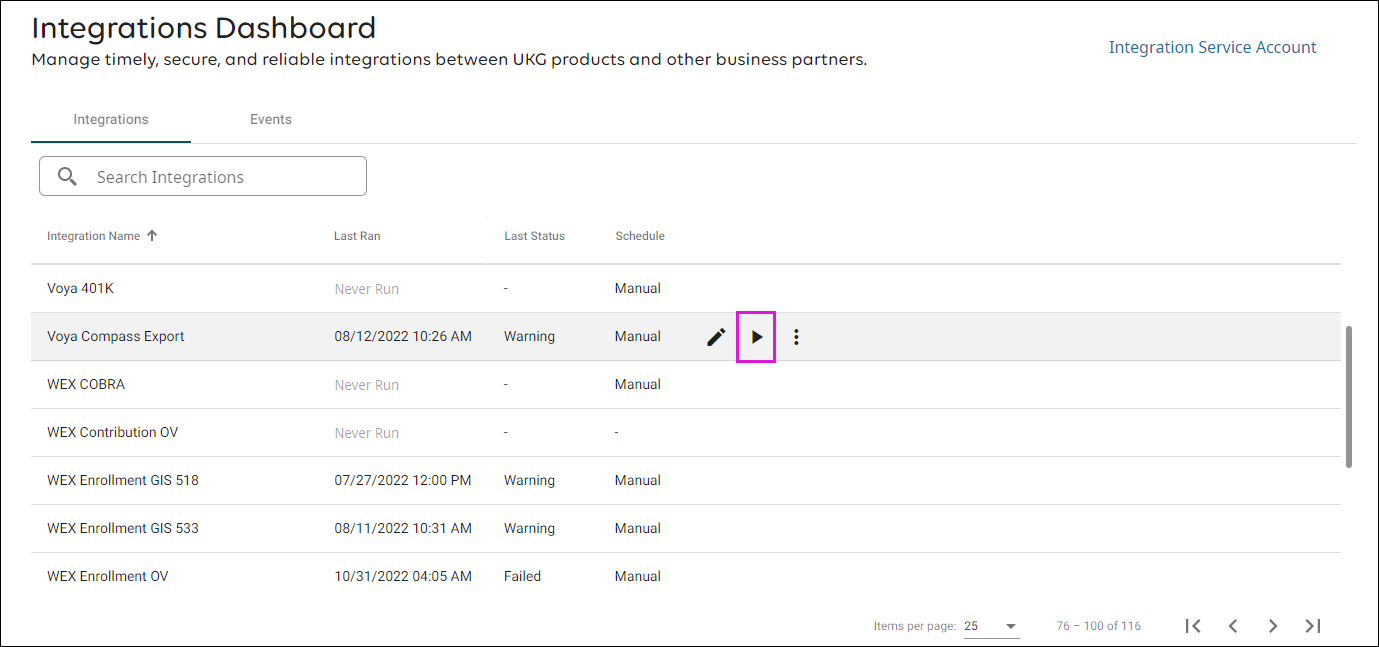
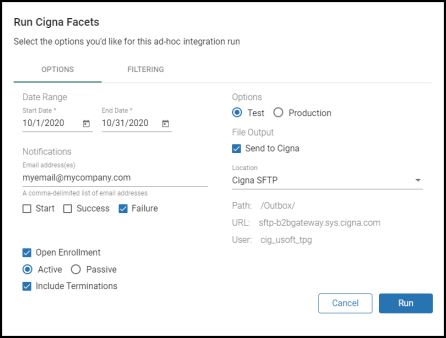
- Select the Run icon. The Integration Run page displays.
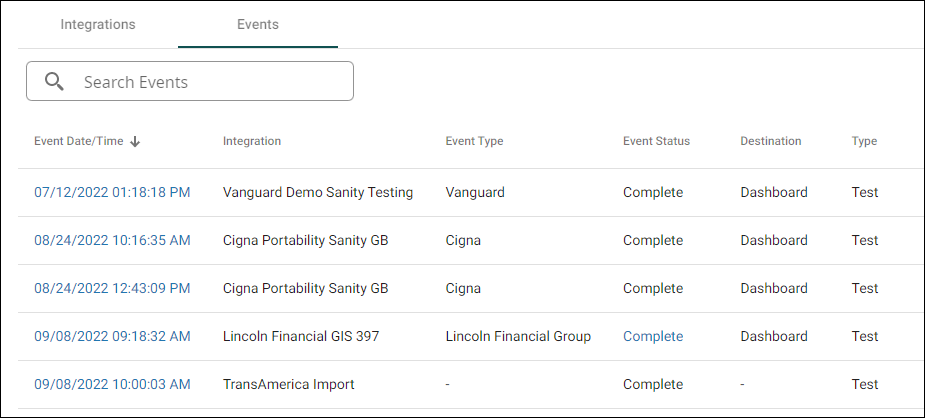
- Select the Events page link to view the integration.
Select the link in the Event Date/Time column to view the event details.
Select the link in the Event Status column to view the file details.
Pause Scheduled Integrations
Before running an Open Enrollment integration, you must ask your carrier when you need to pause current scheduled exports.
- Select the three-dots icon, then select Edit.
Resume Integration Schedule
Before resuming your scheduled integrations, you must review and address any feedback provided by your Open Enrollment carrier after your integration file was processed.
You are responsible for making any changes in UKG Pro based on your carrier's feedback.
Your carrier must confirm that you can resume a scheduled integration after your Open Enrollment period is closed and the final Open Enrollment integration file has been sent.
From the Integrations Dashboard page, hover your mouse over the open enrolmment integration to display additional action item icons.
- Select the three-dots icon, then select Edit.
From the File Output and Scheduling page, select the Schedule option and enter the Start Date as the date that your vendor communicated that future exports can be scheduled.
Select Save.
Work with your carrier to manage Open Enrollment changes outside of the Open Enrollment window. In most cases, these changes must be managed manually in both UKG Pro and directly with your vendor.
© 2023 UKG Inc. All rights reserved. For a full list of UKG trademarks, visit https://www.ukg.com/trademarks. All other trademarks, if any, are the property of their respective owners.
This document and all information contained herein are provided to you "AS IS" and UKG Inc. and its affiliates (collectively "UKG") make no representation or warranties with respect to the accuracy, reliability, or completeness of this document, and UKG specifically disclaims all warranties, including, but not limited to, implied warranties of merchantability and fitness for a particular purpose. The information in this document is subject to change without notice. The document and its content are confidential information of UKG and may not be disseminated to any third party. No part of this document or its content may be reproduced in any form or by any means or stored in a database or retrieval system without the prior written authorization of UKG. Nothing herein constitutes legal, tax, or other professional advice. All legal, tax, or other questions or concerns should be directed to your legal counsel, tax consultant, or other professional advisor. All company, organization, person, and event references are fictional. Any resemblance to actual companies, organizations, persons, and events is entirely coincidental.