Create and Manage Prompts in People Analytics

Prompts

Prompts are reusable filters that add interactivity to a report.

When a user runs a report that contains prompts, the prompts act as questions that help the user customize the information in the report to suit their needs. For example, a prompt can allow users to select a department, a date, or a numeric value to filter results.

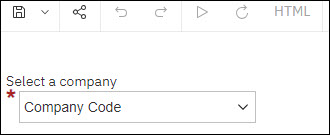
You can build a simple prompt in the Detail Filter Expression dialog box by enclosing text in question marks (for example, ?Select a company?). People Analytics automatically selects a prompt type based on the type of data item selected.

Manual prompt example

Alternatively, you can build a prompt page with special formatting and multiple prompt controls. You can allow one prompt per page or multiple prompts on a page.

Prompt page example

Another option is to use cascading prompts to reduce the number of values in each prompt. After a user makes a selection from the first prompt control, People Analytics uses that selection to filter the data available in subsequent prompts.

Create a Simple Manual Prompt

Use a filter expression to create a simple manual prompt that filters for a single data item. Reporting automatically selects a prompt type based on the type of data item selected.

Navigation:Menu > Administration > People Analytics (Business Intelligence)

  1. In UKG ProPeople Analytics, open the report in the report editor.
    1. From the People Analytics application bar, select the Open Menu icon.
    2. From the Open Menu, select Content.
    3. From the Content page, select a tab, and then navigate to the location of the report.
    4. Select the Action Menu icon for the report.
    5. Select Edit Report.
  2. Select any column in the report.
  3. Create a filter.
    1. From the on-demand toolbar, select the Filters icon, and then select Edit Filters from the drop-down list.
    2. In the Filters dialog box, select the Add icon.
    3. If the Create Filter dialog box appears, select the Advanced radio button, and then select OK.
    The Detail Filter Expression dialog box appears.
  4. Define the filter expression.
    1. In the Detail Filter Expression dialog box, select the Data Items tab.
    2. On the Available Components pane, move the data item you want to filter to the Expression Definition pane.
      Note You can perform either of the following actions to move a data item:
      • Double-click the data item.
      • Drag and drop the data item.
    3. On the Expression Definition pane, use the table below to complete the expression definition.
      Prompt TypeExpression DefinitionExample
      Drop-down list that allows users to select a single item[Data item] = ?Prompt Name?[Company] = ?Select a company?
      List that allows users to select multiple items[Data item] in ?Prompt Name?[Company] in ?Select a company?
      Date range selector[Data item] between ?Begin Date?and ?End Date?[Period Control Date] between ?Begin Date? and ?End Date?
    4. Select the Validate icon.
      A Prompt dialog box appears with the data item you selected.
    5. Select a value or multiple values from the prompt, and then select OK.
      If your expression definition contains no errors, the following message appears on the Information pane: No errors. If your expression definition contains errors, a list of errors appears on the Information pane.
    6. Select OK to close the Detail Filter Expression dialog box.
  5. Select OK to close the Filters dialog box.
  6. Run the report to test your prompt.
    1. Select the Run Actions icon, and then select Run HTML from the drop-down list.
      The Prompt page displays with the prompt you created.
    2. Select a value or multiple values from the prompt, and then select OK .
  7. Close the report viewer and save the report.

Create a Prompt Page

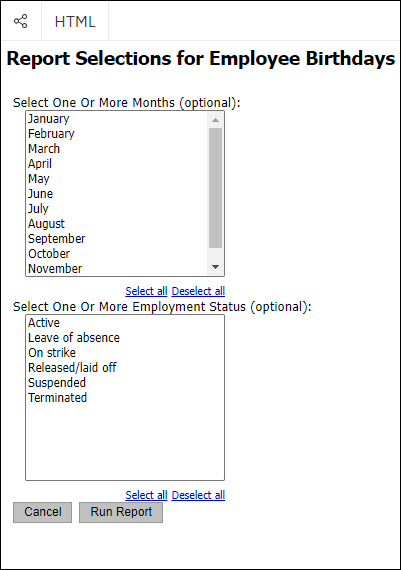
Create a prompt page to improve performance when you need to add multiple prompts to a report. Prompt pages also enable you to add formatting to the page and provide instructions to help users. You can create multiple prompt pages and specify the number of prompts to display on each page.

Navigation:Menu > Administration > People Analytics (Business Intelligence)

  1. From the UKG Pro® People Analytics portal, open the report in the report editor.
    1. From the People Analytics application bar, select the Open Menu icon.
    2. From the Open Menu, select Content.
    3. From the Content page, select a tab, and then navigate to the location of the report.
    4. Select the Action Menu icon for the report.
    5. Select Edit Report.
  2. Select each row or column that contains a data item that you want to filter.
    Note Press and hold the Ctrl key to select multiple data items.
  3. Select the More (vertical ellipses) icon from the on-demand toolbar, and then select Build Prompt Page from the drop-down list.
    A prompt page appears with a prompt for each data item you selected. Each prompt type varies based on the type of data item selected. A separate detail filter is automatically created for each prompt control in the report's main query. Additionally, a new query is automatically created for each prompt.
  4. (Optional) Mark a prompt as optional.
    Note All prompts are marked as required by default, meaning users are required to select a value before they can run the report.
    1. From the prompt page, select the prompt control.
    2. On the Properties pane, go to the General section, and then turn the Required toggle off.
    3. From the navigation menu, select Report, and then select the main query associated with the report from the drop-down list.
    4. From the Query page, go to the Detail Filters pane, and then select the filter for the data item associated with the prompt control.
    5. On the Properties pane, go to the General section, and then select Optional from the Usage drop-down list.
  5. From the navigation menu, select Report, and then select the prompt page from the drop-down list.
  6. (Optional) Add a title to the prompt page:
    1. Double-click the page header.
    2. Enter text.
    3. Select OK.
  7. (Optional) Add instructional text for each prompt:
    1. Double-click the text above the prompt.
    2. Modify the text.
    3. Select OK.
  8. (Optional) Modify the appearance or behavior of the prompt:
    1. From the prompt page, select a prompt control.
    2. On the Properties pane, modify settings as needed.
    The Properties pane displays the available options for the prompt. For example, you can specify whether a user can select multiple values, change the user interface (UI) control type, or modify the font settings. The available properties for a prompt control vary based on the prompt type, which is automatically selected based on the type of data item. For example, you can select a UI of List Box or Check Box Group for a Value Prompt, while you can select a UI of Calendar or Edit Box for a Date Prompt.
  9. Run the report to test your prompts.
    1. Select the Run Actions icon, and then select Run HTML from the drop-down list.
      The Prompt page displays with the prompt you created.
    2. Select a value or multiple values from the prompt, and then select OK.
  10. Close the report viewer and save the report.

Create a Cascading Prompt

Cascading prompts improve the user experience of a report by reducing the values that appear in a child prompt based on the user's selection in a parent prompt. A Value, Text Box, or Search & Select prompt can be used as a parent in a cascade, but only a Value prompt or Search & Select prompt can be used as a child.

Navigation:Menu > Administration > People Analytics (Business Intelligence)

  1. From the UKG Pro® People Analytics portal, open the report in the report editor.
    1. From the People Analytics application bar, select the Open Menu icon.
    2. From the Open Menu, select Content.
    3. From the Content page, select a tab, and then navigate to the location of the report.
    4. Select the Action Menu icon for the report.
    5. Select Edit Report.
  2. Select each row or column that contains a data item that you want to filter.
    Note Press and hold the Ctrl key to select multiple data items.
  3. Select the More (vertical ellipses) icon from the on-demand toolbar, and then select Build Prompt Page from the drop-down list.
    A prompt page appears with a prompt for each selected data item. Each prompt type varies based on the type of data item selected. A separate detail filter is automatically created for each prompt control in the report's main query.
  4. (Optional) Select a prompt to view the prompt type.
    The prompt type appears next to the Select Ancestor icon in the Properties pane.
  5. If the first prompt in your cascade (the parent prompt) is a Value prompt, select the prompt, and then modify the following properties in the General section of the Properties pane:
    1. Turn the Multi-select toggle off.
    2. Turn the Auto-Submit toggle on.
  6. If the parent prompt is a Text Box or Search & Select prompt, add a Reprompt button:
    1. From the Toolbox tab, expand the Prompting section, and then drag and drop the Prompt Button object to the prompt page.
    2. Select the Prompt Button from the prompt page.
    3. In the General section of the Properties pane, select Reprompt from the Type drop-down list.
  7. Select the cascade source for a child prompt:
    1. Select the child prompt from the prompt page.
    2. On the Properties pane, go to the General section, and then double-click the Cascade Source property.
    3. Select the parent prompt from the Cascade Source drop-down list, and then select OK.
    Note The Cascade Source property is only available for Value prompts and Search & Select prompts.
  8. Repeat the steps for each parent and child prompt in your cascade.
  9. Run the report to test your prompts.
    1. Select the Run icon, and then select Run HTML from the drop-down list.
      The Prompt page displays with the cascading prompts you created.
    2. Select values from the prompts, and then select OK.
  10. Close the report viewer and save the report.

Delete a Prompt Page

When you create a prompt page, a filter for each prompt is automatically added to the main report query. To remove a prompt page, you must delete both the page and the underlying filter.

Navigation:Menu > Administration > People Analytics (Business Intelligence)

  1. From the UKG Pro® People Analytics portal, open the report in the report editor.
    1. From the People Analytics application bar, select the Open Menu icon.
    2. From the Open Menu, select Content.
    3. From the Content page, select a tab, and then navigate to the location of the report.
    4. Select the Action Menu icon for the report.
    5. Select Edit Report.
  2. Delete the prompt page.
    1. Select the Report drop-down list from the navigation menu, and then select Prompt Pages.
    2. From the list, select the prompt page, and then select the Delete icon from the on-demand toolbar.
  3. Delete the prompt filters.
    1. From the navigation menu, select the Report drop-down list and then select the query that includes the filter.
    2. From the Detail Filters pane, select each filter to be deleted, and then select the Delete icon from the on-demand toolbar.
  4. (Optional) Run the report to verify your changes.
    1. Select the Run Actions icon, and then select Run HTML from the drop-down list.
    2. Verify that the prompts from the prompt page do not appear. If a prompt does appear, verify that you deleted the filter for the prompt.
  5. Select the Save icon to save the report.