UKG Wallet and UKG Pro Integration
UKG Wallet Integration
The following prerequisites are required for integration:
- Create a Service Account
- Service Account user name
- Service Account password
- User API key
- Customer (Client) key
- Base URL
- Deduction code setup
- Permissions to access data
Disclaimer
The information in this guide is based on a standard production environment.
Environments that are configured differently may require additional adjustments. Payactiv handles support for UKG Wallet but may require UKG support resources, based on the configuration requirements. If you have questions regarding your UKG solution integration with Wallet (for example, API access), you can create a case and reference knowledge articles 000160051 and 000182208.
Create a Service Account
Complete the steps to create a service account.
Configure Web Service Access Permissions for UKG Wallet
Assign the required permissions to access the data for the service account you created.
Retrieve the User API and Client Keys
Complete the following steps to retrieve the API Key and Client Key.
-
Find the service account in the list and note the User API Key.

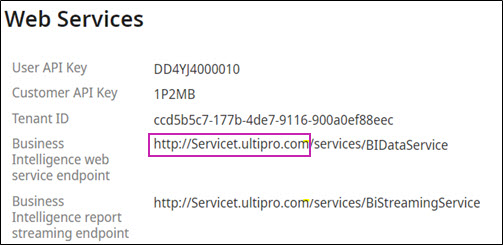
Retrieve the Base URL
Complete the following steps to Retrieve the Base URL to provide to Payactiv.
-
From the Web Services page, make note of the URL through ".com."
Configure Deduction Codes for UKG Wallet Integration
Create a deduction code and add the code to an employee benefits group for UKG Wallet integration.
- From the Business Rules page, select Deduction/Benefits Plans.
- From the Deduction/Benefits plan page, select Add Deductions/Benefits Plan to create a new deduction code.
- In the Add Deduction/Benefit Plan dialog, enter an Effective Date, as needed.
- Select Next.
- From the Deduction Setup work event, in the Main tab, enter the required information. In addition, under General Information pane, ensure the following values are selected:
- In the Deduction Type list, as a best practice, select either Additional or Miscellaneous.Note Selecting the Additional for Deduction type requires additional configuration after you save the new deduction code.
- You must ensure the Benefit Plan checkbox is selected. If the Additional or Miscellaneous deduction types do not have the Benefit Plan checkbox selected, choose a different type that is configured as a Benefit Plan.
- In the Deduction Type list, as a best practice, select either Additional or Miscellaneous.
- Select Next.
- On the Calculations tab, ensure the following settings are selected under Employee and Employer:
- Select the Use rate at employee level checkbox.
- In the Amount field, select Flat amount.
- Ensure the values are 0.
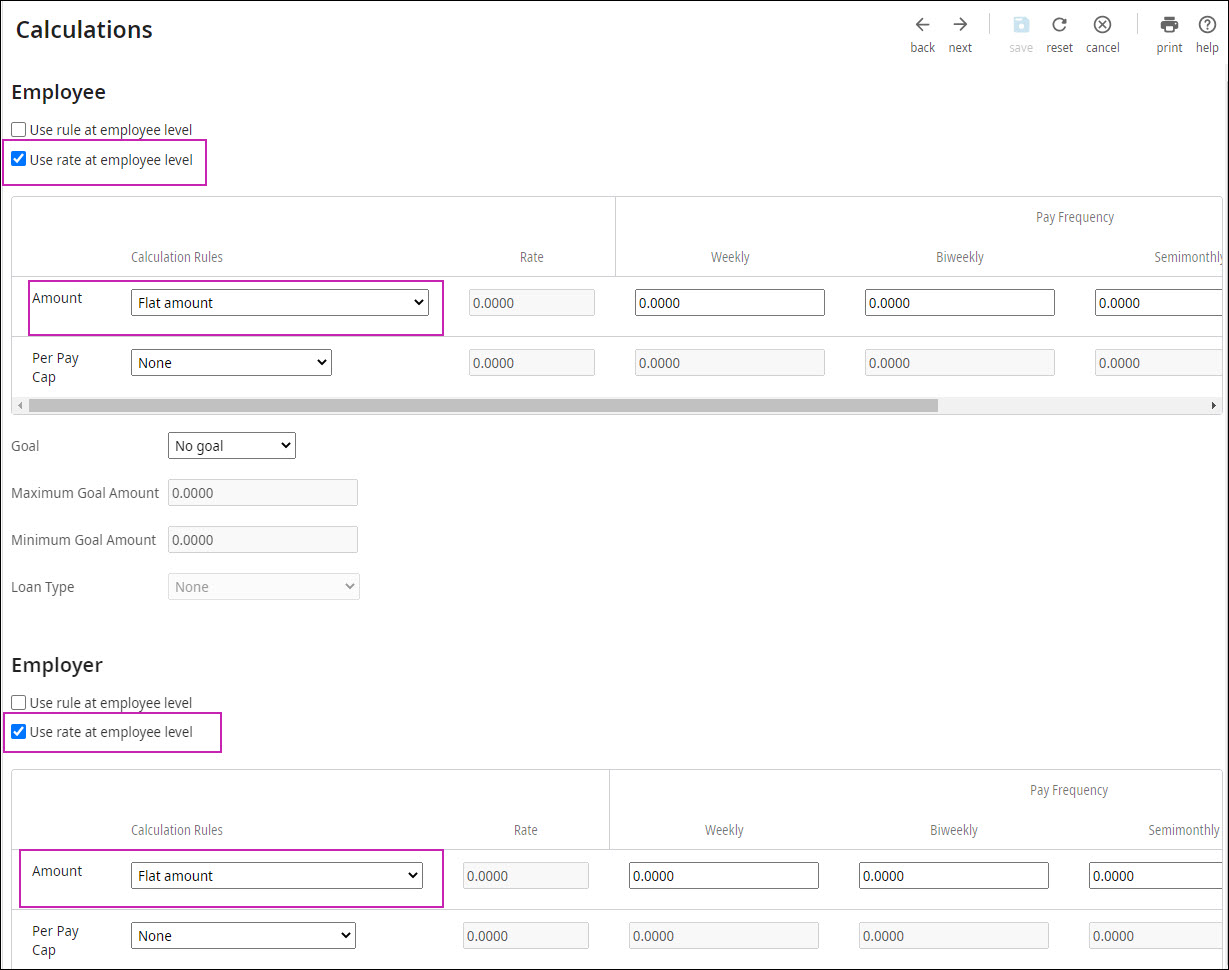
- Select Next.
- From the Payroll tab, select all checkboxes in the Scheduled Pay Periods by Default section.
- Select Save.
Available Deduction Type Additional Configuration
When you select the Available Deduction Type in the Deduction Code setup process, the following configuration is required.
- From the Deduction/Benefit Type Detail page, complete the following:
- Deselect the Is available for open enrollment checkbox.
- Select the Allow Multiple Deductions checkbox.

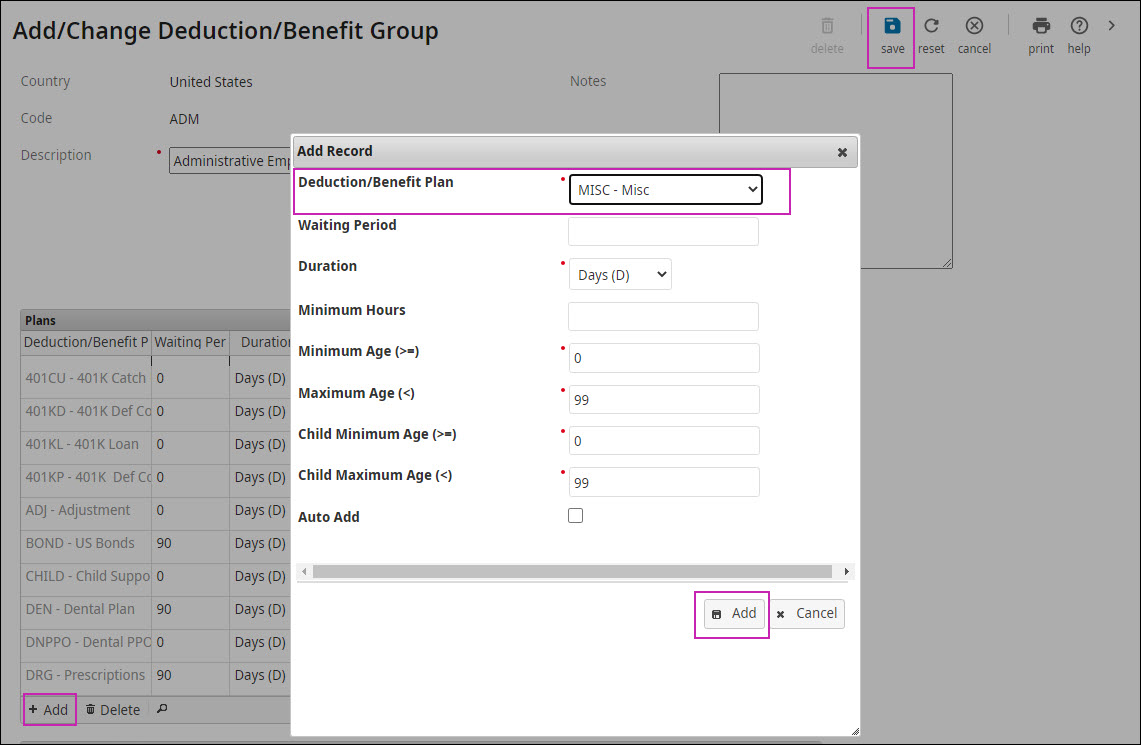
Add a Deduction Code to an Employee Benefits Group
Link the created deduction code with the appropriate employees.
-
Select Add and then Save.
UKG Pro Endpoints Leveraged by Payactiv
Below is the list of endpoints utilized by Payactiv:
- {{BaseURL}}/api/personnel/v1/employee-demographic-details
- {BaseURL}}/api/personnel/v1/employee-employment-details
- {{BaseURL}}/api/configuration/v1/integration-company-details
- {{BaseURL}}/api/configuration/v1/locations
- {{BaseURL}}/services/LoginService
- {{BaseURL}}/benefits/v3/payCalendars/years/{{Year}}
- {{BaseURL}}/benefits/v3/deductions/effectivedates/{date}
- {{BaseURL}}/benefits/v3/deductions/lumpsums/effectivedates/{date}
- {{BaseURL}}/payroll/v1/payroll-deductions-history/?{paydate}&{deductioncode}
- {{BaseURL}}/services/employeepaystatement
- {{BaseURL}}/payroll/v1/direct-deposit?{employeeID}
- {{BaseURL}}//api/personnel/v1/import-tool/
- {{BaseURL}}///personnel/v1/import-tool/status/{stagingID}
{{BaseURL}}/services/payroll/v2/payroll-pending-items/earnings
{{BaseURL}}//services/payroll/v2/payroll-pending-items/deductions
© 2024 UKG Inc. All rights reserved. For a full list of UKG trademarks, visit https://www.ukg.com/trademarks. All other trademarks, if any, are the property of their respective owners.
This document and all information contained herein are provided to you "AS IS" and UKG Inc. and its affiliates (collectively "UKG") make no representation or warranties with respect to the accuracy, reliability, or completeness of this document, and UKG specifically disclaims all warranties, including, but not limited to, implied warranties of merchantability and fitness for a particular purpose. The information in this document is subject to change without notice. The document and its content are confidential information of UKG and may not be disseminated to any third party. No part of this document or its content may be reproduced in any form or by any means or stored in a database or retrieval system without the prior written authorization of UKG. Nothing herein constitutes legal, tax, or other professional advice. All legal, tax, or other questions or concerns should be directed to your legal counsel, tax consultant, or other professional advisor. All company, organization, person, and event references are fictional. Any resemblance to actual companies, organizations, persons, and events is entirely coincidental.