Onboarding administrators can assign links to onboarding processes. For example, you can include a link for a company overview training video.
Note:
To change the order in which Helpful Information documents are presented, go to the General Onboarding Settings page (Settings > General). To change the order in which Onboarding Process documents are presented, go to the Onboarding Process Settings page (Settings > Processes).
Navigation: Document Library > Company Documents
- On the Company Uploaded Documents page, select Add.
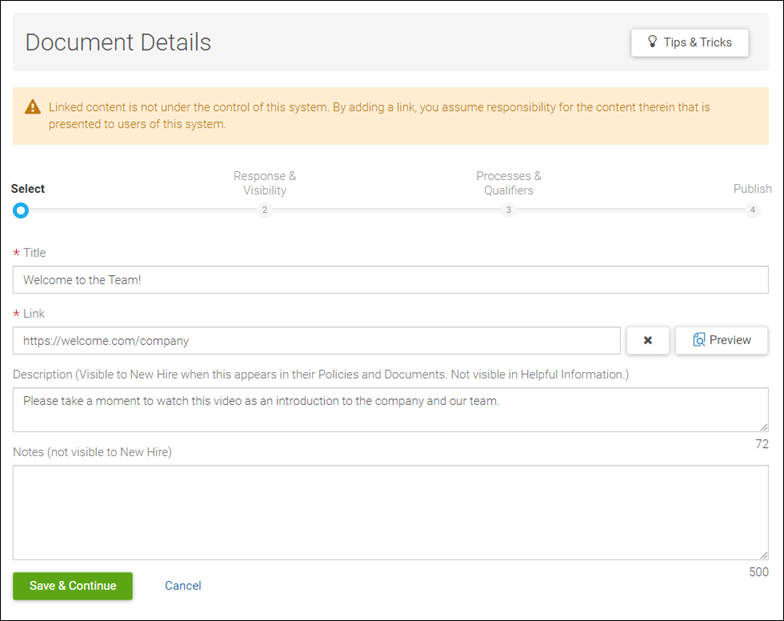
- On the Document Details page, complete the Select step.
- Enter a title for the link.
- Select Add a Link.
- Enter the link.

- Enter an optional description of the document or link that will be visible to the new hire. A description is useful for setting expectations or explaining the reason for a link. For example, the description could be used to instruct new hires to contact HR with questions about a policy.
- Enter any optional notes that need to be documented. Notes are not visible to the new hire. They can be used for internal tracking purposes, such as indicating the intended purpose of a link or recording versions of the link.
- Select Save & Continue.
- At the Response & Visibility step, select how the form should be filled out.
- In the Policy & Documents section, select the type of response required:
- E-Signature stamp
- E-Signature placement
- Acknowledgement
- Do not display to New Hire
- If you select Acknowledgement, you must select processes to assign in the next step. If you select Do not display to New Hire, the next step is Publish.
- Select the Helpful Information box if you would like the link to be included in the Helpful Information section.
- Select Save & Continue.
- In the Policy & Documents section, select the type of response required:
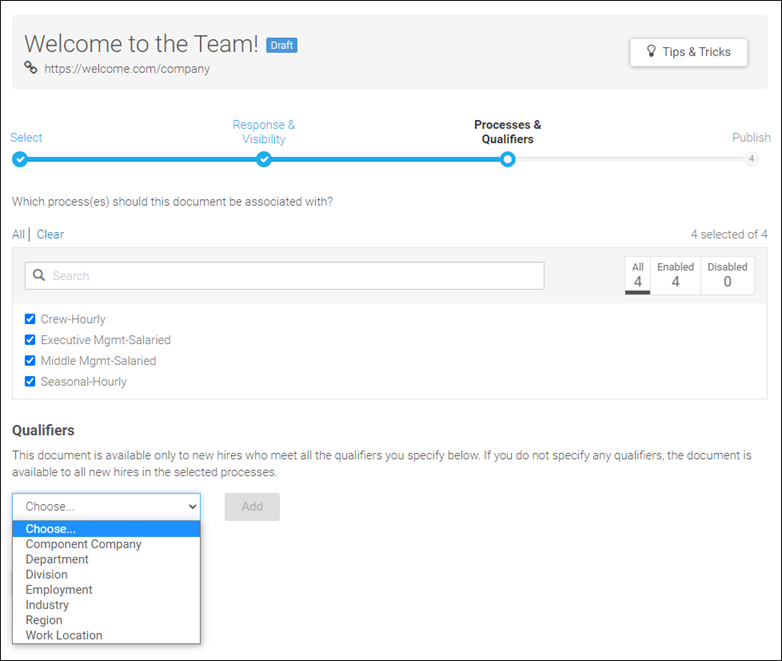
- From the Processes & Qualifiers step, you can associate the link with onboarding processes.
- Select the applicable boxes to determine which processes the link should be associated with. New hires launched with the selected processes and qualifiers can view the link.

- In the Qualifiers section, you can make the link available only to new hires who meet all qualifiers specified. If no qualifiers have been specified, the link is available to all new hires in the selected processes.
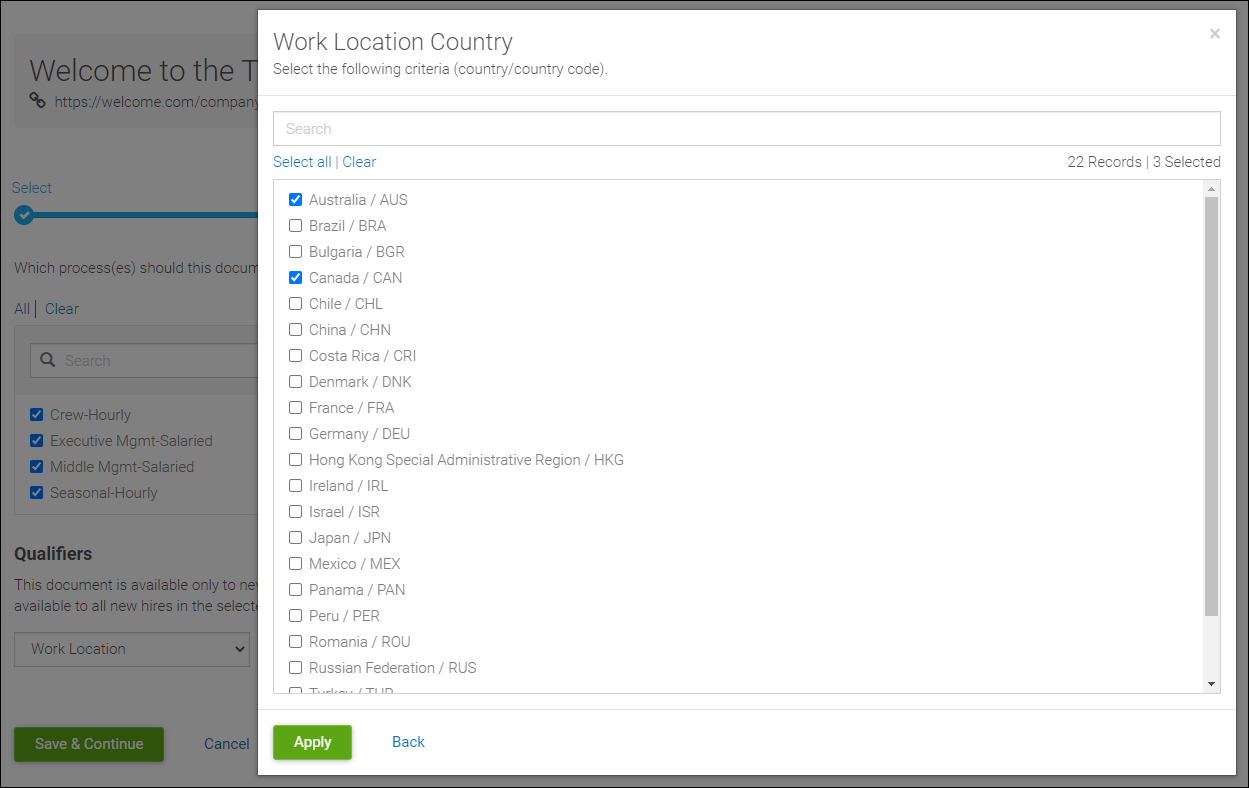
- You can qualify based on Component Company and organization levels, or by umbrella category. Umbrella categories are combined qualifier options that include Employment and Work Location. These umbrella categories are "OR" conditions, meaning you can qualify on one of the options, but not all. For example, if you select Work Location as a qualifier, a new window appears. From here, you select if the document will include a qualifier of Country, State, or City, but not more than one.
- Select the desired qualifier option, and then select Next to see additional criteria for the umbrella category qualifier.

- Select the applicable boxes for the desired criteria, and then select Apply. All selected qualifiers will display as a summary.
- Select the applicable boxes to determine which processes the link should be associated with. New hires launched with the selected processes and qualifiers can view the link.
- To make any changes to the selected qualifiers, select the Actions menu.
- To edit the selected qualifiers, select Edit Selection and then make the necessary changes to the selected criteria.
- To delete a qualifier, select Remove.
- To change the qualifier option, select the applicable option listed under Replace Qualifier With.
Note:
Only those that are umbrella categories will have the Replace Qualifier With option in the Actions menu.
- Once all applicable processes and qualifiers have been added, select Save & Continue.
- Complete the Publish step, which displays a summary of all selected options.
- Select Publish to make the link visible to future new hires launched using the selected processes.
- Select Keep as Draft to save a copy of the link so you can continue editing and publish later.
Once published, the Document Library page displays the newly created link in alphabetical order.