Add, Manage, and Remove Users in the UKG Community

Manage UKG Community Contacts

Focal administrators (for accounts with the UKG Pro solution) and support administrators (for accounts with UKG Pro WFM and all other solutions) can update access for the active UKG Community contacts in their organization and reset passwords for selected contacts.

Note Based on your account access, you may not have the option to assign or manage Service Request Users.

Navigation:The UKG Community

  1. From the UKG Community home page, select the profile menu > My Organization.
    The UKG Community home page with the profile menu selected. From the drop-down menu, My Organization is highlighted.
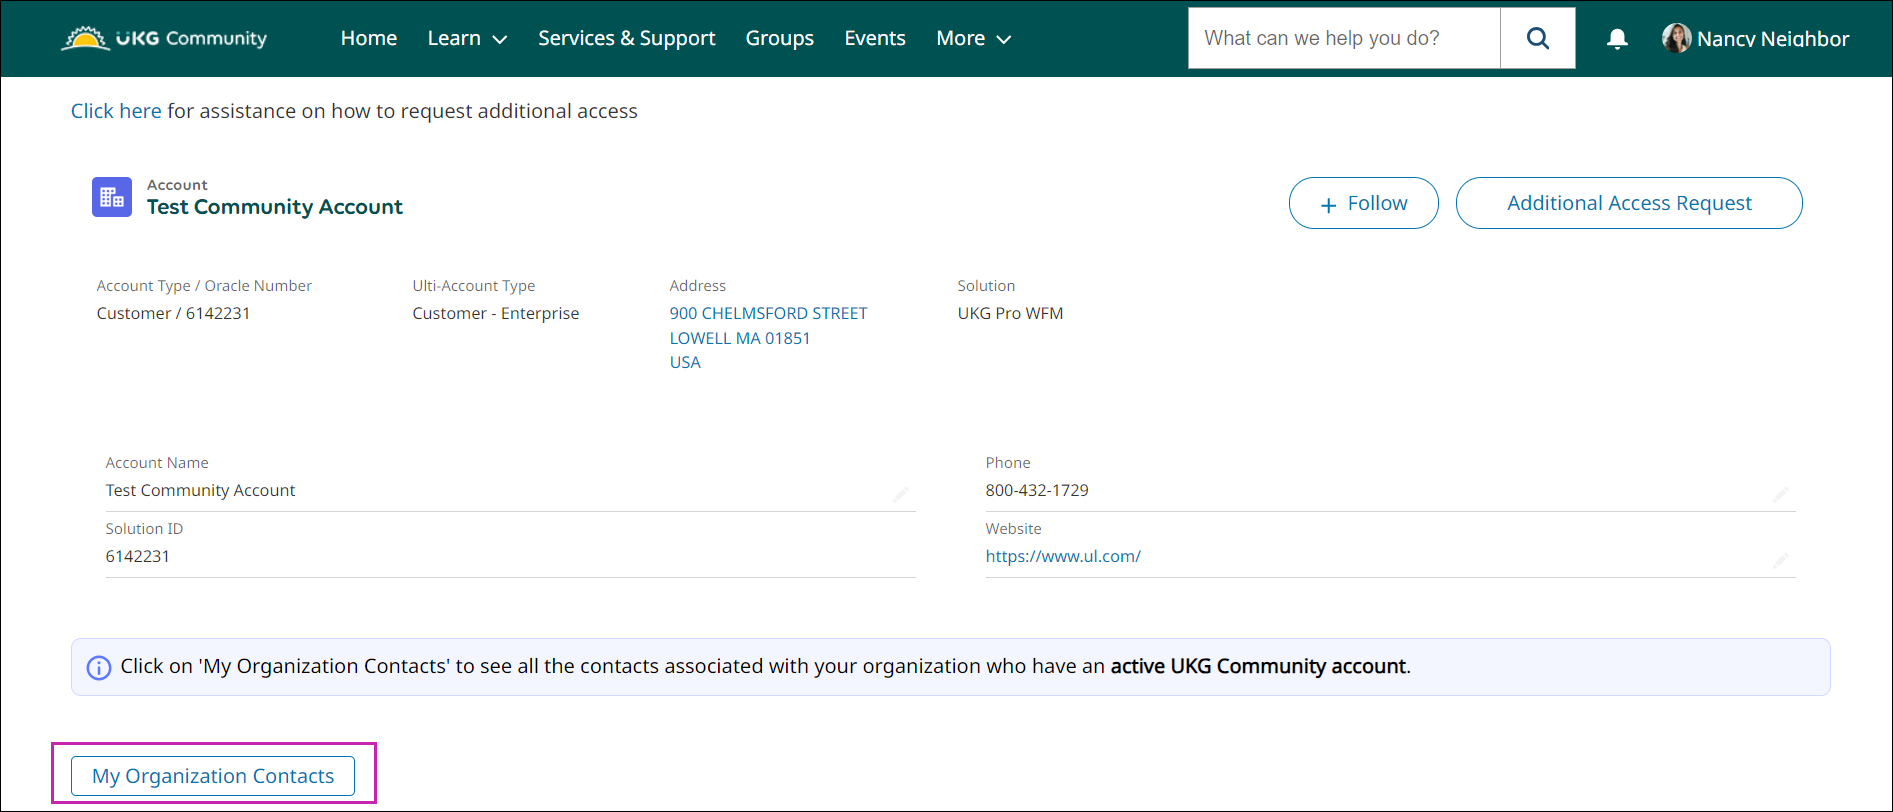
  2. From the My Organization page, select My Organization Contacts.
    The My Organization page with My Organization Contacts highlighted.
  3. From the Contacts page, for a user, select the down arrow icon and then select one of two options:
    • Edit
    • Reset Password
    The Contacts page with the down arrow icon highlighted for a user. The drop-down has two options: Edit and Reset Password.
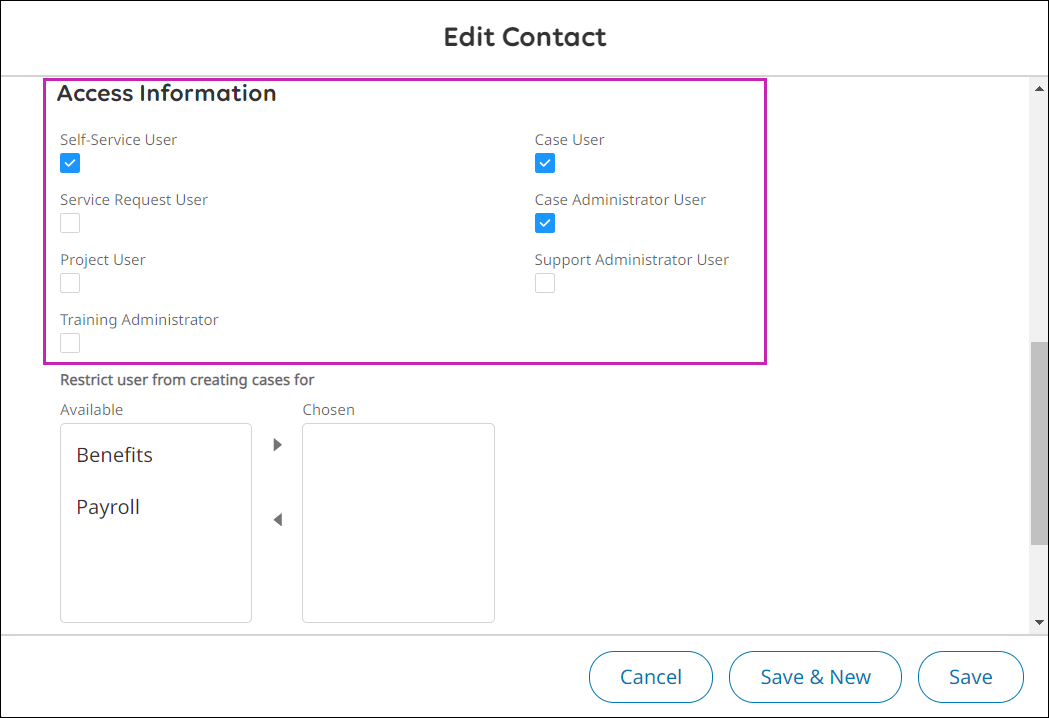
  4. If you chose Edit, from the Edit Contact window, in the Access Information section, select or deselect boxes for the different levels of access.
    OptionDescription
    Guest UserUsers who can access publicly available product documentation. No registration or log in is required to access this content.
    Self-Service User Users who have base access to the UKG Community, including the ability to search, ask questions, collaborate with other community members, and access content and learning material. This access is assigned by default when a user self-registers to the UKG Community.
    Case User Includes Self-Service User access, plus the ability to create cases and manage your own cases. If you select this checkbox, the Self-Service User checkbox is automatically selected after you save.
    Note Based on your account's access, Case Users may be restricted from submitting Payroll or Benefits cases.
    Service Request User Includes Self-Service User access, plus the ability to create and manage your own service requests. If you select this checkbox, the Self-Service User checkbox is automatically selected after you save.
    Note Based on your account access, you may not have the option to assign Service Request Users.
    Project User (formerly known as Activation User in our Legacy Ultimate Community) Includes Self-Service User access, plus the ability to access the project console (for our Legacy Ultimate project users) and to the Launch application (for our UKG Pro, UKG Dimensions, and UKG Ready users).
    Case Administrator User Includes Self-Service User access and Case User access, plus the ability to view and manage all cases at your primary account or other accounts that you support. If you select this checkbox, the Case User and Self-Service User checkboxes are automatically selected after you save.
    Training AdministratorUsers who can assign courses and learning journeys to individual training users in their organization.
    Support Administrator User Includes Case Administrator User, Service Request User, Case User, and Self-Service User access, plus the ability to create new users and manage the access for other users of your primary account. This user type is for accounts with UKG Pro WFM and all other solutions. Accounts with the UKG Pro solution should have a Focal Administrator designated – view this job aid for more information.
    The Access Information section with several user types selected.
  5. If you chose Reset Password, a confirmation statement appears at the top of the page stating that the action completed successfully. The selected user has up to 24 hours to access the reset password link in the email.
  6. Select Save.

Respond to Additional Access Request

When a customer contact requests additional access in the UKG Community, a Support Admin or Focal Admin from their organization can approve or reject the request.

Navigation:community.ukg.com

  1. From the top right corner of the UKG Community home page, select and open the profile menu.
  2. From the profile menu, select My Organization.
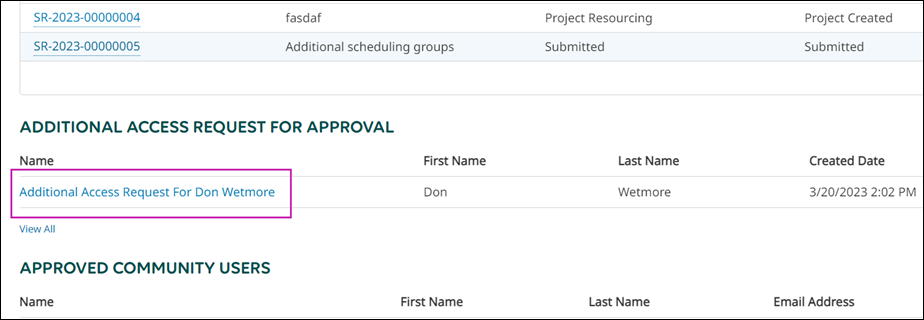
  3. In the Additional Access Request for Approval section, select the specific request.
    Additional Access Request for Approval section where you can select a request.
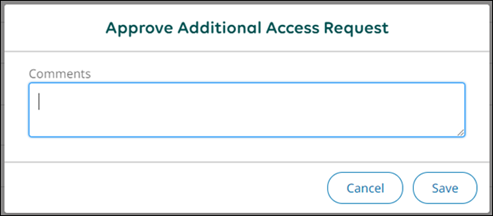
  4. From the request, select either the  Approve Additional Access Request  or  Reject Additional Access Request button. Fill in the Comments and select Save.
    Your request is sent to your Organization's Support Administrator(s) for approval, and you will be notified by email whether your request was approved or rejected.
    Approve Additional Access Request where you can enter comments and select Save.
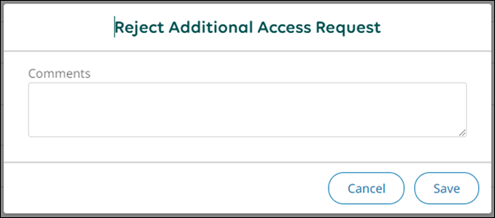
    Reject Additional Access Request where you can enter comments and select Save.

Restrict Case Users from Submitting Benefits and Payroll Cases

Focal administrators (for accounts with the UKG Pro solution) and support administrators (for accounts with UKG Pro WFM and all other solutions) can restrict case users from submitting Benefits and Payroll type cases via the UKG Community.

Navigation:The UKG Community

  1. From the UKG Community home page, select the profile menu > My Organization.
  2. From the My Organization page, select My Organization Contacts.
  3. From the Contacts page, for a user, select the down arrow icon and then select Edit.
    The Contacts page with the down arrow icon highlighted for a user. The drop-down has an option for Edit.
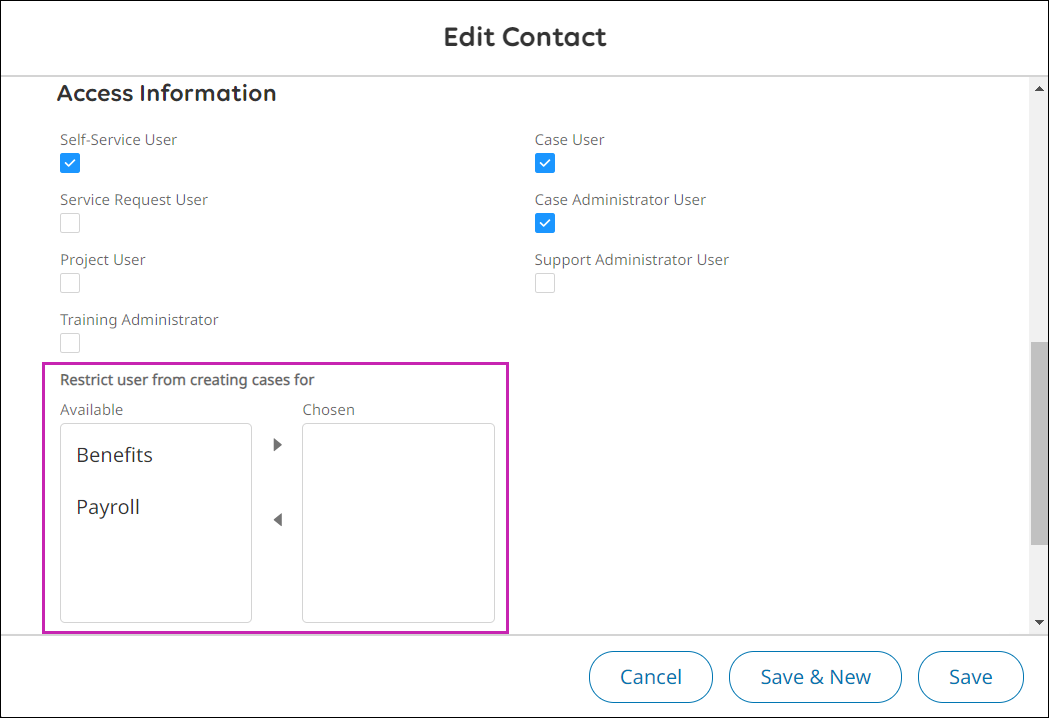
  4. From the Edit Contact window, in the Restrict user from creating cases for section, select Benefits, Payroll, or both and use the right arrow to move the selected option(s) from the Available list to the Chosen list.
    Access Information section with a callout box around the Available and Chosen lists.
  5. Select Save.

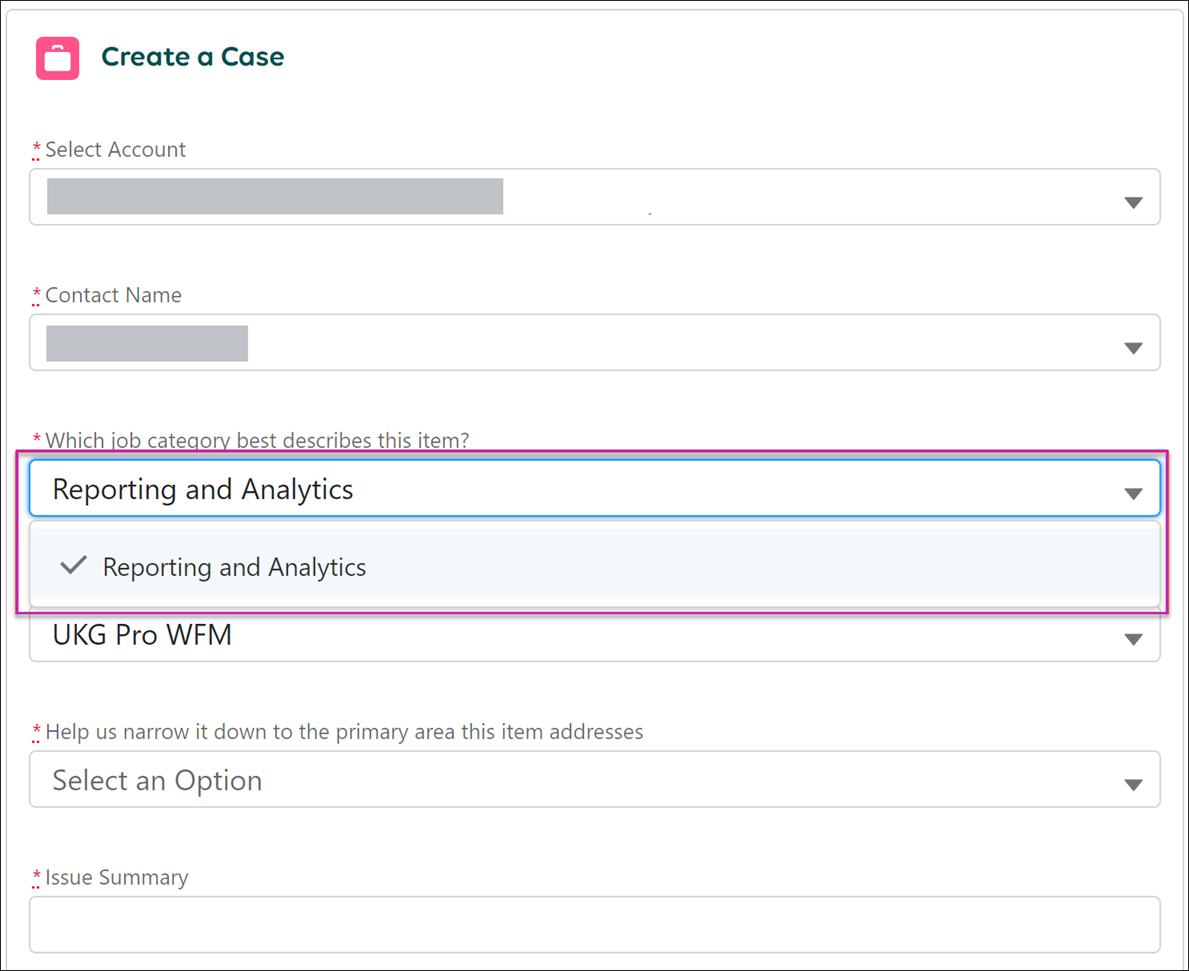
    The applied restrictions will prevent the contact from being able to select Payroll and/or Benefits options as part of the Job Category picklist options. For example, if Payroll is selected as a Chosen restriction, the contact will not have the Payroll option from the Create a Case form, therefore restricting the Product Solution options that can be selected.

    Create a Case page with a callout box around Reporting and Analytics at the field asking for the job category for this item.

    Use this same process to update the contact's restrictions.

Allow a Related Company Contact to Create and Manage Service Requests

Focal administrators (for accounts with the UKG Pro solution) and support administrators (for accounts with UKG Pro WFM and all other solutions) can allow Related Company Contacts to create and manage their own service requests.

  1. From the UKG Community home page, select the profile menu > My Organization.
  2. From the My Organization page, select My Organization Contacts.
    The My Organization page with My Organization Contacts highlighted.
  3. From the Contacts page, scroll to the Related Company Contacts table, select the down arrow icon for the appropriate contact, and then select Edit.
    Note If the appropriate contact is not in the Related Company Contacts table, submit a support case to add them.
    The Related Company Contacts table with the drop-down icon highlighted
  4. In the Start Date field, specify the date to begin access.
    The edit window for a related company contact
    If you select the current date, the Service Request User checkbox is checked automatically. If you select a date in the future, the Service Request User checkbox is not checked until after the specified date.
  5. (Optional) In the End Date field, specify the date when access will end.
    If you select an end date, the system automatically deselects the Service Request User checkbox when that date is met.
  6. Select Save.
    After the specified start date, a check icon appears in the Service Request User column for the contact in the Related Company Contacts table.

Restrict a Related Company Contact from Creating and Managing Service Requests

If a Related Company Contact was previously allowed to create and manage service requests, focal administrators and support administrators can edit the contact and remove access.

Note Based on your account access, you may not have access to this functionality.
  1. From the UKG Community home page, select the profile menu > My Organization.
  2. From the My Organization page, select My Organization Contacts.
    The My Organization page with My Organization Contacts highlighted.
  3. From the Contacts page, scroll to the Related Company Contacts table, select the down arrow icon for the appropriate contact, and then select Edit.
  4. Deselect the Service Request User checkbox.
    The current date automatically appears in the End Date field.
  5. Select Save.
    In the Related Company Contacts table, a check icon no longer appears in the Service Request User column for the contact.

Remove UKG Community Contacts

Focal administrators (for accounts with the UKG Pro solution) and support administrators (for accounts with UKG Pro WFM and all other solutions) can remove a contact who has completely left their company or organization or simply remove a contact's access to the UKG Community.

Remove UKG Community Contacts Who Have Left Your Company or Organization

The UKG Community

  1. From the UKG Community home page, select the profile menu > My Organization.
  2. From the My Organization page, select My Organization Contacts.
  3. From the Contacts page, for a user, select the down arrow icon and then select Edit.
    The Contacts page with the down arrow icon highlighted for a user. The drop-down has an option for Edit.
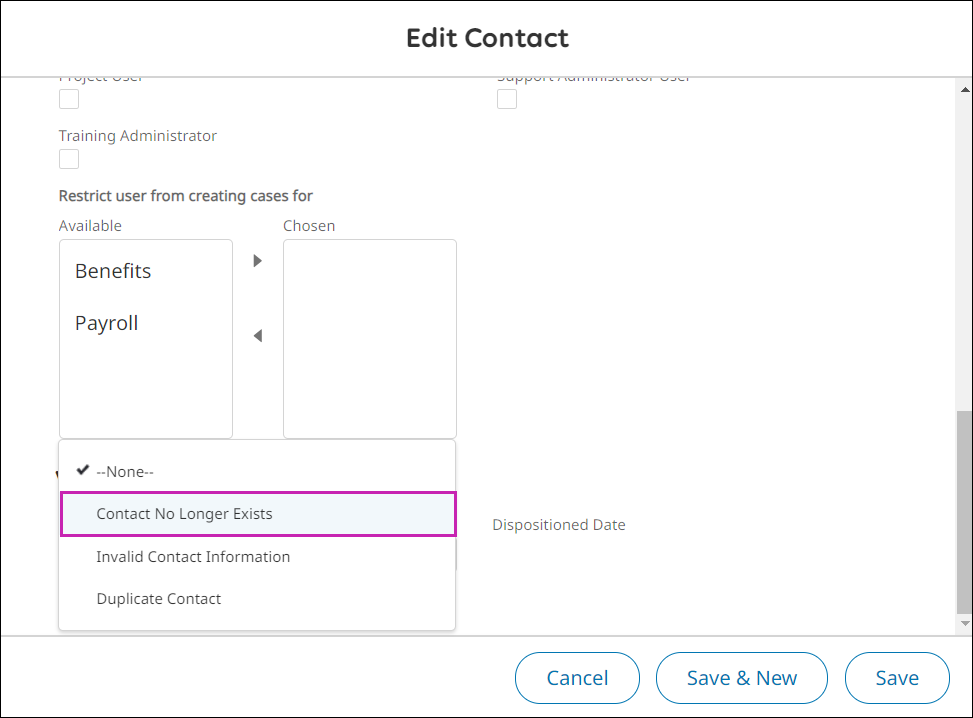
  4. From the Edit Contact window, in the Verification Status section, select Contact No Longer Exists.
    The Edit Contact window with the Disposition contact options open. Contact No Longer Exists is selected.
  5. Select Save.
    The contact no longer has access to the UKG Community.

Remove UKG Community Contacts Who Belong to Your Company or Organization

You can remove a contact from the UKG Community who still belongs to your company or organization.

Navigation:The UKG Community

  1. From the UKG Community home page, select the profile menu > My Organization.
  2. From the My Organization page, select My Organization Contacts.
  3. From the Contacts page, for a user, select the down arrow icon, then select Edit.
  4. Deselect the Self-Service Access box.
  5. Select Save.
    Note Please allow a few moments for the Active Community Contacts list to update after completing this action.

Add UKG Community Contacts

Focal administrators (for accounts with the UKG Pro solution) and support administrators (for accounts with UKG Pro WFM and all other solutions) can add contacts to the UKG Community.

Navigation:The UKG Community

  1. From the UKG Community home page, select the profile menu > My Organization.
  2. From the My Organization page, select My Organization Contacts.
    The My Organization page with My Organization Contacts highlighted.
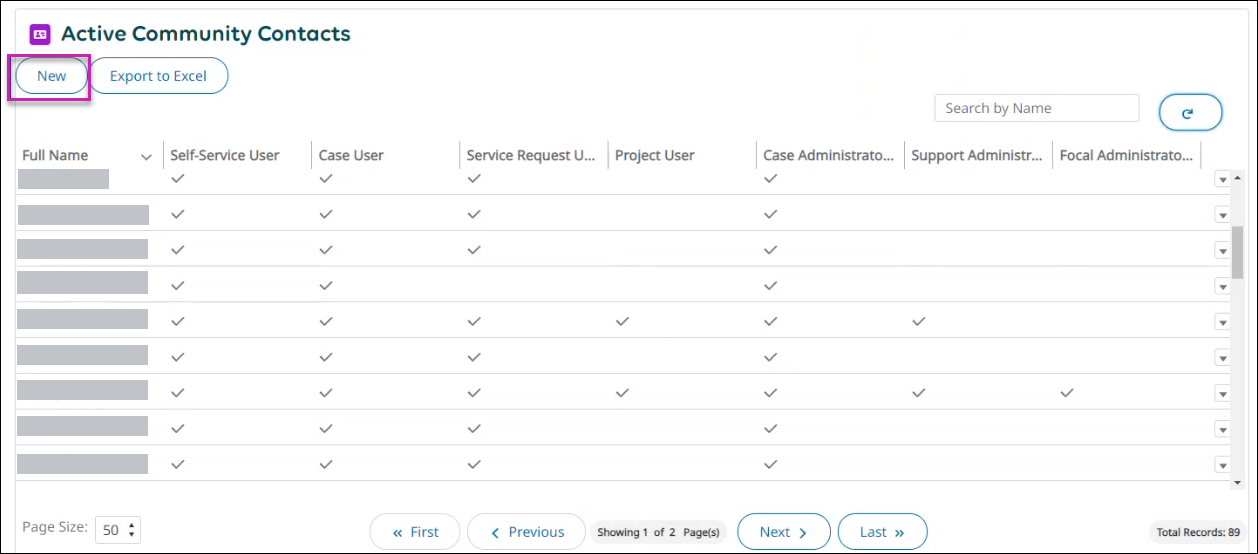
  3. From the Contacts page, select New.
    The Contacts page with New highlighted.
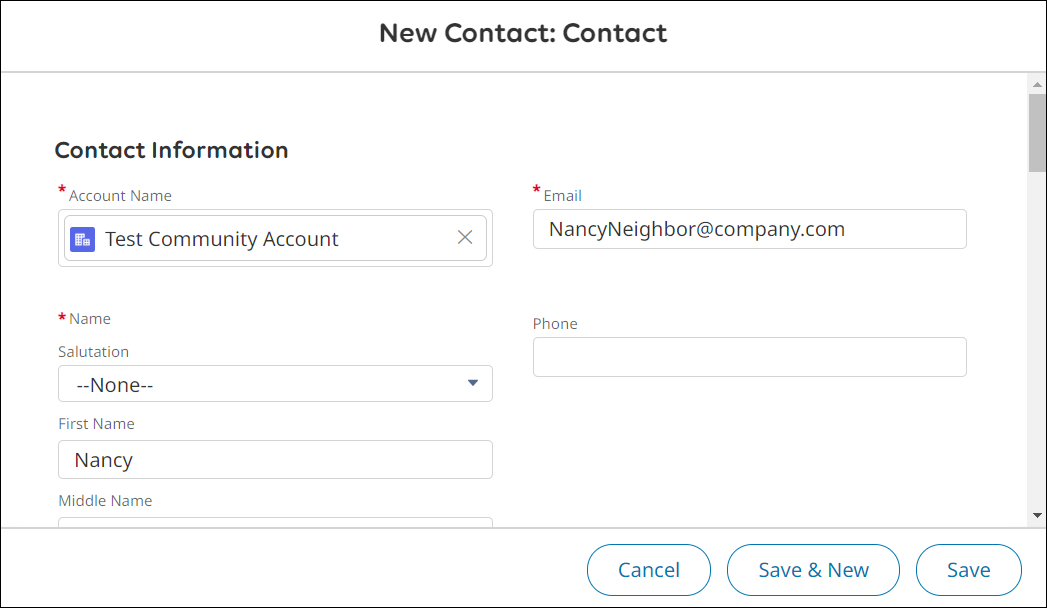
  4. Enter the required information:
    • At the Name field, enter a first and last name.
    • At the Email field, enter an email.
      Note The email must have a company email domain. Non-company emails are not allowed.
    • At the Title field, enter a title.
    • In the Access Information section, select levels of access.
    The New Contact window with example information.
  5. Select Save.
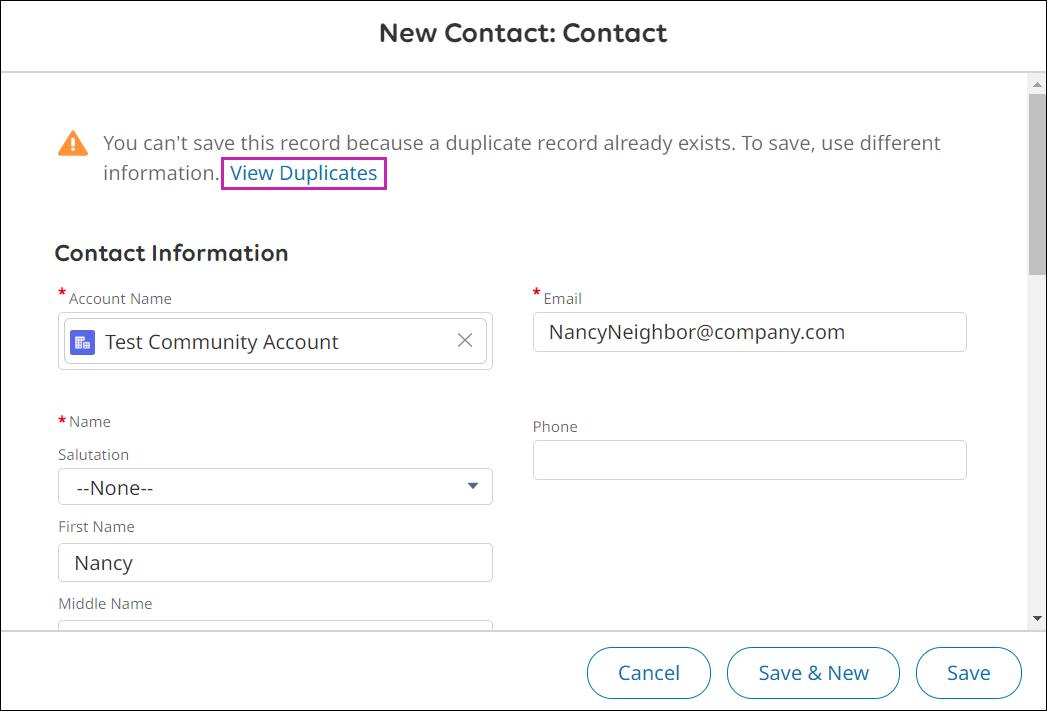
    Note If the contact already exists, a warning message appears. To view the existing contact, select View Duplicates.
    The New Contact window with the duplicate record warning message. The View Duplicates link is highlighted.

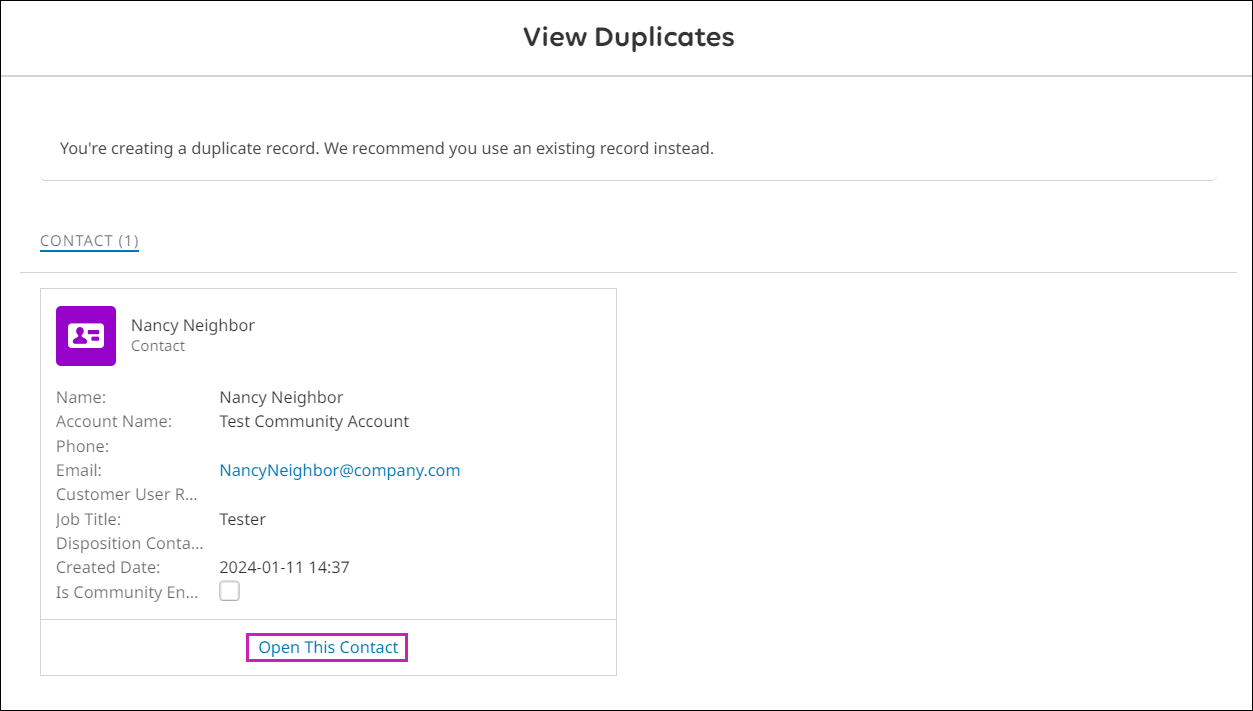
    To view the contact's page, select Open This Contact.

    The View Duplicates window with Open This Contact highlighted.

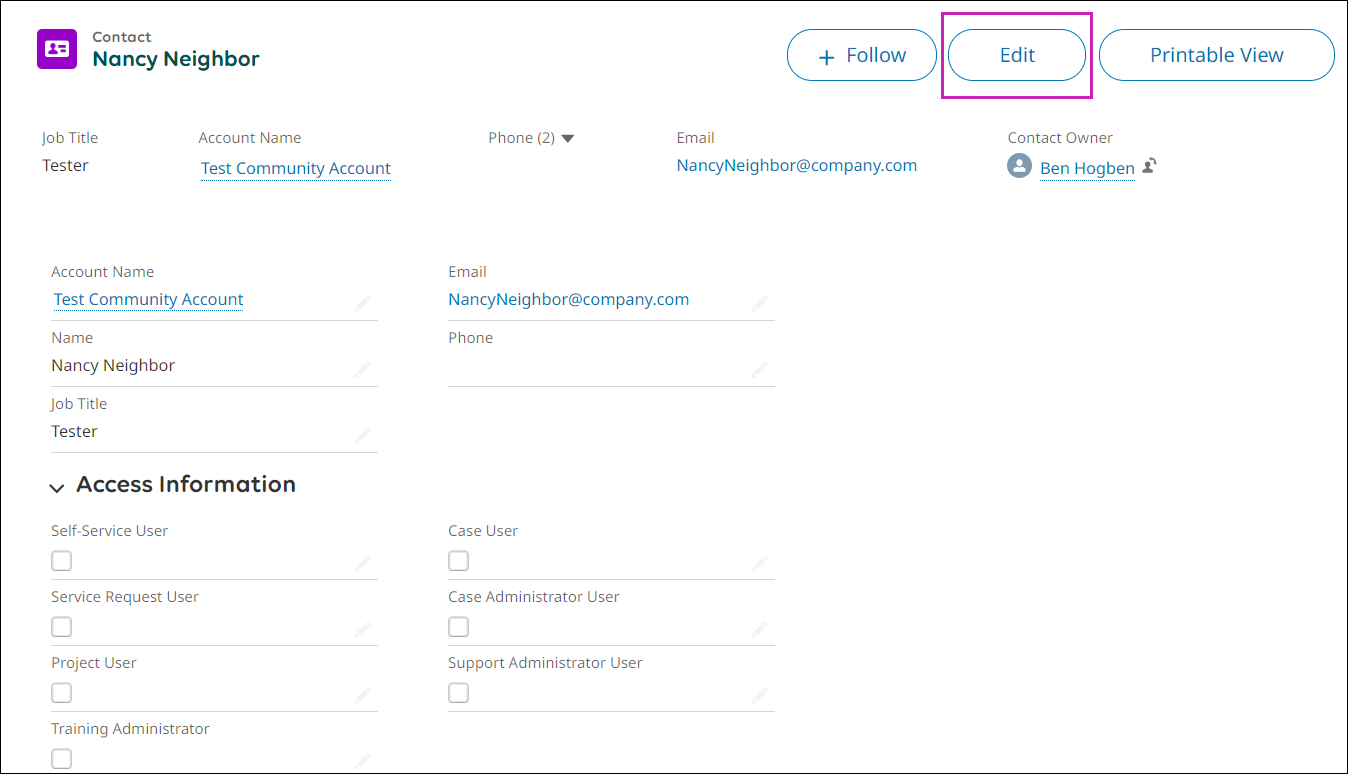
    From the contact's page, select Edit to update the contact's information. To send the contact a welcome email with UKG Community login details, select the appropriate levels of access and save the changes.

    An example contact page with Edit highlighted.
    When a new contact is added, a welcome email from the UKG Community will be sent to the email you provided. A link to create the password is provided in the email.

Add Focal or Support Administrators

Every organization should have at least one focal administrator (for accounts with the UKG Pro solution) or support administrator (for accounts with UKG Pro WFM and all other solutions).

  1. If your organization has a focal administrator user, they can create an admin case. If your organization has a support administrator user, create a support case.
  2. Attach a letter to the admin case or support case. The letter must meet the following requirements:
    • The letter must use the organization letterhead.
    • The letter must be signed by an officer or C-level employee at your organization.
    • The letter must request that "said individual" be assigned as a focal administrator user.