System-delivered alerts are notifications generated when associated requirements and trigger points are met during the onboarding process. Onboarding system administrators can customize alerts to determine who receives the notification and when.
Navigation: Settings > Notifications
- On the Notification Settings page, select Add and then select Alert to create and configure a new alert.
For alerts that have already been created, select the Title of the alert to be configured.
Note:
The title for system-generated alerts is pre-populated and cannot be changed.
- On the New Alert page, complete the Type of Notification step.
- Enter a title for the alert.
- At the Description/Notes field, add any additional information that is necessary. This information is only visible to the sender and cannot be seen by recipients.
- Select the category that the alert should be associated with.
- Select Save & Continue.
- At the Processes step, associate the alert with onboarding processes.
- Select the applicable boxes to determine which processes the alert should be associated with.
- Select Save & Continue.
- At the Qualifiers step, select applicable qualifiers from the drop-down list. You can qualify based on Component Company, Employee Type, Employment, and Work Location.
Note:
The Employment and Work Location qualifiers are considered umbrella categories. There umbrella categories are "OR" conditions, meaning you can qualify on one of the options, but not all. For example, if you select Work Location as a qualifier, a new window appears. From here, you select if the alert will include a qualifier of Country, State, or City, but not more than one.
- Select the applicable qualifier option and then select Next to see additional criteria if an umbrella category was selected.
- Select the boxes for the applicable criteria, and then select Apply. All selected qualifiers will display as a summary.
- Select the Actions menu to make any changes to the selected qualifiers.
- To edit the selected qualifiers, select Edit Selection and then make the necessary changes to the selected criteria.
- To delete a qualifier, select Remove.
- To change the qualifier option, select the applicable option listed under Replace Qualifier With.
Note:
Only those that are umbrella categories will have the Replace Qualifier With option in the Actions menu.
- Select Save & Continue.
- At the Additional Conditions step, select the conditions that must be met for the alert to be sent, and then select Save & Continue.
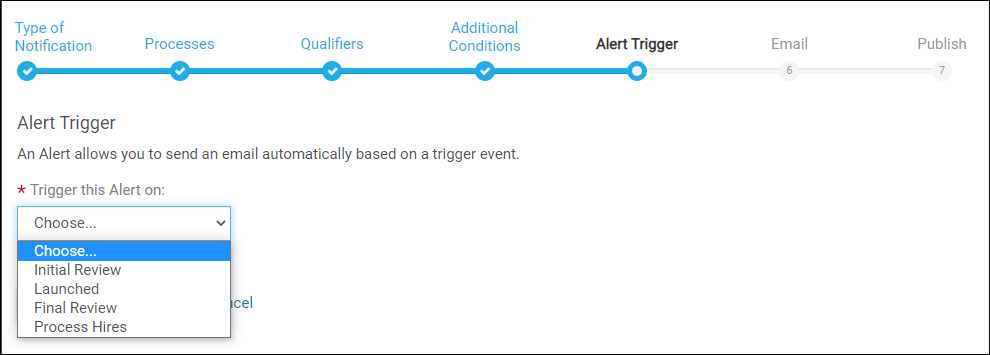
- At the Alert Trigger step, select the applicable trigger event from the Trigger this Alert on drop-down list.

- At the Email step, customize the email content.
- At the To field, you can add or change email recipients or select an applicable merge tag.
- Select the Cc and Bcc fields to add any additional recipients, up to 25 for each field.
- At the From field, select Other email sender to have the alert sent from a different email than the Default email sender.
Note:
If your organization went live with UKG Pro Onboarding after November 1, 2022, the sender Email Address field is not available.
- Add a subject at the Email Subject field. This is pre-populated for system-generated alerts but can be edited.
- Add information in the Email Content section. This field includes the option to include rich text formatting.
- Select Save & Continue.
Note:
To personalize a notification with images and hyperlinks, review the Create a Custom Notification help topic.
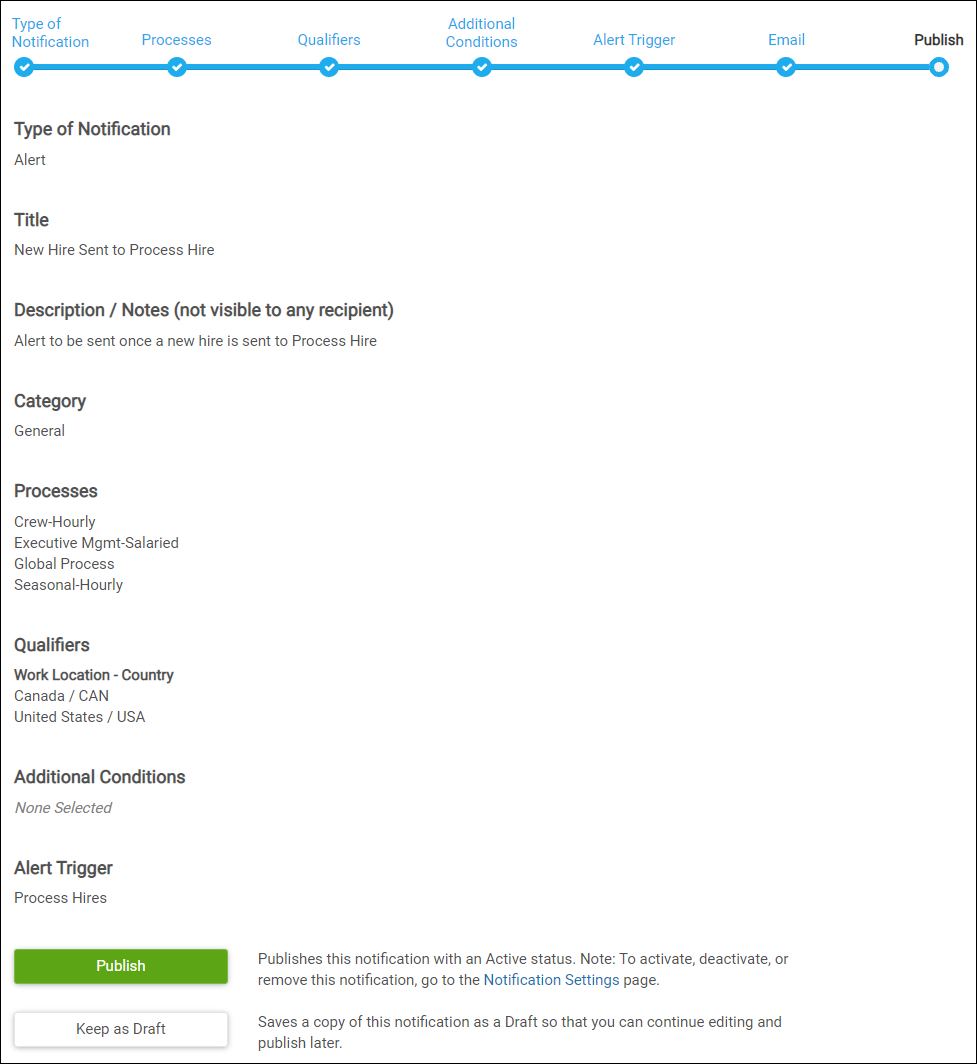
- Review the Publish step for a summary of all selected options.
- Select Publish to publish the alert with an Active status.
- Select Keep as Draft to save a copy of the alert to continue editing and publish later.
Note:
Any changes made to an alert will take effect once the alert is published.
