Create an Offer Letter

When Recruiters or Hiring Managers are ready to extend an offer to an applicant, they can create an offer letter within the Recruiting solution.

Navigation: UKG Pro Recruiting > Opportunities
  1. From the Opportunities List page, select the number in the Applicants column for the opportunity.
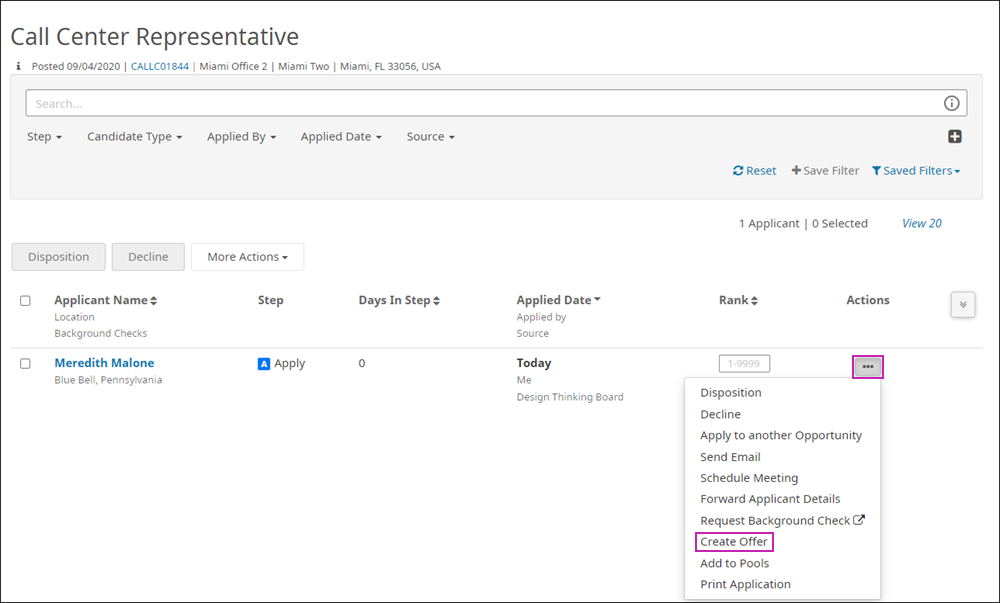
  2. From the Applicants List page, select the Actions icon for the applicant. Then, select Create Offer.

    Applicant List page for the opportunity. Image displays a table with the list of applicants. For the first applicant, the Ellipses icon in the Actions column is highlighted and the menu displays. The Create Offer option is highlighted.

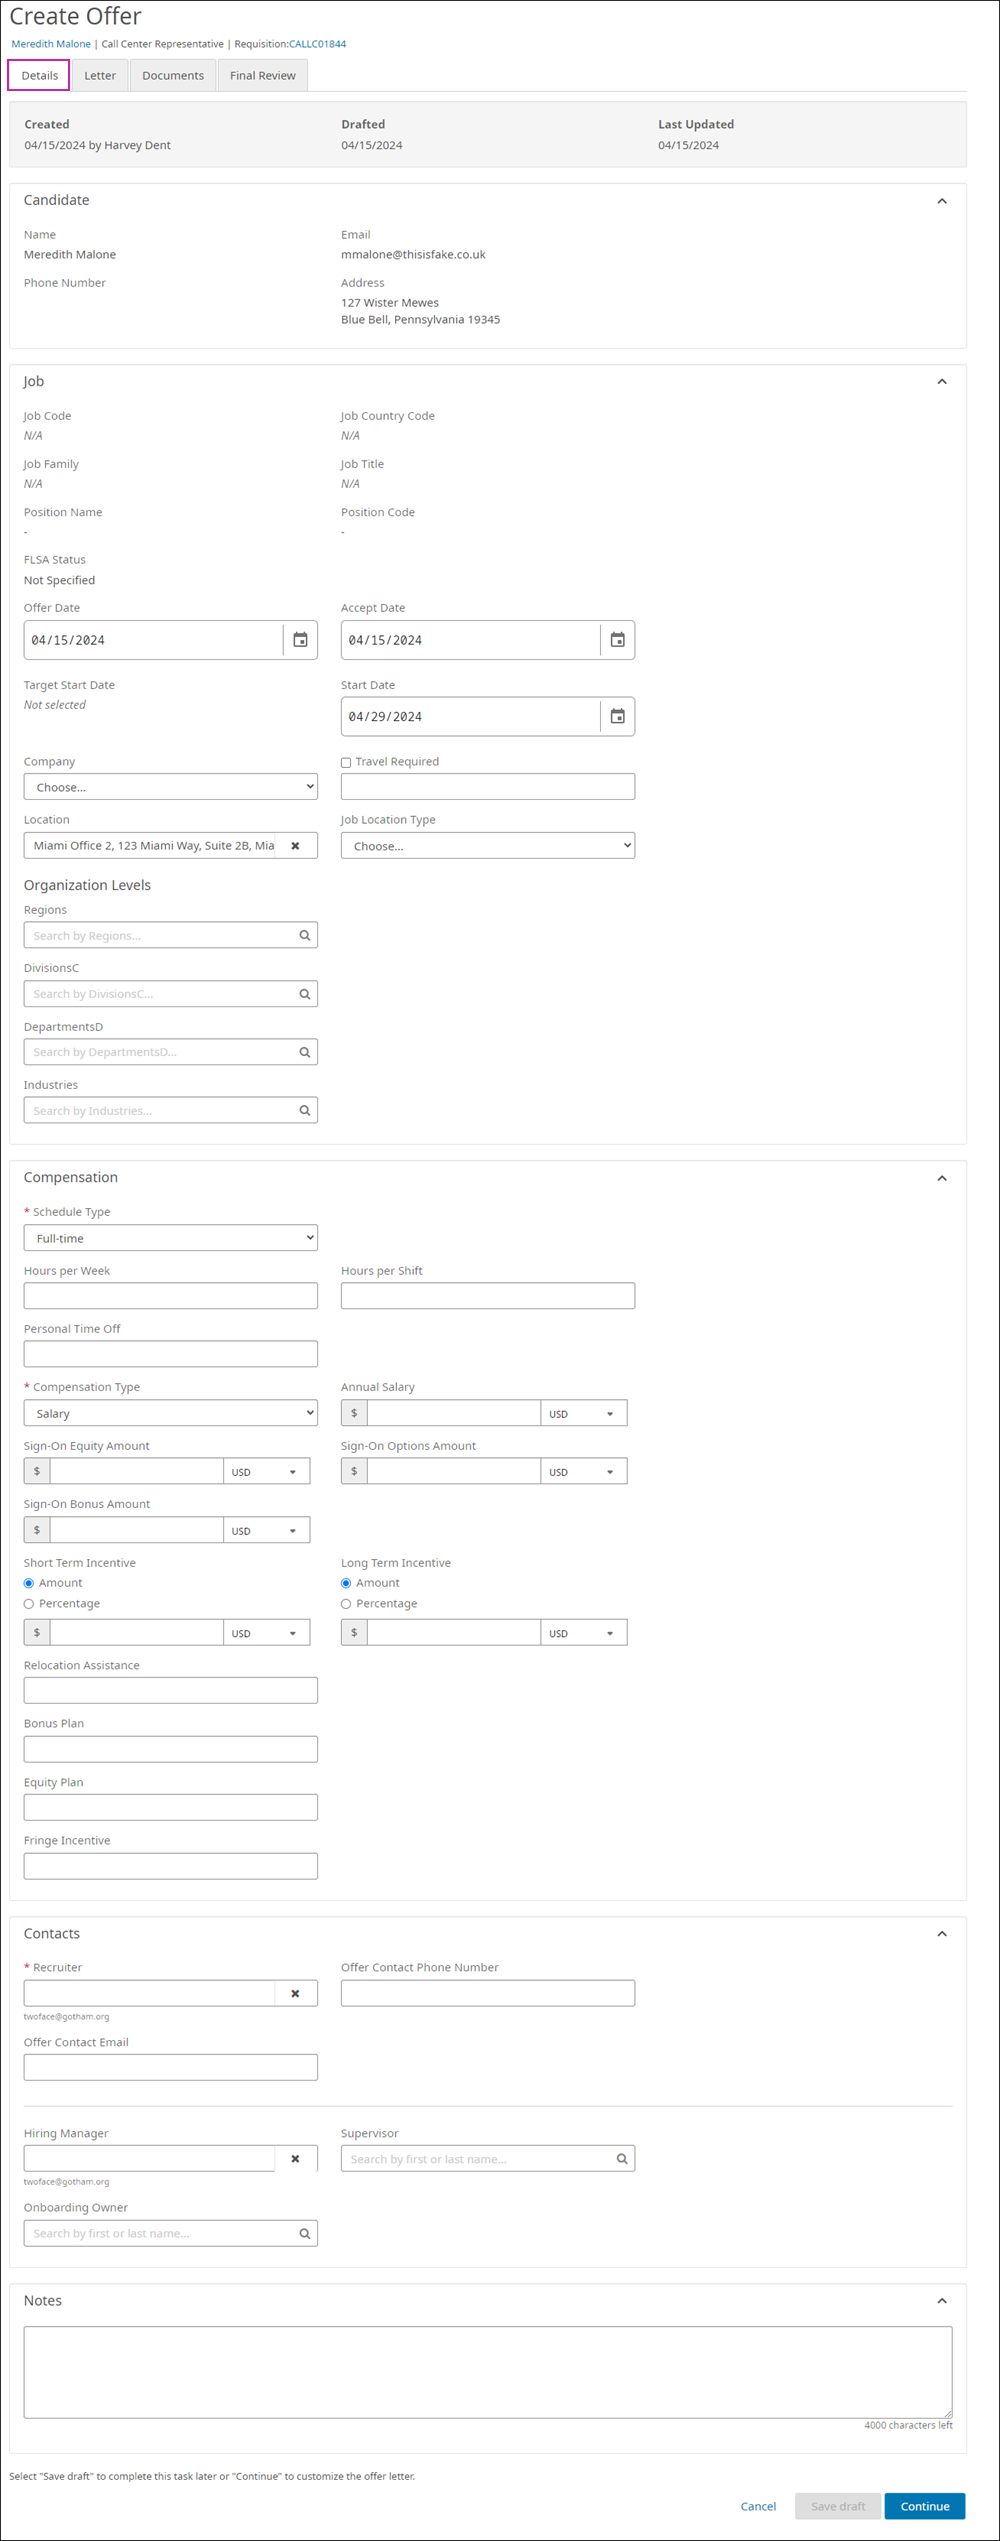
  3. From the Details tab, enter the offer details, such as offer date, start date, compensation information, contacts, and more. Then, select Continue.

    Create Offer page, Details Tab. Image displays candidate's contact information, job details, compensation information, recruiter contact info, hiring manager, supervisor, onboarding owner, and Notes. 

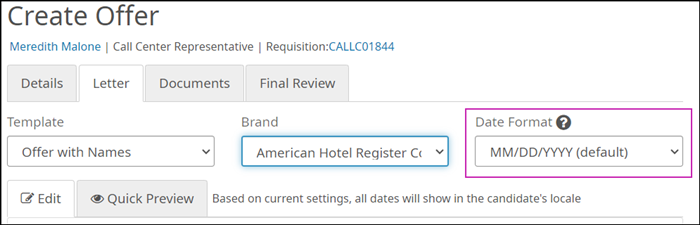
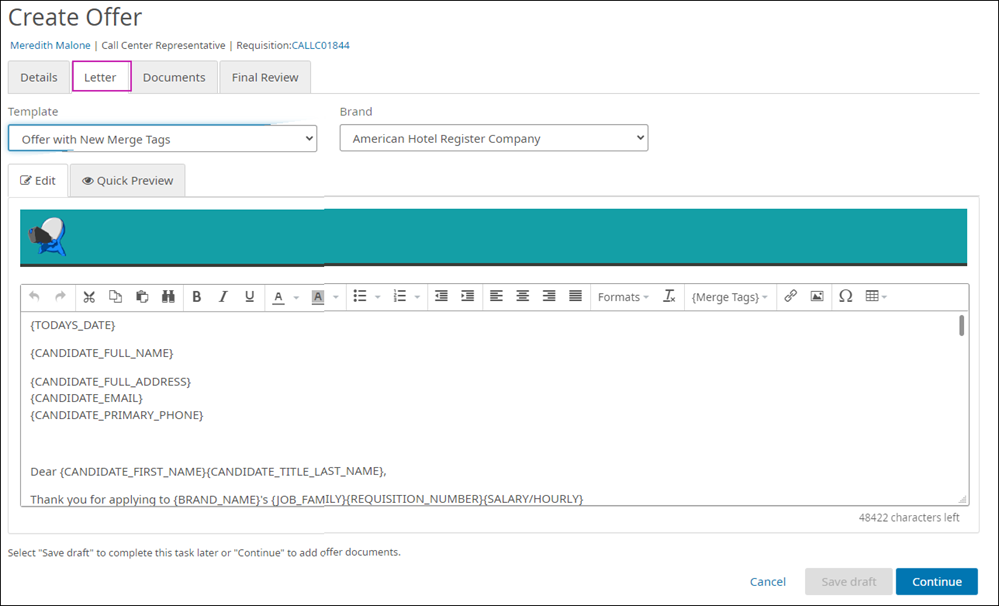
  4. From the Letter tab, select an offer letter template and brand. If your organization has activated the global date feature and your Recruiting administrator allows it, you can also select the date format used for this Offer by using the Date Format drop-down list.

    The Create Offer page Letter tab. The Date Format drop-down is highlighted. This is only available if your Recruiting Administrator has activated the feature.

  5. Edit the body as needed. The character limit for an offer letter is 100,000 characters, including any HTML, markup, and images. Select Continue when finished.

    Create Offer page, Letter Tab. Image displays drop-down lists for Template and Brand. Image also displays the selected email template.

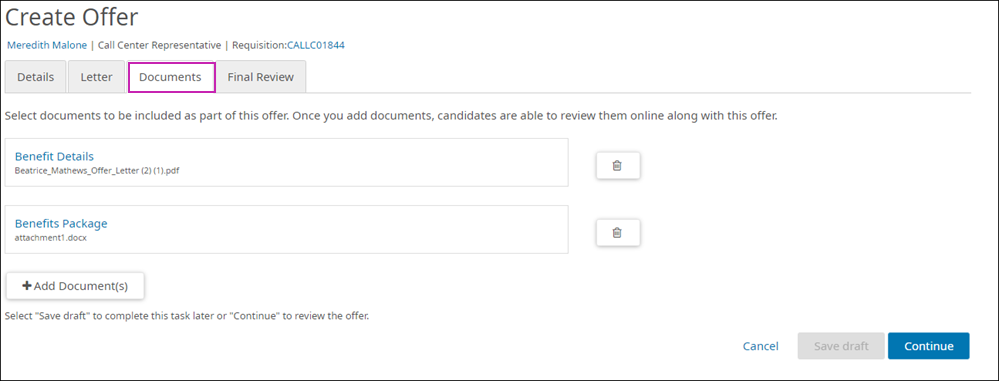
  6. From the Documents tab, select one or more documents, and select Add. Then, select Continue.

    Note:

    Documents are configured in Settings > Document Library.

    Create Offer page, Documents Tab. Image displays documents configured in the Document Library with the option to select one or more documents.

  7. From the Approvals tab, select an approval process and add one or more approvers. Then, select Continue.
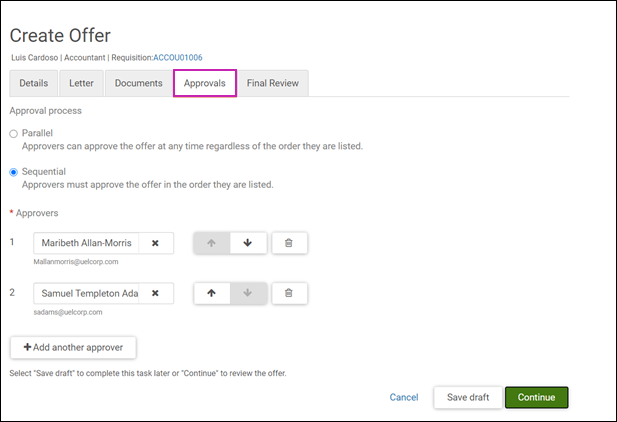
    Create Offer page, Approvals Tab. Image displays radio buttons to select the Parallel or Sequential approval process. It also includes the option to add one or more approvers. 

    Note:

    Approvals for offer letters must be enabled in Settings > Offers for the Approvals tab to display.

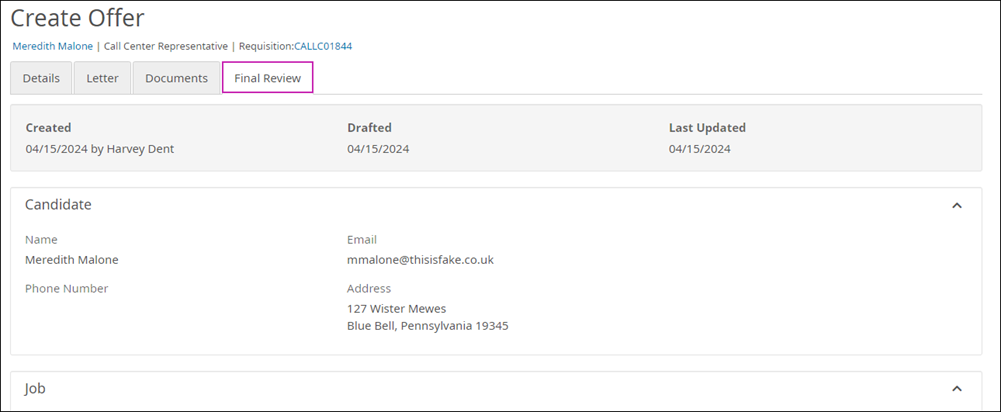
  8. From the Final Review tab, review the offer details. Then, select Submit.

    Create Offer page, Final Review Tab. Image displays candidate's contact information, job details, compensation information, recruiter contact info, hiring manager, supervisor, onboarding owner, notes, the offer letter, documents, and list of approvers.

Related Topics