HR Administration Guide
This chapter explains how the Rehire Wizard is implemented in addition to its fundamental purpose within UltiPro.
The main topics covered in this chapter include:
The Rehire Wizard guides you through the process of rehiring a previously terminated employee in the system. Once the employee is rehired, this information may be viewed or modified on the employee View/Edit windows. The employee View/Edit windows are a group of windows that allow you to change, add, or remove information as needed.
The Rehire Wizard contains the following pages:
|
Page |
Descriptions |
|
Start |
The Start page requires you to enter basic name information and displays previous termination information about the employee. |
|
Key Dates |
The Key Dates page contains the employee's personal and key dates information. |
|
Address |
The Address page contains the employee's address and telephone information. |
|
Job |
The Job page contains the employee's job and pay related information. |
|
Federal/State Taxes |
The Federal/State taxes page establishes an employee's Federal and State taxes. |
|
Local Taxes |
The Local taxes page establishes an employee's Local taxes. |
|
Summary |
The Summary page allows you to review the employee's information before saving it into the system. |
During the rehire process, the Transfer Wizard stores the information you enter in employee level tables. The following table defines what tables are affected during this process.
The following employee-level tables are used when you rehire employees.
|
Table Name |
Description |
|
EMPCOMP |
This table stores the employee's current job information that display-only on the employee Jobs window. The table contains only company specific fields that may vary from company to company. The information includes both personal and organizational information that relates to the employee's job. |
|
EMPPERS |
This table stores information that is specific to the employee, such as name and address. This information is not affected by the employee's company assignments. |
|
EMPHSTAT |
This table stores an employee's status history information. |
|
EMPHJOB |
This table contains the job history for every employee in the company. |
|
EMPALLOC |
This table stores the employee's job allocation information. |
|
EMPDIRDP |
This table stores the employee's direct deposit information. |
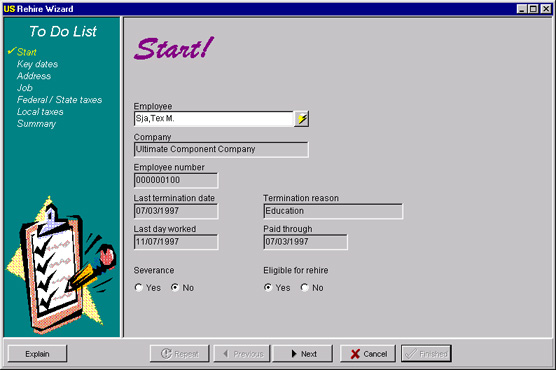
The Start page of the Rehire Wizard requires you to select an employee in order to process their rehire. After you select an employee, you can view:
Company information
Employee number
Termination dates and reason
Severance option
Eligible for rehire option
Note: Unless an employee to be rehired has an employment status of terminated, they cannot be processed with the Rehire Wizard.
The only required field for the Start page is Employee.
The Start page is defined as follows:
Employee is a required field. Click the SuperFinder button to find the employee to rehire.
Note: The employee must have been terminated via the Termination Wizard in order to be rehired via the Rehire Wizard.
Company displays the company name for the employee that was selected.
Employee number is a display-only field that allows you to view the number a company assigns to each and every employee.
Last termination date displays the employee's last termination date.
Termination reason displays a reason for the employee's termination. Examples are tardiness, education and moving.
Last day worked is a display-only field that represents the last day of actual work. It defaults from the employee's termination date.
Paid through is a display-only field where you view the date through which a terminated employee should be paid. It defaults to the termination date.
The Severance option allows you to indicate whether a terminated employee is eligible for severance pay. This field defaults to no.
The Eligible for rehire option allows you to indicate whether a terminated employee is eligible for rehire. This field defaults to no.
To add information to the Start page:
From the main menu, select Employee then Rehire.
In the Employee field, select the employee being rehired.
In the Severance option, select whether this employee is eligible for severance pay.
In the Eligible for rehire option, select whether this employee is eligible for rehire.
Click Next to go to the Key Dates page.
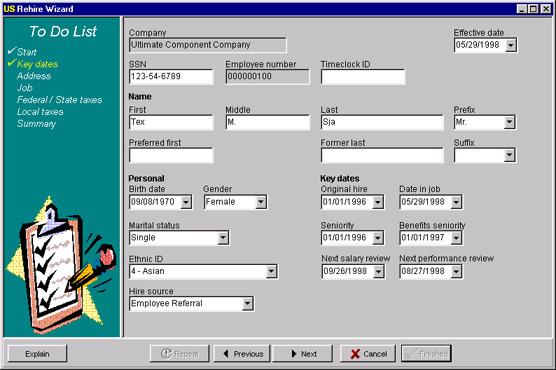
Most HRMS systems require you to search for the employee's information in multiple places. With this in mind, the system includes a Key Dates page that provides a summary of personal information and key dates related to a particular employee. There is no more searching for the employee's personal information now that all of the important information can found in one location.
The Key Dates page allows you to view and enter information pertaining to the employee's:
Company and effective date
Name information
Personal information
Key dates information
You must enter the following information in order to complete this page.
|
|
|
|
|
|
|
|
|
|
|
|
|
|
Note: Most fields on the Key Dates page default from the employee's existing record. These fields can be changed if desired.
The Key Dates page is defined in the following topics.
The Company field is a required field that defaults to the company you selected during your login to the Rehire Wizard.
Effective date is a required field used to identify the effective date the employee is to be rehired. This field defaults to the current system date. You can change this field as needed.
Note: The rehire effective date must be greater than the employee's date of termination. The effective date is the employee's last hire date.
Effective Date Example
An employee is rehired on 02/01/97 but you do not enter the information
into the Rehire Wizard until 02/05/97. When the employee is entered into
the system, the effective date defaults to that current system date of
02/05/97. In this case, change the effective date to the exact date (02/01/97)
the employee was rehired.
SSN is a required field used to identify the employee's social security number. You can temporarily enter the number as 999-99-9999 if you do not currently know the employee's social security number.
Note: A standard payroll report lists all employees whose SSN is equal to all 999-99-9999. It is highly recommended that you run this report on a regular basis, especially prior to quarterly reporting and prior to W-2 printing.
The system checks for and does not allow duplicate social security numbers within the same company. When a duplicate social security number is entered in the system, you are prompted with the following dialog box:
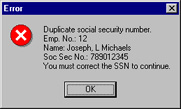
After you click OK, the system highlights the social security number for you to type a new SSN. The system also warns you about duplicate social security numbers in all master and component companies.
Employee number displays the number a company assigns to each and every employee. The number defaults to the employee's existing employee number. There are four options established in company setup to assign employee numbers. The following table defines each option (refer to the Employee example below):
|
Option |
Description |
|
Manual |
This option allows you to manually number each employee through the Rehire Wizard. Manual employee numbers can be alphanumeric and are padded with leading zeros. |
|
Equal to SSN |
This option indicates that the assigned employee number is the employee's Social Security number. |
|
Equal to timeclock |
This option indicates the employee number within the system is the employee's assigned timeclock or batch number. These employee numbers can be alphanumeric and are padded with leading zeros. |
|
Auto incrementing |
This option instructs the system to automatically number new or rehired employees in sequential order. If this option is selected, the Last number used field becomes available. The system does not search for random, unused numbers to assign to employees. |
Employee
Example
Each employee number must be unique within the company. The following dialog
box appears if a duplicate number is entered into the system:
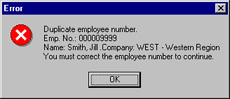
Click OK and enter a new employee
number.
Timeclock ID is an optional field that is used to enter the employee's timeclock code or identification, if used by your company.
When rehiring the employee, there is certain name information you want to document about the individual. The following fields allow you to enter the personal information necessary to rehire the employee.
Note: Name information defaults from the employee's existing record and is available for modification.
First is a required field where you enter the employee's first name or initial.
Middle is an optional field where you enter the employee's middle name or initial.
Last is a required field where you enter the employee's last name.
Prefix is an optional field where you select the employee's prefix. Examples are Mr., Miss and Dr.
Preferred first is an optional field where you enter the employee's preferred first name or nickname.
Former last is an optional field where you enter the employee's former last name.
Suffix is an optional field where you select the employee's suffix. Examples are Sr., Jr. or MD.
When rehiring the employee, there is certain personal information you want to document about the individual. The following fields allow you to enter the personal information necessary to rehire the employee.
Note: Personal information defaults from the employee's existing record and is available for modification.
Birth date is a required field where you enter the employee's date of birth. You can type the date by using the calendar box.
Note: The system warns you if the employee is younger than 15 or older than 75.
Gender is a required field to indicate the employee's gender.
Marital status is an optional field to indicate an employee's personal marital status. This is not the same as tax filing status.
Ethnic identification is a required field allowing you to select an employee's ethnic identification.
Hire source is an optional field allowing you to select an employee's hire source. Examples are walk-in, referral, headhunter or consulting firm.
When rehiring an employee, there are certain key dates you want to document about the individual. The following fields allow you to enter the key dates necessary to hire an employee.
Original hire is a required field that displays the employee's original hire date. This field defaults from the existing employee record.
Date in job is a required field that displays the date the employee started this job. This field defaults to the effective date entered on the Start page.
Seniority is a required date field used to determine an employee's accruals eligibility and length of service. This field defaults from the existing employee record and can be changed if desired.
Benefits seniority is a required field used to determine when the system should begin calculating waiting periods for an employee's benefits. For example, some companies require you to be employed six months before being eligible for a 401k. This field defaults from the existing employee record.
Next salary review is an optional field where you add the employee's next scheduled salary review.
Note: You have the option of creating defaults for this field in company setup. The Human Resources page of the Company Setup window is where you enter the number of days before the next salary review. When you hire a new employee, the Next salary review value defaults from the options entered in company setup.
Next Salary Review Example
In company setup, the new hire defaults for Next salary review is 90 days.
When you hire an employee, the Next salary review field defaults 90 days
from the effective date the employee is hired. For example, if the effective
date of hire is 02/05/1997, the Next salary review date is 5/05/1997.
Next Performance Review is an optional field where you add the employee's next scheduled performance review.
Note: You have the option of creating defaults for this field in company setup. The Human Resources page of the Company Setup window is where you enter the number of days before the next performance review. When you hire a new employee, the Next performance review value defaults from the options entered in company setup.
Next Performance Review
Example
In company setup, the rehire defaults for Next
performance review is 90 days. When you hire an employee the Next
performance review field defaults 90 days from the effective date the
employee is hired. For example, if the effective date of hire is 02/05/1997,
the Next performance review date is 5/05/1997.
To add information to the Key Dates page:
If all the defaulted information on the Key Dates page is current for the employee being rehired, simply click Next to advance to the Summary page. Otherwise, proceed to step one.
From the main menu, select Employee then Rehire.
Complete the applicable information on the previous pages in the to do list.
In the SSN field, type a social security number.
In the Timeclock ID field, type the employee's timeclock identification, if applicable.
In the Name information fields, type the First, Middle, Last, Prefix, Preferred first, Former last and Suffix.
In the Personal fields, select the employee's Birth date, Gender, Marital status, Ethnic ID and Hire source.
In the Key date fields, select the employee's key dates.
Click Next to advance to the Address page.
When rehiring an employee, there is certain address information you want to document about the individual. The following fields allow you to enter the address information necessary to rehire an employee.
Note: All the fields on the Address page default from the employee's existing record and are available for modification.

You must enter the following information in order to complete the page.
Address 1
City
State
The Address page field descriptions are defined as follows:
Employee name is a display-only field which shows the employee's last and first name selected from the Start page.
Employee number is a display-only field which shows the employee's number. If the employee number is automatically incremented, the system creates a unique number, eliminating the need for input of a manual number.
Address 1 is a required field where you type an employee's address, typically house number and street name.
Address 2 is an optional field where you type additional address information. Examples include apartment number and post office box.
City is a required field where you enter the employee's mailing address city.
State is a required field where you select the employee's mailing address state.
Zip/Postal Code is an optional field where you enter the employee's zip code.
County is an optional field where you enter the employee's county.
Country is an optional field where you enter the employee's country.
E-mail is an optional field where you enter the employee's e-mail address.
Mailstop is an optional field where you enter an employee's internal/work mail code or mailstop. For example, to deliver an employee's mail, the mailroom assigns a mailstop number to every employee's office or cubicle. Enter the employee's number if applicable.
Home is an optional field is where you enter an employee's home telephone number.
Work is an optional field where you enter an employee's work telephone number.
Ext is an optional field where you enter an employee's work extension number.
Other is an optional field where you enter an employee's alternate phone number.
Type is an optional field to describe the employee's alternate telephone number. Examples are beeper, fax machine or cellular phone.
Employers must verify the employment eligibility of all rehires, including U.S. citizens. To fulfill this requirement, employers must complete INS Form I-9, "Employment Eligibility Verification Form."
An employer must record on the I-9 form the types of documents examined and their identification numbers and expiration dates, then sign and retain the form for either three years after the date of hire or one year after the date of the individual's termination, whichever is later.
Note: Recording I-9 information in the system is optional.
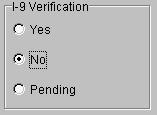
The I-9 Verification group box contains three options: Yes, No and Pending. The information defaults to Pending. The I-9 verification group box allows you to choose the applicable option associated with the employee's I-9 verification status.
I-9 Verification Example
You recently rehired an employee into the system but the employee was unable
to provide current I-9 information at that present time. In the I-9 verification
field, you selected No because
the rehire was unable to provide the information.
To add information to the Address page:
If all the defaulted information on the Address page is current for the employee being rehired, simply click Next to advance to the Jobs page. Otherwise, proceed to step 1.
From the main menu, select Employee then Rehire.
Complete the applicable information on the previous pages in the to do list.
In the Address fields, enter an employee's Address 1 and 2, City, State, Zip code, County and Country.
In the E-mail field, enter an employee's E-mail address.
In the Mailstop field, enter a mailstop if applicable.
In the phone number fields, enter an employee's Home phone number and Work phone number with Ext.
In the I-9 group box, select the appropriate I-9 verification option.
Click Next to advance to the Job page.
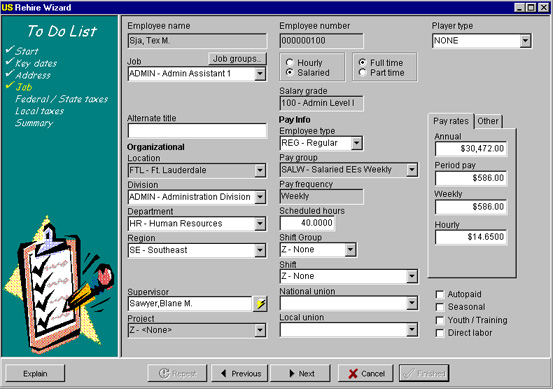
The Job page contains the rehire's existing job related information such as organizational information, pay groups and pay rates. If selected on the company level, union information also appears.
You must enter the following information in order to complete the page.
|
|
|
|
|
|
|
|
|
|
|
|
Note: All the fields on the Jobs page default from the employee's existing record and are available for editing.
The Job page field descriptions are defined as follows:
Employee name is a display-only field which shows the employee's last and first name selected on the Start page.
Employee number is a display-only field which shows the employee's number. If the employee number is automatically incremented, the system creates a unique number, eliminating the need for input of a manual number.
Job is a required field for selecting an employee's current job code and description.
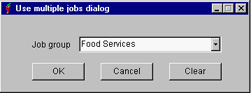
Job groups is an optional field for selecting the job group that an employee's job belongs to. An employee does not have to belong to a job group at the time of hire, but this can always be changed with the Job Change Wizard. Select the Job Groups button to use the multiple jobs dialog box:
Alternate title is an optional field where you enter an employee's alternate title. For example the employee's job code is secretary and the alternate title is marketing secretary.
Employee type is a required field where you select an employee's employee type. Examples include regular or temporary.
Salary grade is a display-only field that defaults from the job code. It associates the job with a specific salary range.
The Pay Scale field appears if the employee's job code has a pay scale assigned and if your company is setup to use pay scales. The pay scale defaults to the first salary step.
The Salary Step field appears if the employee's job code has a salary step assigned and if your company is setup to use salary steps.
The Hourly/Salaried option indicates whether an employee is hourly or salaried. This information defaults from the job code, but can be changed.
The Full time/Part time option indicates whether an employee works full time or part time. This information defaults from the job code but can be changed. The field defaults to full time but can be changed if desired.
When hiring an employee, there is certain organizational information you want to document about the individual. The following fields allow you to enter the organizational information necessary to hire an employee.
Location is an display-only field that displays an employee's physical work location. It defaults from the system.
Organization levels 1-4 are optional fields that indicate the employee's place in your company's organization hierarchy. The fields labels offered on the Organization page are user-defined. This means your company creates its own custom fields. You may designate up to four fields for categorizing employees. The organization level fields are defined in company setup. In our example, only three organization levels are defined. If a fourth level existed, it would be directly under the Region level.
Supervisor is an optional field to select an employee's supervisor from a list of employees. Click on the lightening bolt next to the field to activate the SuperFinder. For more information on the SuperFinder, refer to Selecting an Employee in this guide.
Project is an optional field to identify employees who are performing specific projects as a way to designate employee cost. You can assign a Project code to an employee in the Project field.
When rehiring an employee, there is certain pay information you want to document about the individual. The following fields allow you to enter the pay information necessary to rehire an employee.
Every employee record belongs to a Pay group. This pay group defines how and when the employee is paid. Pay groups designate the employee's pay frequency -- also known as a pay period.
If setup on the company level, Shift is a required field where you select the employee's current shift. It defaults to none.
Scheduled hours is a required field that displays the employee's regularly scheduled hours per pay period. The scheduled hours information defaults from the pay group field but can be overridden.
Union information appears in the Rehire Wizard only if the Unions check box is selected in company setup. When hiring an employee, there is certain union information you may want to document about the individual. The following fields allow you to enter the union information necessary to rehire an employee when applicable.
National union is an optional field where you select an employee's national union affiliation.
Local union is an optional field where you select an employee's local union affiliation.
When rehiring an employee, there is certain pay rate information you want to document about an employee. The following fields allow you to enter the pay rate information necessary to rehire an employee. The Other tab is used when an employee is working on different shifts that have higher or lower pay rates. You could have multiple positions available that would require a change in a payrate.
Note: Only one of the four pay rates needs to be entered for the employee. The system calculates the other three pay rates.
Annual is a required field that displays the employee's annual equivalent pay rate. Your default annual pay rates are established in Job codes located in the Setup tables module.
Note: The system validates pay rates against the salary range for a particular job and warns you if you are above the maximum salary or below the minimum salary. However, if the job has no salary grade, the system does not perform this edit.
Period pay is a required field that displays the employee's pay period equivalent pay rate.
Weekly is a required field that displays the employee's weekly equivalent pay rate.
Hourly is a required field that displays the employee's hourly equivalent pay rate. Your default hourly pay rates are established in Job codes located in the Setup tables module.
The Autopaid check box is used to indicate whether an employee is to be automatically paid or not. Autopaid is optional. If checked, the system automatically pays the employee on a specified date. If not checked, the employee will not be automatically paid. This indicator defaults to blank.
The Seasonal check box indicates whether an employee is a seasonal worker. A seasonal worker is an employee who may work only part of the year (for example, in the hospitality industry there may be a restaurant that is only open during the winter and not in the summer, so the employee agrees to work only during the winter). This indicator defaults to blank.
The Youth/Training check box indicates whether an employee is a youth or training worker. Depending on the job, someone defined as Youth or In Training may be paid at either a higher or lower rate (for example, the employee may be a server making $2.15/hour plus tips, but since they are in training, they may be paid $6.25/hour). This indicator defaults to blank.
The Direct labor check box indicates a direct labor employee. Direct labor is most often used in the manufacturing industry (for example, employees who work on an assembly line). This indicator defaults to blank.
To add information to the Job page:
If all the defaulted information on the Job page is current for the employee being rehired, simply click Next to advance to the Summary page. Otherwise, proceed to step 1.
From the main menu, select Employee then Rehire.
Complete the applicable information on the previous pages in the to do list.
In the Job groups field, select a job group if applicable.
In the Job field, select an employee job code and description.
In the Alternate title field, enter an alternate title.
In the Employee type field, select an employment type.
In the Hourly/Salaried group box, select whether the employee is hourly or salaried.
In the Full time/Part time group box, select whether the employee is full time or part time.
In the Organizational fields, select an employee's Location, Division, Department, Region, Supervisor and Project if applicable.
In the Pay Information fields, select a Pay group, Shift and the employee's scheduled hours.
In the Union fields, select National and Local union information if applicable.
In the Pay rates fields, enter one of the four pay rates and the system calculates the remaining pay rate fields.
Select the appropriate check box if the employee is either Autopaid, Seasonal, Youth/Training or Direct labor.
Click Next to advance to the Federal/State Taxes page.
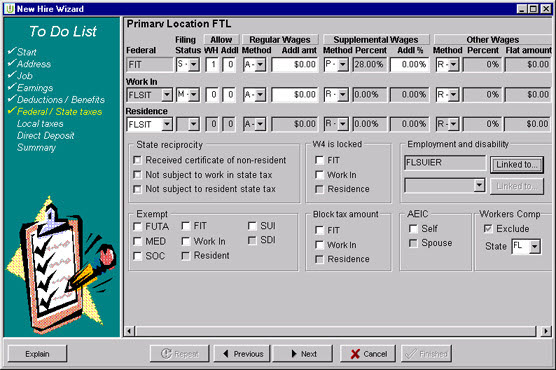
The Federal/State taxes page allows you to enter your employee's federal and state tax information quickly and efficiently. It contains all the vital information necessary to get your employee's taxes into the system quickly and easily.
You must enter the following Federal/State tax information in order to complete this page.
|
|
|
|
|
|
The Federal/State taxes page field descriptions are defined as follows:
When the master company was established, the company designated whether location codes are used to manage employee payroll tax setup. Location codes enable you to tax employees who work in multiple state and local tax jurisdictions or employees who work in one tax jurisdiction and reside in another.
Whether or not location codes is used to manage employee tax setup, the Locations table provides another level for categorizing and reporting employee payroll and human resources information. Location codes designate cost centers for general ledger, labor allocation and EEO reporting. Location codes can also be used to designate common areas in your company such as different geographical locations in which your company has offices or different areas of a building.
The Primary Location displayed at the top of the Federal/State and Local taxes pages comes from the Location specified in the Location field on the Job page. All employees must have a location code. The location code displays the employee's primary tax setup.
The Federal field displays the employee's federal income tax filing code.
The Filing status field defaults to Single but can be changed. Some states have filing options other than married or single, and the system is designed to only show the valid status for that particular state.
The Work In field is the state in which the employee is currently working. Work In populates with the tax code set up on the default location code, or the location code selected from the Job screen. It can not be changed.
The Residence field is populated from the employee's Address state selected. The employee's resident tax jurisdiction is established at the employee level.
Employee allowances contain the number of withholding allowances (or additional exemptions in some states) for Federal Income Tax (FIT), State Income Tax (SIT) and Local Income Tax (LIT) that the employee claims on their W-4s.
The WH field allows you to enter in the number of withholding allowances you are claiming.
The Addl field allows you to enter an additional withholding allowance if desired.
The withholding method for regular wages appears here. The only option is Annualized Regular Wages Tax Method.
The Method field is where you select the appropriate taxation method. For FIT, the method defaults to the method selected at the Company tax code level. The method field allows you to select:
Annualized - The annualized wages method produces little difference in the amount of withholding when compared to the percentage method. Wages for the current payroll period are multiplied by the number of payroll periods in a year, and withholding is computed using the percentage method and the annual payroll period tables. This amount then is divided by the number of payroll periods in the year. The result is the amount to be withheld during the current payroll period.
Annualized Method Example
Vivian is married and claims five withholding allowances; she is paid monthly.
In January, she earned $3,000; in February $2,000; and in March $5,000.
Under the regular percentage method tables using Table 4(b), withholding
on Vivian's wages would be $203.68 in January, $53.68 in February, and
$517.70 in March, for total of $775.06 for the first three months of the
year.
The Addl amt field is where you select an additional dollar amount only.
The Supplemental wage field designates these earnings as supplemental for taxation purposes. For federal and state taxation purposes, supplemental wages are defined as payments to an employee in addition to the employee's regular wages Examples of supplemental wages include:
Bonuses, commissions, and overtime pay
Prizes and awards
Dismissal or severance pay
Retirement incentive pay
Payments for working during vacation
Reimbursements for employee business expenses or moving expenses
Noncash fringe benefits (including personal use of company vehicles and group-term life insurance in excess of $50,000)
Lump-sum payment for unused accumulated annual and/or sick leave
Amounts by which the fair market value of stock exceeds the option price under terms of an employee's stock option
Back pay awards and retroactive wage increases
The state income tax (SIT) calculation for supplemental wages varies from state to state, for example:
Some states tax supplemental wages the same as regular wages.
Some states apply a special SIT rate for all supplemental wages.
Some states tax supplemental wages based on whether they are paid on the same check as regular wages or on a separate check.
The state-by-state rules and amounts for calculating SIT on supplemental wages is stored in the Tax Withholding table. To calculate the SIT amount on supplemental wages, the system uses the state supplemental tax rule and/or amount for the employee's Work In state income tax code.
Note: Earnings are identified as supplemental wages when the earning code is created. It is best to check with your company's tax advisor before marking an earnings as supplemental.
The Method field allows you to select the applicable taxation method for supplemental wages. The tax method available are based on the tax jurisdiction. The system stores all applicable selections.
Method Example
For FIT, the system allows you to choose P for Percent or R for Regular.
The percent method displays the default % (28) for FIT. If Regular is
selected the system, the system taxes the wages as regular pay. Some states
off %,
The Percent field displays the default percent rate for the jurisdiction.
Additional percent is a display-only field where you type your additional percentage over the default tax rate displayed.
Additional Percent Example
For example if you want to take 33 percent out of your supplemental wages,
you would type five in the Additional
percent field. You only need to take out an additional five percent
to reach your 33 percent because the federal support is 28 percent.
Persons that are not considered "regular employees" are those paid 1099R, 1099M or 1042S wages. Below is a brief explanation of each type of wage:
1099R - Form 1099R must be issued to each person to whom you have made any 1099R distributions from profit-sharing or retirement plans, IRA's, annuities, pensions, insurance contracts, survivor income benefit plans, permanent and total disability payments under life insurance contracts, charitable gift annuities, etc., whether or not federal income tax was withheld. If portions of the distribution are taxable and portions non-taxable, the entire distribution must be reported on Form 1099R.
1099M - These types of workers are considered "miscellaneous" or "contractors". They are not covered by any company benefit plans. For example, a consultant may come to a company to help establish an HR department. This person may be doing other consulting jobs for other companies and is not considered an employee of either company. He or she receives a form 1099M at year end and the employer reconciles tax deposits on form 945.
1042S - An earning type has been added for Foreign Person's U.S. Source Income Subject to Withholding ("FSW"). The FSW earning type supports only the tax withholding and reporting requirements for nonresident alien Artist and Athletes wages paid, identified as IRS 1042 Income code 20. Earnings paid to artists and athletes are taxed at the statutory rate of 30%, however the rate can be reduced or exemptions allowed (under a Subject to Tax Treaty). Every nonresident alien individual with United States income must file a United States income tax return. The taxable wages are reported on the 1042S Tax Liability Report. These wages are excluded from the 941 and 945 reports. This earning type cannot be paid with any other type of earning (W-2 earnings or 1099 earnings).
FSW earnings are reported annually on Form 1042 and are excluded from Form 941 and W-2 reporting. Each nonresident alien who has received any U.S. earnings must receive a form 1042S, titled "Foreign Person�s U.S. Source Income Subject to Withholding."
This different method of tax classification is considered "Other" tax method wages. There are four tax setup requirements for Other Wages:
Regular Withholding (R)-The regular withholding employees submit a W-4 (Employee's Withholding Allowance Certificate) or W-4P (Withholding Certificate for Pension of Annuity Payments) form to provide the employer with their tax setup information required to determine the withholding taxes. The employee has the option to claim exempt from withholding, identify the number of allowances allowed by the state or federal and request additional withholding taxes. Wages identified as 1099R or 1042S use the Regular Withholding Setup.
Flat Tax Percent (P)-The flat tax percent is defined based on a tax treaty, or federal, or statutory percent withholding requirements. Wages identified as 1099M or 1042S or 1099R use the Percentage Withholding Setup.
Flat Dollar Amount (D)-The Flat dollar amount is defined based on a statutory minimum flat dollar amount allowed. Wages identified as 1099R use the Regular Withholding Setup. For example, In New Jersey if the employee elects to have taxes withheld from their Pension payments, at least a minimum tax amount of 10.00 must be withheld from 1099R earnings.
Combine Regular & Flat Tax Percent (C)-The combined regular and flat tax percent is defined based on a tax treaty, or federal or statutory percent withholding and minimum allowed exemption allowance. The total wages must be adjusted by a prorated exemption allowance. The employee must be setup with a Daily Payroll Period. The total number of estimated days worked must be defined. For example, a student receives a Fellowship Grant. The taxes are computed by reducing the earnings by a prorated personal exemption (Prorated on a daily basis of 6.67 (96) during the period in 1996 he or she expects to be in the United States.), and by applying a 14% withholding rate to the adjusted wages. Wages identified as 1042S use the combined Regular and flat tax percent, such as, scholarships and fellowship earnings paid to a nonresident alien are reported on 1042S return. The student is allowed a prorated daily personal exemption for time period the student is in the United States. The exemption amount reduces the wages and the tax rate is applied to the adjusted wages.
The Percent field allows you to enter a percent if you select either flat tax percent (P) or combined regular & flat tax percent (C) from the Method field.
The Flat amount field allows you to enter a flat dollar amount if you select flat dollar amount (D) from the Method field.
Many companies have employees who either work in multiple state or local tax jurisdictions or employees who work in one tax jurisdiction and reside in another. Some tax jurisdictions have reciprocal agreements to avoid double taxation. Some tax jurisdictions require the full tax withholding from an employee's resident jurisdiction regardless of whether taxes are withheld in another jurisdiction. Still other tax jurisdictions require the full tax withholding from the employee's resident jurisdiction only if the work-in jurisdiction has no tax withholding requirements.
States usually require employees to complete a state withholding exemption certificate in addition to the federal certificate because state exemptions are different than federal exemptions. For example, several states do not allow exemptions for itemized deductions. Select the Received certificate of non resident check box if employee has received a certificate of non residency.
Select the Not subject to work state tax check box if the employee is not subject to be taxed by the state the employee works in.
Select the Not subject to resident state tax check box if the employee is not subject to be taxed by the state the employee resides in.
Reciprocal Agreements
Example
States have jurisdictional policies for employee's who live and work in
different jurisdictions. For example, New Jersey has a reciprocal agreement
with PA. If you enter PA for the Work In state and NJ for the Resident
state, the system should produce a pop-up that states the following: "NJ
and PA have a reciprocal agreement." This generic message should
display any time the system detects a reciprocal agreement between two
states.
If an employee lives in NJ and works in any other state other than PA,
the state requires that the tax be calculated for each jurisdiction. If
the work in jurisdiction has a higher tax than NJ, then the employee should
pay taxes to the work in jurisdiction only, and should not pay taxes in
NJ. If the work in state is less than NJ, withhold all of the work in
state tax and the difference withhold as NJ taxes. The system should display
the following message that is unique to the state's reciprocity type and
regulation: "Residents employed totally outside of NJ are not subject
to withholdings provided that the withholdings required by the worked
state equal or exceed the withholding required by NJ. If NJ withholdings
are greater, employers must withhold the difference."
The Employment and disability group box displays the employee's valid SUI (State Unemployment Income) and SDI (State Disability Income) codes based on Work in states.
SUI is determined by applying a certain percentage to taxable wages paid by an employer. Each employer is assigned an unemployment rate based on their employment history. Most states use varying formulas in determining the taxable wage base and tax rates.
Certain states provide a tax supported state fund to benefit employees who are temporarily disabled through a non-work related illness or injury.
The SUI field is display-only, where the work-in state tax code for State Unemployment Income is based on the work-in state.
In the Linked to field is a list of additional tax codes, referred to as "linked" codes. SUI is dictated by the state (whether the employer or employee pays for unemployment income), and you only see the codes that are used by the state.
The SDI field is display-only, where the work-in state tax code for State Disability Income is based on the work-in state.
In the Linked to field is a list of additional tax codes, referred to as "linked" codes. With state disability income, the company has the choice to pay for all, some and share costs with the employee or none, where the employee covers all costs for disability income. Another choice that may be available is to use a state-funded program or private company. You only see the codes that are used.
Note: If you mark the SUI field or SDI field code as exempt, all linked codes should also be marked exempt.
Some employees are exempt from certain taxes. They need to have a particular filling status, such as Student Resident Alien, to not be taxed.
The Exempt information group box allows you to select the appropriate check box to allow an employee to be exempt from the following taxes:
FUTA
MED
SOC
FIT
WORK IN
RESIDENT
SUI
SDI
Note: These codes are accessible based on the Work-in and Resident codes selected.
Select the FUTA check box to allow an employee to be exempt from Federal Unemployment Tax. Non-profit organizations, such as churches, are exempt from this tax.
Select the MED check box to allow an employee to be exempt from Medicare. Resident aliens are exempt from this tax.
Select the SOC check box to allow an employee to be exempt from Social Security.
Select the FIT check box to allow an employee to be exempt from federal income tax.
Select the Work In check box to allow an employee to be exempt from Work in state taxes.
Select the Resident check box to allow an employee to be exempt from Residence state taxes.
Select the SUI check box to allow an employee to be exempt from state unemployment income.
Select the SDI check box to allow an employee to be exempt from state disability income.
The Block tax amount field allows you to block an employee's taxes for FIT, Work In or Residence. If the tax category is taxable for federal , state or local income taxes and the income taxes are blocked, the blocked tax is not calculated. However, the earnings amount is still considered taxable wages (such as small bonuses).
Block taxes defaults are established at the company level and are automatically applied to every employee with this earning code. However, this field can be customized at the employee level. Select the appropriate check box.
Select the FIT check box to block the federal income tax.
Select the Work In check box to block state income tax of the work in state.
Select the Residence check box to block state income tax of the residence state.
Employees may be entitled to an income tax refund or credit from the federal government if they meet eligibility requirements relating to their annual income or family size. Eligible employees may receive advance payments of earned income credit directly from their employer in the form of EIC payments added to the wages in their pay statements. To receive these payments, the employee must first complete a W-5 form. You can select the AEIC options only if the employee is not set up as exempt for federal income tax, social security or Medicare.
Select Single from the drop-down list if the employee is eligible for Advanced Earned Income Credit.
Select Married with spouse certificate from the drop-down list if the spouse is eligible for Advanced Earned Income Credit and the company received a spouse certificate.
Select Married without spouse certificate from the drop-down list if the employee is married and the spouse did not file a certificate.
Risk rates vary by state, which means that calculations need to identify which state to use for the employee. However, not all states rely on the SUI state code as the workers comp state code for multi-state employees.
In some companies (and this varies state to state) certain employees such as executive officers, partners, sole proprietors or other statutorily excluded employees should be excluded altogether from the payroll computation for calculating workers comp premiums.
The Exclude check box allows you to identify employees who should be excluded. The default is set to No, but can be changed.
The State combo box defaults to the same state as the employee's SUI state, but allows you to change this selection. The list of states available only includes SUI or SIT states. The State combo box is only available is the Exclude check box is not selected.
To enter an employee's federal and state tax information:
From the main menu, select Employee then Rehire.
Complete the applicable information on the previous pages in the to do list.
In the Filing Status field, enter the employee's filing status.
In the Allow WH field, enter the employee's withholding allowances.
In the Allow Addl field, enter the employee's additional withholding allowances.
In the Regular Wages Method field, enter the employee's taxation method for the regular wages.
In the Regular Wages Addl amt field, enter the employee's additional withholding amount for regular wages.
In the Supplemental Wages Method field, enter the employee's taxation method for supplemental wages.
In the Supplemental Wages Addl % field, enter an additional amount for supplemental wages if desired. The amount is percentage amount.
In the Other Wages Method field, enter the employee's taxation method for other wages.
In the Other Wages Percent field, enter the employee's percentage withholding amount for other wages, if applicable.
In the Other Wages Flat amount field, enter the employee's dollar withholding amount for other wages, if applicable.
In the Work In state field, select the state where the employee works.
Repeat steps one through eight to enter the Work In tax information.
In the Residence field, select the state where the employee lives.
Repeat steps one through eight to enter the Residence information.
In the State reciprocity group box, select the appropriate check box, if available, that applies to state reciprocity.
In the W4 is locked group box, select the appropriate check box that applies.
In the Employment and disability group box, select the Linked to dialog boxes for SUI and SDI, if available, to select from a list of additional tax codes.
In the Exempt group box, select any taxes from which the employee is exempt.
In the Block tax amount group box, select the check box to block the appropriate tax.
In the AEIC group box, select from the drop-down list if the employee qualifies for Advanced Earned Income Credit.
In the Workers Comp group box, select the check box if the employee is excluded from workers compensation benefits.
In the Workers Comp group box, select a workers comp state if the employee is eligible to receive workers compensation.
Select the Local Taxes page.
The Local taxes page allows you to quickly and efficiently enter your employee's local tax information. The Local taxes page is activated by the system if the employee's work in or resident state tax code determines the state has local tax codes.

The required fields for local taxes are based upon the employee's location. For example, an employee living in Miami has different local taxes than an employee living in Ohio. You can either enter the local tax information in the Rehire Wizard or in the View/Edit windows on the Taxes page.
The Local Taxes page field descriptions are defined as follows:
When the master company was established, the company designated whether location codes are used to manage employee payroll tax setup. Location codes enable you to tax employees who work in multiple state and local tax jurisdictions or employees who work in one tax jurisdiction and reside in another.
Whether or not location codes is used to manage employee tax setup, the Locations table provides another level for categorizing and reporting employee payroll and human resources information. Location codes designate cost centers for general ledger, labor allocation and EEO reporting. Location codes can also be used to designate common areas in your company such as different geographical locations in which your company has offices or different areas of a building.
The Local taxes page field descriptions are defined as follows:
The Primary Location displayed at the top of the Federal/State and Local taxes pages comes from the Location specified in the Location field on the Job page. All employees must have a location code. The location code displays the employee's primary tax setup.
Work-in State is a display-only field where the work-in state is specified from the federal/state tax page.
Work-in County is a display-only field where the work-in county is specified from the company setup.
Resident state is a display-only field where the resident state is specified from the federal/state tax page.
Resident county is where the resident county is specified depending on the Resident tax code selected on the Federal/State page.
The data entered in the Work In field represents the work-in levied tax code.
The data entered in the Residence field represents the resident levied tax code.
The data entered in the School field represents the resident school district tax code.
The data entered in the Occupation field represents the additional work-in levied tax code.
The data entered in the WCC field represents the workers' compensation employer levied tax code (for states OR, WA and NM).
The data entered in this field represents the employer levied tax code.
The Filing Status field defaults to Single, but can be changed. Some states have filing options other than married or single, and the system is designed to only show the valid options for that particular state.
If available, the following codes have filtering options:
Work In
Residence
School
Occupation
WCC
Other
Employee allowances contain the number of withholding allowances (or additional exemptions in some states) for the following:
Work In
Residence
School
Occupation
WCC
Other
The WH field allows you to enter the number of withholding allowances the employee is claiming.
The Addl field allows you to enter additional withholding allowances if desired.
The withholding method for regular wages appears here. The only option is Annualized Regular Wages Tax Method.
The Method field is where you select the appropriate taxation method. For FIT, the method defaults to the method selected at the Company tax code level. The method field allows you to select:
Annualized - The annualized wages method produces little difference in the amount of withholding when compared to the percentage method. Wages for the current payroll period are multiplied by the number of payroll periods in a year, and withholding is computed using the percentage method and the annual payroll period tables. This amount then is divided by the number of payroll periods in the year. The result is the amount to be withheld during the current payroll period.
Annualized Method Example
Vivian is married and claims five withholding allowances; she is paid monthly.
In January, she earned $3,000; in February $2,000; and in March $5,000.
Under the regular percentage method tables using Table 4(b), withholding
on Vivian's wages would be $203.68 in January, $53.68 in February, and
$517.70 in March, for total of $775.06 for the first three months of the
year.
The Addl Amt is where you select an additional dollar amount depending on the taxation method chosen.
The Supplemental wage field designates these earnings as supplemental for taxation purposes. For federal and state taxation purposes, supplemental wages are defined as payments to an employee in addition to the employee's regular wages Examples of supplemental wages include:
Bonuses, commissions, and overtime pay
Prizes and awards
Dismissal or severance pay
Retirement incentive pay
Payments for working during vacation
Reimbursements for employee business expenses or moving expenses
Noncash fringe benefits (including personal use of company vehicles and group-term life insurance in excess of $50,000)
Lump-sum payment for unused accumulated annual and/or sick leave
Amounts by which the fair market value of stock exceeds the option price under terms of an employee's stock option
Back pay awards and retroactive wage increases
The state income tax (SIT) calculation for supplemental wages varies from state to state, for example:
Some states tax supplemental wages the same as regular wages.
Some states apply a special SIT rate for all supplemental wages.
Some states tax supplemental wages based on whether they are paid on the same check as regular wages or on a separate check.
The state-by-state rules and amounts for calculating SIT on supplemental wages is stored in the Tax Withholding table. To calculate the SIT amount on supplemental wages, the system uses the state supplemental tax rule and/or amount for the employee's Work In state income tax code.
Note: Earnings are identified as supplemental wages when the earning code is created. It is best to check with your company's tax advisor before marking an earnings as supplemental.
The Method field allows you to select the applicable taxation method for supplemental wages. They consist of either the percent or regular method. The percent method taxes your supplemental wages by using a percentage and the regular method taxes your annualized wages.
The Additional percent allows you to type the employee's additional percentage over the default tax rate of 28 percent.
Additional Percent Example
For example, if you want to take 33 percent out of your supplemental wages,
you would type five in the Additional
percent field. You need to take out only an additional five percent
to reach your 33 percent because the system is calculating the 28 percent.
Persons that are not considered "regular employees" are those paid 1099R, 1099M or 1042S wages. Below is a brief explanation of each type of wage:
1099R - Form 1099R must be issued to each person to whom you have made any 1099R distributions from profit-sharing or retirement plans, IRA's, annuities, pensions, insurance contracts, survivor income benefit plans, permanent and total disability payments under life insurance contracts, charitable gift annuities, etc., whether or not federal income tax was withheld. If portions of the distribution are taxable and portions non-taxable, the entire distribution must be reported on Form 1099R.
1099M - These types of workers are considered "miscellaneous" or "contractors". They are not covered by any company benefit plans. For example, a consultant may come to a company to help establish an HR department. This person may be doing other consulting jobs for other companies and is not considered an employee of either company. He or she receives a form 1099M at year end and the employer reconciles tax deposits on form 945.
1042S - An earning type has been added for Foreign Person's U.S. Source Income Subject to Withholding ("FSW"). The FSW earning type supports only the tax withholding and reporting requirements for nonresident alien Artist and Athletes wages paid, identified as IRS 1042 Income code 20. Earnings paid to artists and athletes are taxed at the statutory rate of 30%, however the rate can be reduced or exemptions allowed (under a Subject to Tax Treaty). Every nonresident alien individual with United States income must file a United States income tax return. The taxable wages are reported on the 1042S Tax Liability Report. These wages are excluded from the 941 and 945 reports. This earning type cannot be paid with any other type of earning (W-2 earnings or 1099 earnings).
FSW earnings are reported annually on Form 1042 and are excluded from Form 941 and W-2 reporting. Each nonresident alien who has received any U.S. earnings must receive a form 1042S, titled "Foreign Person�s U.S. Source Income Subject to Withholding."
This different method of tax classification is considered "Other" tax method wages. There are four tax setup requirements for Other Wages:
Regular Withholding (R)-The regular withholding employees submit a W-4 (Employee's Withholding Allowance Certificate) or W-4P (Withholding Certificate for Pension of Annuity Payments) form to provide the employer with their tax setup information required to determine the withholding taxes. The employee has the option to claim exempt from withholding, identify the number of allowances allowed by the state or federal and request additional withholding taxes. Wages identified as 1099R or 1042S use the Regular Withholding Setup.
Flat Tax Percent (P)-The flat tax percent is defined based on a tax treaty, or federal, or statutory percent withholding requirements. Wages identified as 1099M or 1042S or 1099R use the Percentage Withholding Setup.
Flat Dollar Amount (D)-The Flat dollar amount is defined based on a statutory minimum flat dollar amount allowed. Wages identified as 1099R use the Regular Withholding Setup. For example, In New Jersey if the employee elects to have taxes withheld from their Pension payments, at least a minimum tax amount of 10.00 must be withheld from 1099R earnings.
Combine Regular & Flat Tax Percent (C)-The combined regular and flat tax percent is defined based on a tax treaty, or federal or statutory percent withholding and minimum allowed exemption allowance. The total wages must be adjusted by a prorated exemption allowance. The employee must be setup with a Daily Payroll Period. The total number of estimated days worked must be defined. For example, a student receives a Fellowship Grant. The taxes are computed by reducing the earnings by a prorated personal exemption (Prorated on a daily basis of 6.67 (96) during the period in 1996 he or she expects to be in the United States.), and by applying a 14% withholding rate to the adjusted wages. Wages identified as 1042S use the combined Regular and flat tax percent, such as, scholarships and fellowship earnings paid to a nonresident alien are reported on 1042S return. The student is allowed a prorated daily personal exemption for time period the student is in the United States. The exemption amount reduces the wages and the tax rate is applied to the adjusted wages.
The Percent field allows you to enter a percent if you select either flat tax percent (P) or combined regular & flat tax percent (C) from the Method field.
The Flat amount field allows you to enter a flat dollar amount if you select flat dollar amount (D) from the Method field.
Many companies have employees who either work in multiple state or local tax jurisdictions or employees who work in one tax jurisdiction and reside in another. Some tax jurisdictions have reciprocal agreements to avoid double taxation. Some tax jurisdictions require the full tax withholding from an employee's resident jurisdiction regardless of whether taxes are withheld in another jurisdiction. Still other tax jurisdictions require the full tax withholding from the employee's resident jurisdiction only if the work-in jurisdiction has no tax withholding requirements.
Select the Not subject to work in local tax check box if employee is not subject to a local work in tax.
Select the Not subject to resident local tax check box if employee is not subject to a resident local tax.
Select the Not subject to school local tax check box if employee is not subject to a school district tax.
The Exempt field allows you to select the appropriate taxes from which the employee is exempt. Select the appropriate check box.
Work in
Residence
School
Occupation
WCC
Other
The Block tax amount field allows you to block an employee's taxes for FIT, Work In or Residence. If the tax category is taxable for federal , state or local income taxes and the income taxes are blocked, the blocked tax is not calculated. However, the earnings amount is still considered taxable wages (such as small bonuses).
Block taxes defaults are established at the company level and are automatically applied to every employee with this earning code. However, this field can be customized at the employee level. Select the appropriate check box.
Work In
Residence
School
Occupation
WCC
Other
To enter an employee's local tax information:
From the main menu, select Employee then Rehire.
Complete the applicable information on the previous pages in the to do list.
In the Work In field, enter the employee's work-in tax code.
In the Filing Status field, enter the employee's filing status.
In the Allow WH field, enter the employee's withholding allowances.
In the Allow Addl field, enter the employee's additional withholding allowances.
In the Regular Wages Method field, enter the employee's taxation method for the regular wages.
In the Regular Wages Addl amt field, enter the employees additional amount for regular wages.
In the Supplemental Method field, enter the employee's taxation method for supplemental wages.
In the Supplemental Addl % field, enter the an additional amount for supplemental wages if desired.
In the Other Wages Method field, enter the employee's taxation method for other wages.
In the Other Wages Percent field, enter the employee's percentage withholding amount for other wages, if applicable.
In the Other Wages Flat amount field, enter the employee's dollar withholding amount for other wages, if applicable.
In the Residence field, enter the employee's residence tax code.
Repeat steps two through nine to enter the Residence tax information.
In the School field, enter the employee's school district tax code, if applicable.
In the Occupation field, enter the work-in occupational tax code, if applicable.
In the WCC field, enter the work-in worker's compensation tax code, if applicable.
In the Other field, enter the employer levied tax code, if applicable.
In the Exempt group box, select any taxes from which the employee is exempt.
In the Block tax amount, select the check box to block the appropriate tax.
In the Local reciprocity group box, select the appropriate check box that applies to local reciprocity.
In the Wages group box, select the appropriate check box that applies.
In the W4 is locked group box, select the appropriate check box that applies.
Click Next to go to the Summary page.
The Summary page provides a summary listing of all information that was recorded via the Rehire Wizard. Both old and new values are presented.
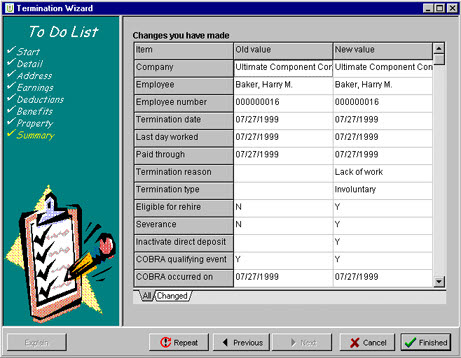
The following fields are defined as follows.
The All filter tab displays all the employee's information you entered in the Rehire Wizard.
The Start filter tab displays all the Start page information you entered in the Rehire Wizard.
The Address filter tab displays all the Address page information you entered in the Rehire Wizard.
The Job filter tab displays all the Job page information you entered in the Rehire Wizard.