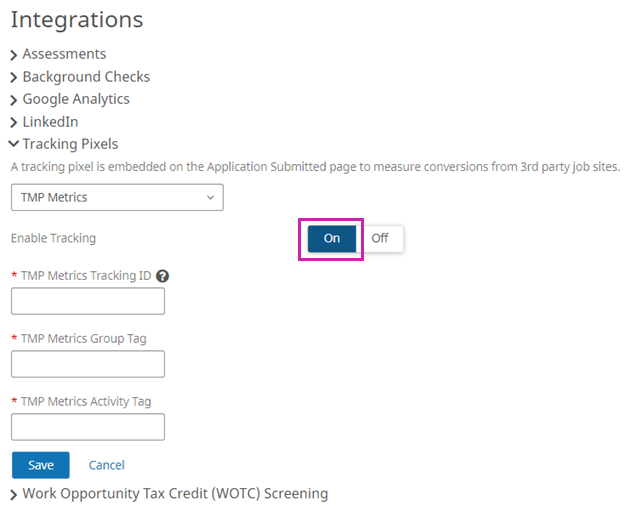
Recruiting administrators can configure Recruiting with the Tracking ID and other account details provided by the third-party job site. This information is included when redirected to the third-party page.
The parameters you need to enter depend on which third-party job site you are configuring. Contact the job site provider to obtain your tracking ID and any required parameters.
After you enable the tracking pixel in Recruiting, your provider can begin monitoring candidate conversion. Contact your provider to obtain your candidate conversion data.
Note:
Indeed is ending support for the Conversion Tracker feature on October 1, 2021. At that time, the Indeed Tracking Pixels feature will no longer be functional.
You may want to consider turning on the Indeed Easy Apply feature, which allows you to track applications originating from Indeed.
If you have questions or want to discuss alternative options on Indeed, please contact your Indeed Client Success specialist.
-
To Enable Tracking, select On.
Tracking parameter fields appear. The number of required fields varies depending on the selected provider.