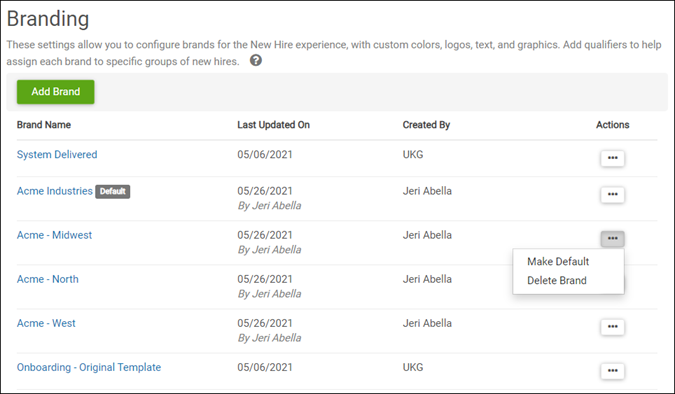
Onboarding system administrators can enhance the new hire experience by creating multiple branding pages and applying their own corporate branding elements.
Navigation: Settings > Branding
- To create a new brand, select Add Brand.
- To edit a brand, select the Brand Name and make modifications.
- To delete a brand, select the Actions menu and then select Delete Brand.
- To designate a default brand, select the Actions menu and then select Make Default.
Note:
If the designated default brand is deleted, the System Delivered brand automatically becomes the default.
Note:
The designated default brand cannot include qualifiers. If qualifiers have been selected, the Make Default option will not appear in the Actions menu.

The following pre-configured brands are available:
- System Delivered: This template includes a different background image than the original Onboarding image. It appears on the landing page of the new hire experience. All other branding elements remain the same as the original image. This is the default template and cannot be edited or deleted.
-
Onboarding - Original Template: This template uses the original
background image that came with Onboarding. This template can be edited or deleted. All
branding elements within the template can be modified:
- Large logo (PNG, JPG, or GIF). Maximum size is 300KB (W 300 x H 65 pixels).
- Small logo (PNG, JPG, or GIF). Maximum size is 300KB (W 75 x H 25 pixels).
- Header background.
- Header links.
- Stripe.
- Background image (PNG, JPG, or GIF). Maximum size is 500KB (W 1500 x H 300 pixels).
- Welcome background.
- Welcome text color.
- Welcome text.