UKG Community User Guide
UKG Community User Guide Overview
The UKG Community is where customers, partners, and U Krewers connect to grow, learn, and innovate. Everything you need to be successful with UKG solutions is in the UKG Community. Use this guide to get comfortable navigating all the resources and functionality offered so you can find what you need, when you need it.
Access and Registration
The UKG Community is open to visitors to search and browse a selection of public resources.
UKG customers and partners register and log in to access additional and personalized content and features, including expanded resources, groups, discussion, and training.
If you are a customer and would like to learn more about registration, review the Community Customer Self-Registration and Access job aid.
If you are a partner and would like to learn more about obtaining access, refer to the UKG Community Access for Partners job aid for instructions and insights. Alternatively, refer to the How to Contact Partner Support knowledge article for additional details.
Solution ID
You need your organization's seven-digit Solution ID to register for the UKG Community™.
- Your manager
- A UKG Administrator
- IT Help Desk
- Payroll Administrator
- HR Administrator
- A colleague who is a registered member
For information about locating a Solution ID as an active member, refer to the Locate Your Solution ID as a Registered Member section of this job aid.
Locate Your Solution ID as a Registered Member
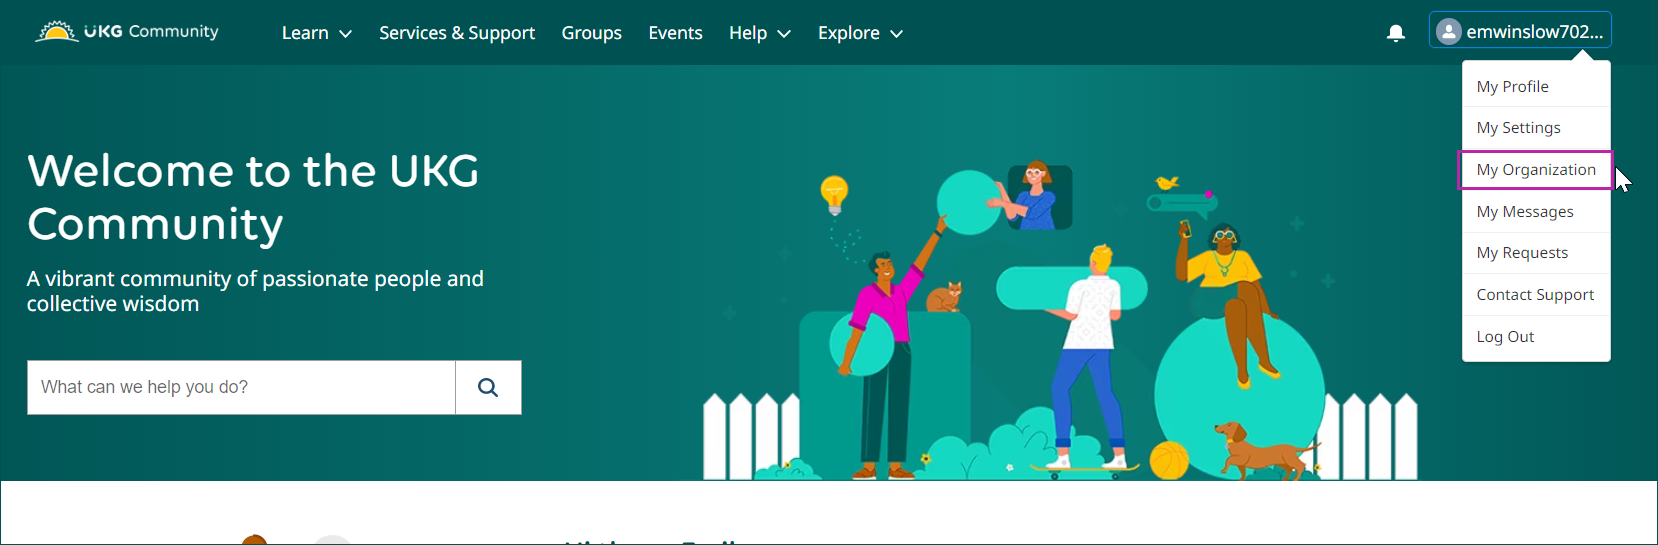
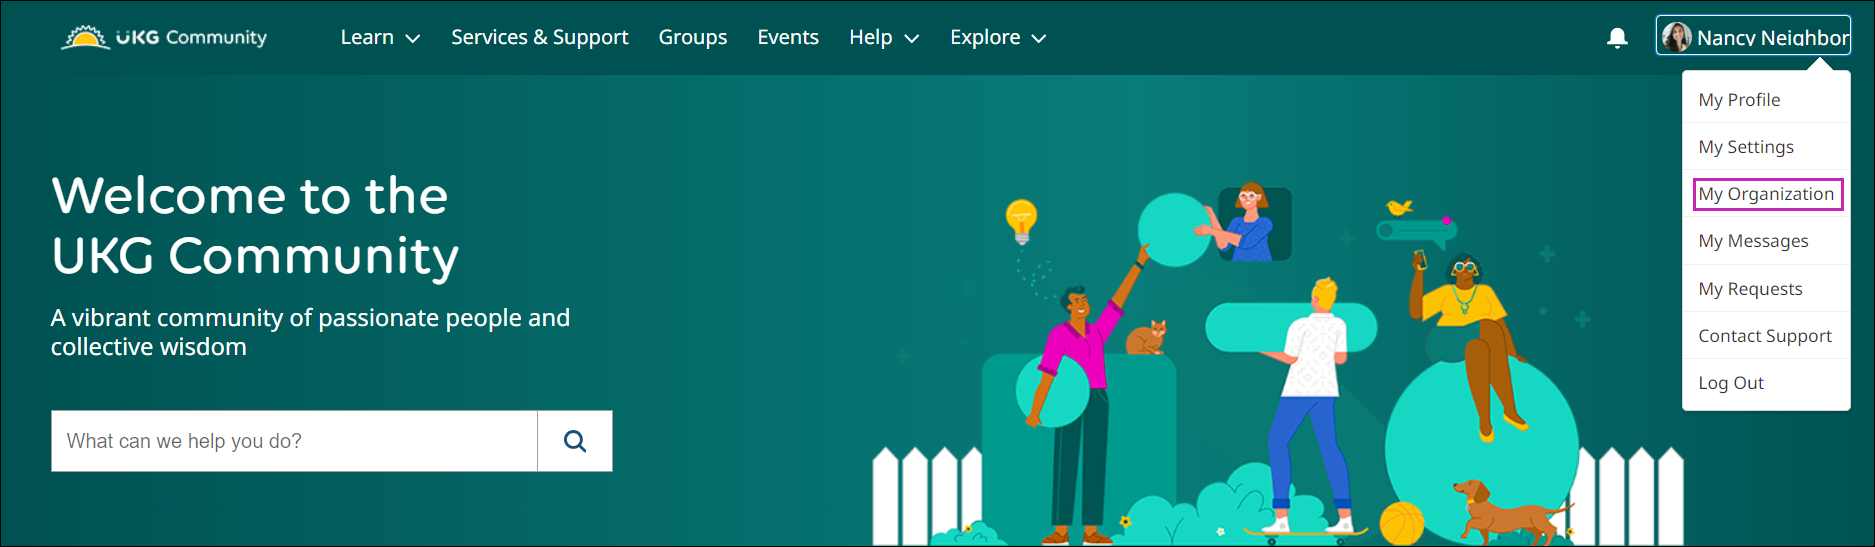
As a registered member of the UKG Community, you can find your organization's Solution ID on the My Organization page in the UKG Community.
- From the profile menu, select My Organization.
Register for the UKG Community
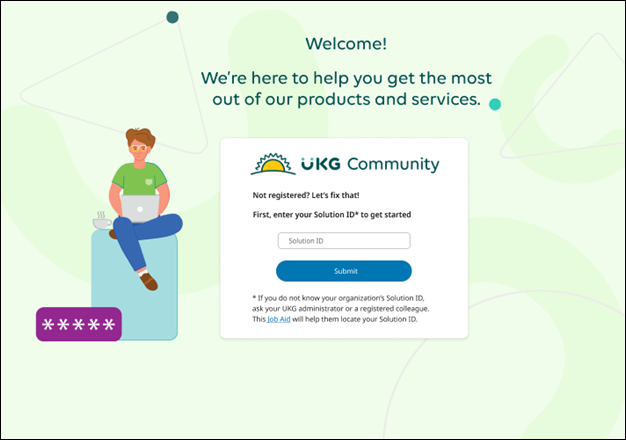
Customers can register for UKG Community access with a Solution ID.
- From the UKG Community home page, select Register.

- Select Submit.
- In the Profile Information section, enter your information. Required fields are marked with an asterisk.Note Be sure to use your work email address.
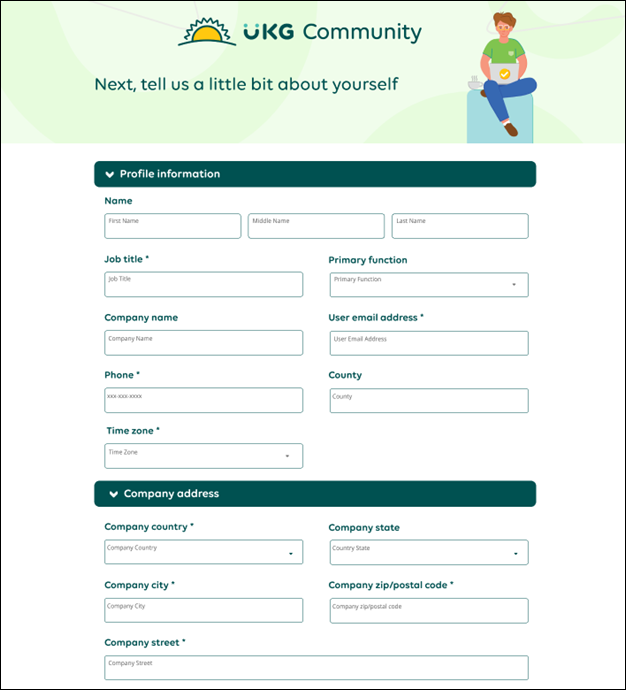
- Select OK, and then wait until a message confirms that you have successfully registered.
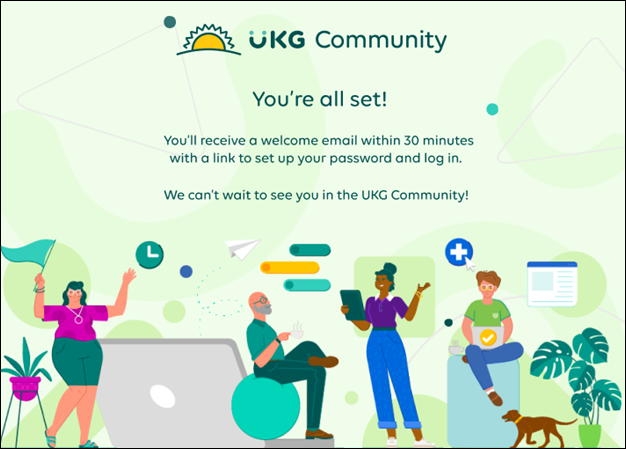 Note The confirmation message may take a couple of minutes to appear.You will receive a welcome email from onesupport-noreply@ukg.com. The email includes a link to get you started, which will take you to a login page. Your username is your email, and you will need to create a password.
Request Additional Access in the UKG Community
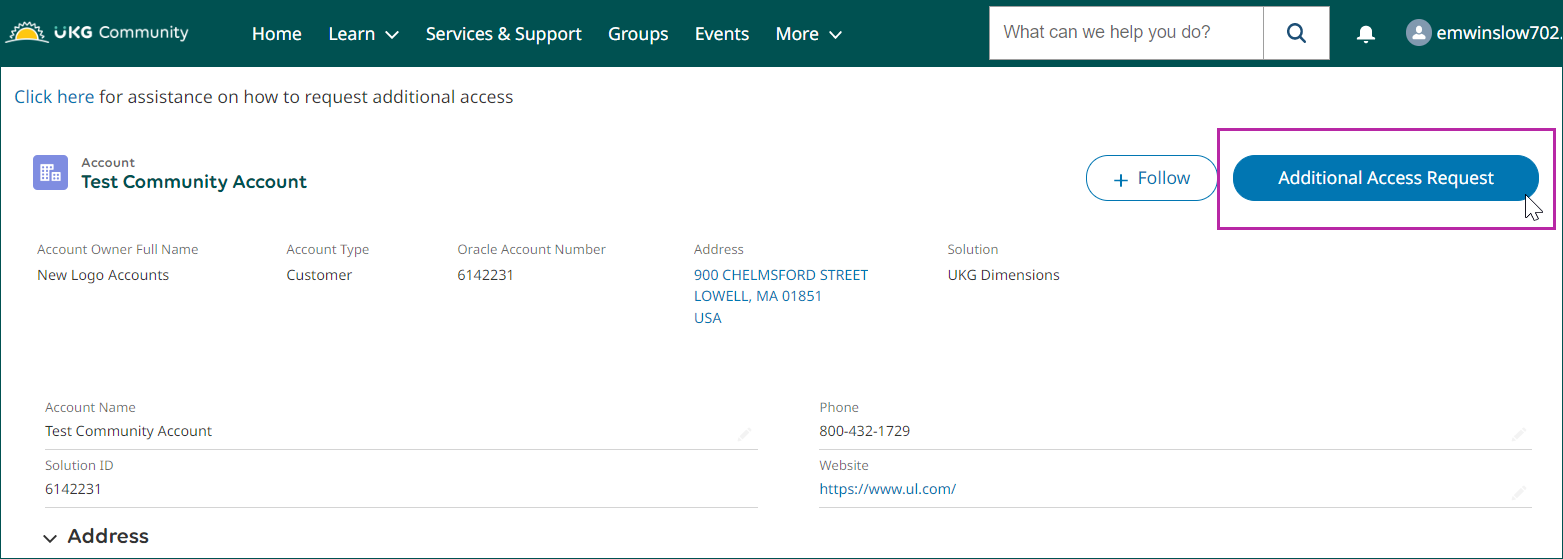
When you register for the UKG Community you are granted self-service access. Self-Service access allows you to access community content and training and engage with other members in discussions, groups, and events. You can request additional access in the UKG Community, for example, to contact UKG Services and Support. You will be notified when changes are made.
- From the profile menu, select My Organization.
- Select Additional Access Request.
Respond to Additional Access Request
When a customer contact requests additional access in the UKG Community, a Support Admin or Focal Admin from their organization can approve or reject the request.
- In the Additional Access Request for Approval section, select the specific request.
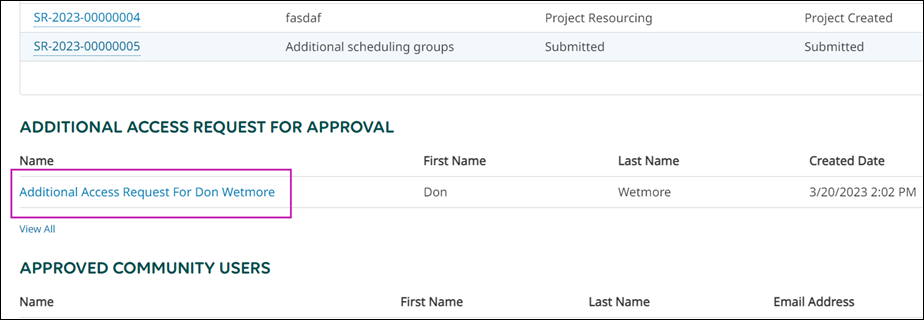
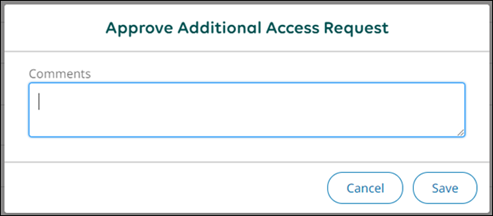
- From the request, select either the Approve Additional Access Request or Reject Additional Access Request button. Fill in the Comments and select Save.Your request is sent to your Organization's Support Administrator(s) for approval, and you will be notified by email whether your request was approved or rejected.

Identify Your UKG Community Administrators
If you have a question about your UKG Community access, you can view a list of your company's administrators to easily identify the right person to ask.
- From the profile menu, select My Organization.
- From the My Organization page, select My Company Admins.
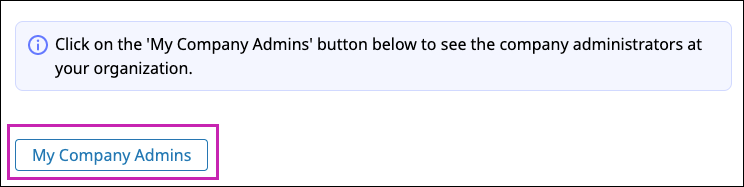 The Contacts page appears with a list of your organization's administrators.
Add a Support Administrator User
Every organization should have at least one Support Administrator or Focal Administrator User.
- If your organization has a Support Administrator User or a Focal Administrator User, they can edit a contact to Add Support Administrator User permissions. For more information on managing permissions, review the Create and Manage Community Contacts job aid.
- If your organization does not have a Support Administrator User or a Focal Administrator User, a registered user must submit a Support Case to be assigned the Support Administrator permissions. This registered user must be designated by your organization to manage user permissions.
Add Focal or Support Administrators
Every organization should have at least one focal administrator (for accounts with the UKG Pro solution) or support administrator (for accounts with UKG Pro WFM and all other solutions).
The UKG Community Registration and Access Troubleshooting
Review the common troubleshooting tips regarding registration and access below.
-
The UKG Community says I'm registered on another account
- You may register with only one Solution ID, but you can be associated with other Solution IDs. If you have multiple Solution IDs, open a case with Support and provide the Solution IDs that should be associated with your account.
- I can't register for the UKG Community because I don't have a company email address
- If you do not have a company email to register, please follow these instructions for help.
-
Every time I try to log into the UKG Community, it doesn't recognize my password
- This issue is generally resolved with some basic browser modifications, including clearing cache and adding Trusted Sites.
-
When I try to create a new password, I get an error
- Please remember that you must mix numbers, uppercase and lowercase letters, and special characters. The password is required to have at least one number, one uppercase letter and one of the following characters: ! # $ % - _ = + < >
If you are still having an issue registering and accessing the UKG Community after following this guide, follow these instructions for help.
Manage UKG Community Contacts
Focal administrators (for accounts with the UKG Pro solution) and support administrators (for accounts with UKG Pro WFM and all other solutions) can update access for the active UKG Community contacts in their organization and reset passwords for selected contacts.
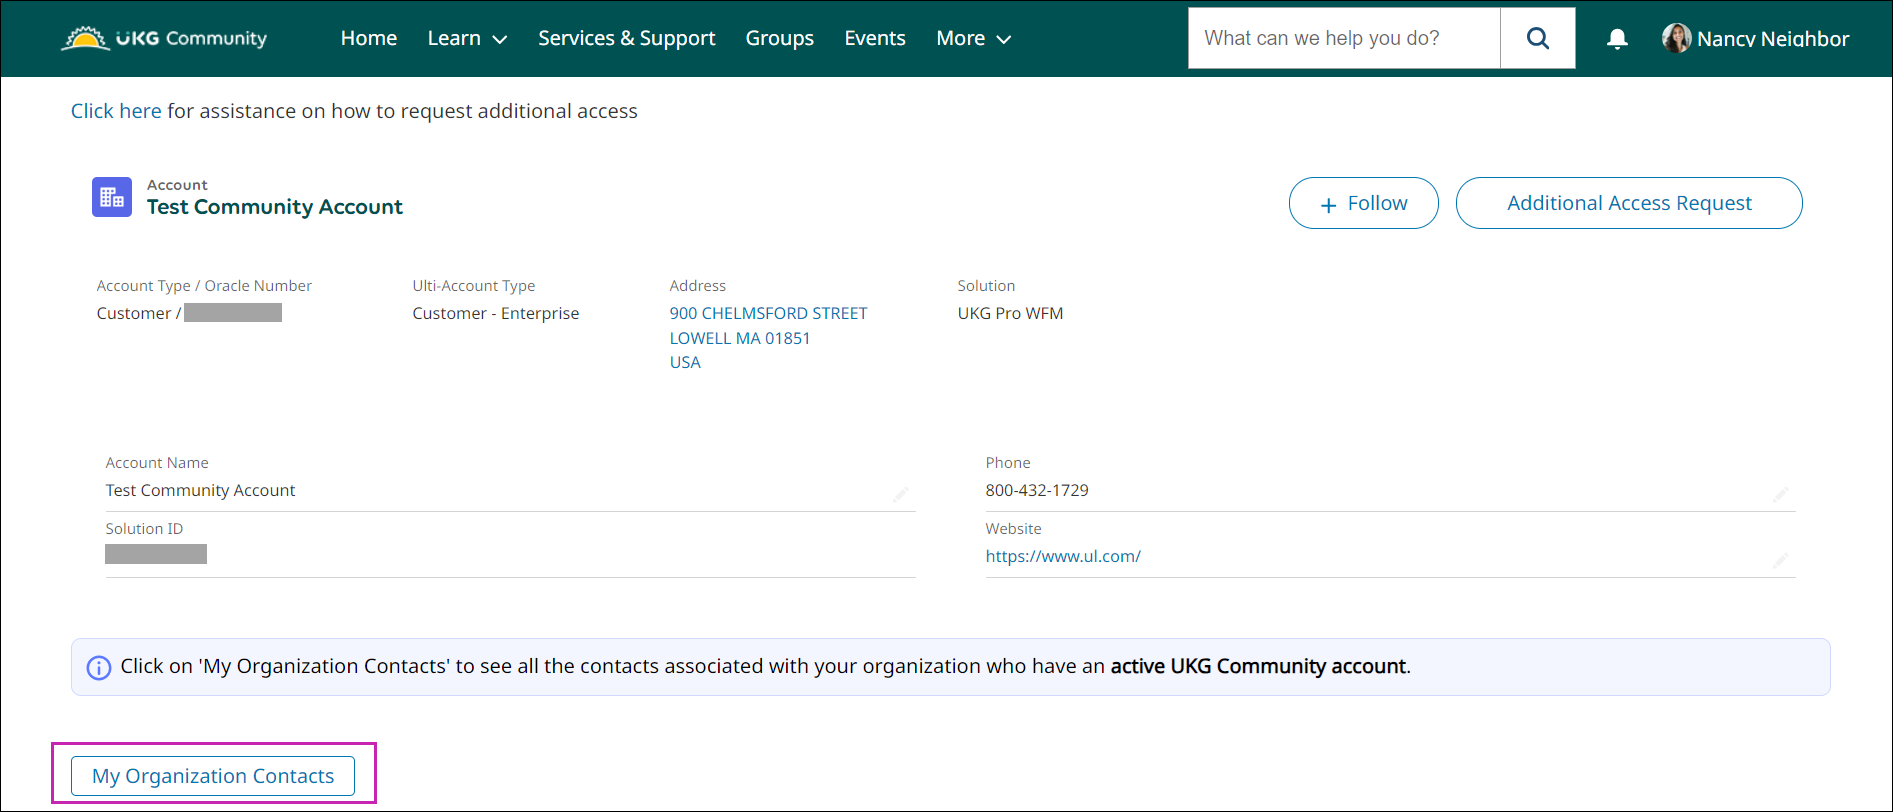
- From the UKG Community home page, select the profile menu > My Organization.
- From the My Organization page, select My Organization Contacts.
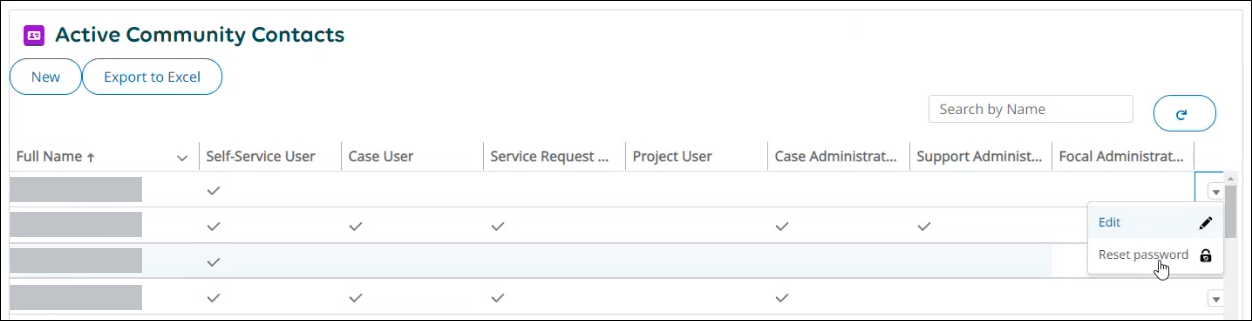
- From the Contacts page, for a user, select the down arrow icon and then select one of two options:
- Edit
- Reset Password
- If you chose Edit, from the Edit Contact window, in the Access Information section, select or deselect boxes for the different levels of access.
Option Description Guest User Users who can access publicly available product documentation. No registration or log in is required to access this content. Self-Service User Users who have base access to the UKG Community, including the ability to search, ask questions, collaborate with other community members, and access content and learning material. This access is assigned by default when a user self-registers to the UKG Community. Case User Includes Self-Service User access, plus the ability to create cases and manage your own cases. If you select this checkbox, the Self-Service User checkbox is automatically selected after you save. Note Based on your account's access, Case Users may be restricted from submitting Payroll or Benefits cases.Service Request User Includes Self-Service User access, plus the ability to create and manage your own service requests. If you select this checkbox, the Self-Service User checkbox is automatically selected after you save. Note Based on your account access, you may not have the option to assign Service Request Users.Project User (formerly known as Activation User in our Legacy Ultimate Community) Includes Self-Service User access, plus the ability to access the project console (for our Legacy Ultimate project users) and to the Launch application (for our UKG Pro, UKG Dimensions, and UKG Ready users). Case Administrator User Includes Self-Service User access and Case User access, plus the ability to view and manage all cases at your primary account or other accounts that you support. If you select this checkbox, the Case User and Self-Service User checkboxes are automatically selected after you save. Training Administrator Users who can assign courses and learning journeys to individual training users in their organization. Support Administrator User Includes Case Administrator User, Service Request User, Case User, and Self-Service User access, plus the ability to create new users and manage the access for other users of your primary account. This user type is for accounts with UKG Pro WFM and all other solutions. Accounts with the UKG Pro solution should have a Focal Administrator designated – view this job aid for more information. 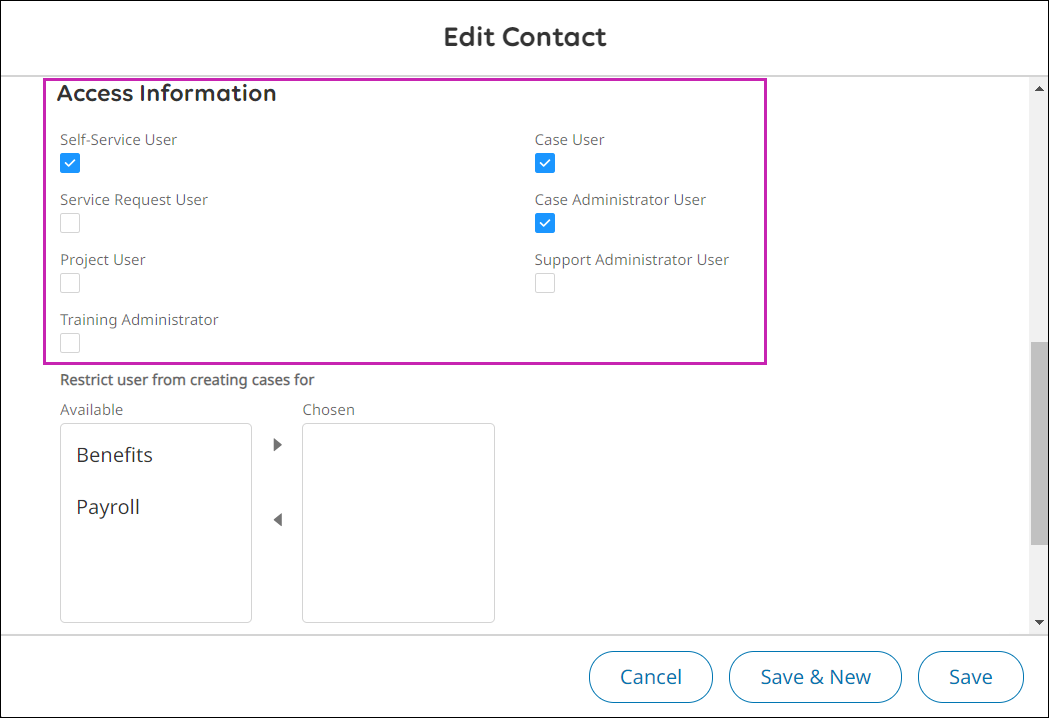
Respond to Additional Access Request
When a customer contact requests additional access in the UKG Community, a Support Admin or Focal Admin from their organization can approve or reject the request.
- In the Additional Access Request for Approval section, select the specific request.
- From the request, select either the Approve Additional Access Request or Reject Additional Access Request button. Fill in the Comments and select Save.Your request is sent to your Organization's Support Administrator(s) for approval, and you will be notified by email whether your request was approved or rejected.
Restrict Case Users from Submitting Benefits and Payroll Cases
Focal administrators (for accounts with the UKG Pro solution) and support administrators (for accounts with UKG Pro WFM and all other solutions) can restrict case users from submitting Benefits and Payroll type cases via the UKG Community.
- From the Contacts page, for a user, select the down arrow icon and then select Edit.
- From the Edit Contact window, in the Restrict user from creating cases for section, select Benefits, Payroll, or both and use the right arrow to move the selected option(s) from the Available list to the Chosen list.
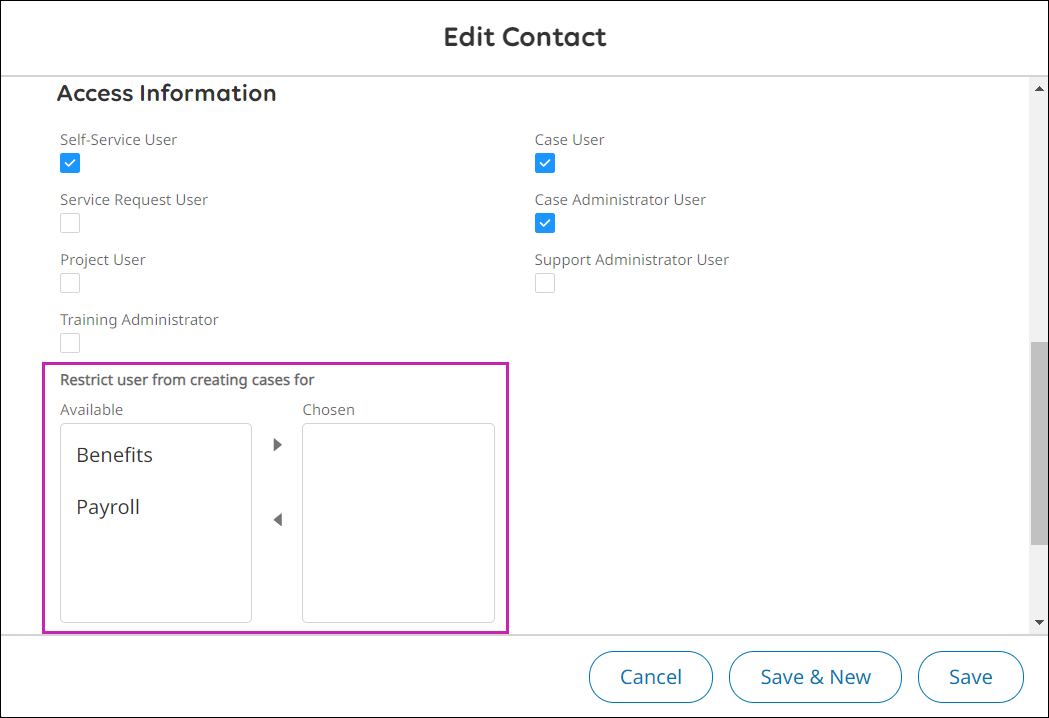
- Select Save.
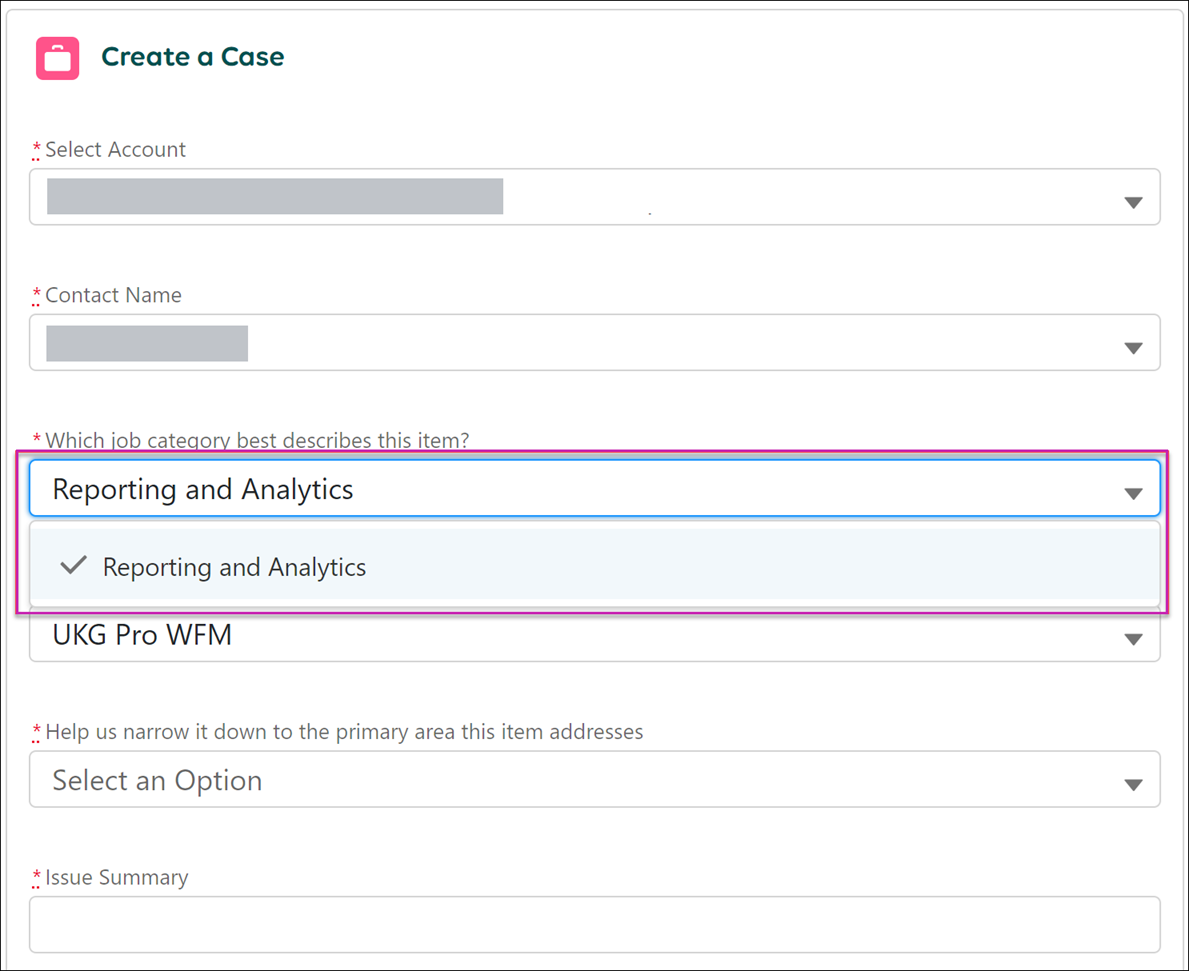
The applied restrictions will prevent the contact from being able to select Payroll and/or Benefits options as part of the Job Category picklist options. For example, if Payroll is selected as a Chosen restriction, the contact will not have the Payroll option from the Create a Case form, therefore restricting the Product Solution options that can be selected.
Use this same process to update the contact's restrictions.
Allow a Related Company Contact to Create and Manage Service Requests
Focal administrators (for accounts with the UKG Pro solution) and support administrators (for accounts with UKG Pro WFM and all other solutions) can allow Related Company Contacts to create and manage their own service requests.
- From the My Organization page, select My Organization Contacts.
- From the Contacts page, scroll to the Related Company Contacts table, select the down arrow icon for the appropriate contact, and then select Edit.Note If the appropriate contact is not in the Related Company Contacts table, submit a support case to add them.

- In the Start Date field, specify the date to begin access.
 If you select the current date, the Service Request User checkbox is checked automatically. If you select a date in the future, the Service Request User checkbox is not checked until after the specified date.
Restrict a Related Company Contact from Creating and Managing Service Requests
If a Related Company Contact was previously allowed to create and manage service requests, focal administrators and support administrators can edit the contact and remove access.
- From the My Organization page, select My Organization Contacts.
Remove UKG Community Contacts
Focal administrators (for accounts with the UKG Pro solution) and support administrators (for accounts with UKG Pro WFM and all other solutions) can remove a contact who has completely left their company or organization or simply remove a contact's access to the UKG Community.
Remove UKG Community Contacts Who Have Left Your Company or Organization
- From the Contacts page, for a user, select the down arrow icon and then select Edit.
- From the Edit Contact window, in the Verification Status section, select Contact No Longer Exists.

Remove UKG Community Contacts Who Belong to Your Company or Organization
You can remove a contact from the UKG Community who still belongs to your company or organization.
Add UKG Community Contacts
Focal administrators (for accounts with the UKG Pro solution) and support administrators (for accounts with UKG Pro WFM and all other solutions) can add contacts to the UKG Community.
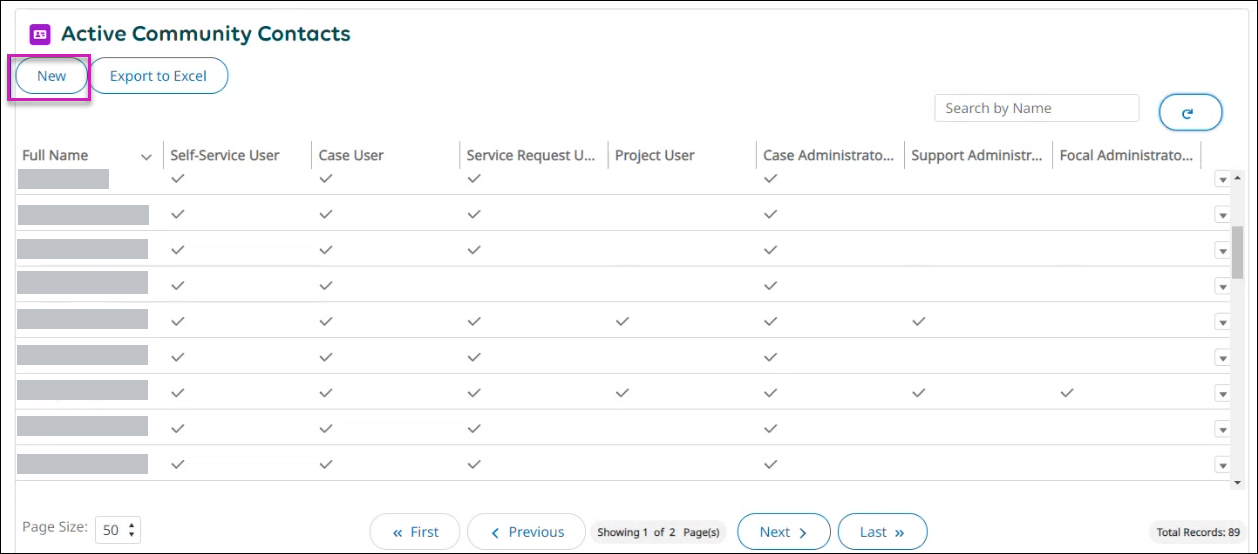
- From the My Organization page, select My Organization Contacts.
- From the Contacts page, select New.
- Enter the required information:
- At the Name field, enter a first and last name.
- At the Email field, enter an email.Note The email must have a company email domain. Non-company emails are not allowed.
- At the Title field, enter a title.
- In the Access Information section, select levels of access.
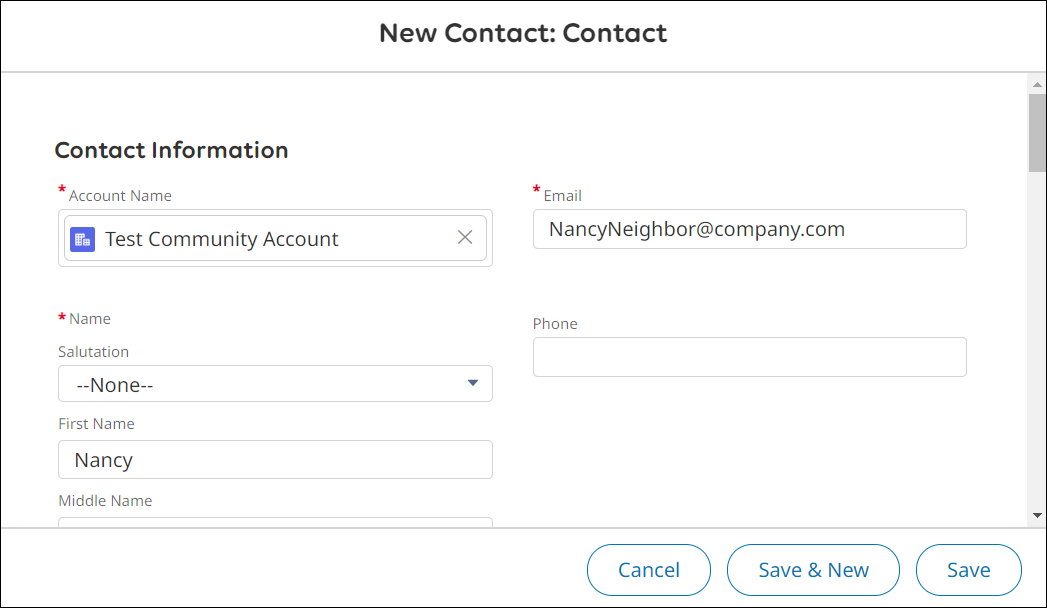
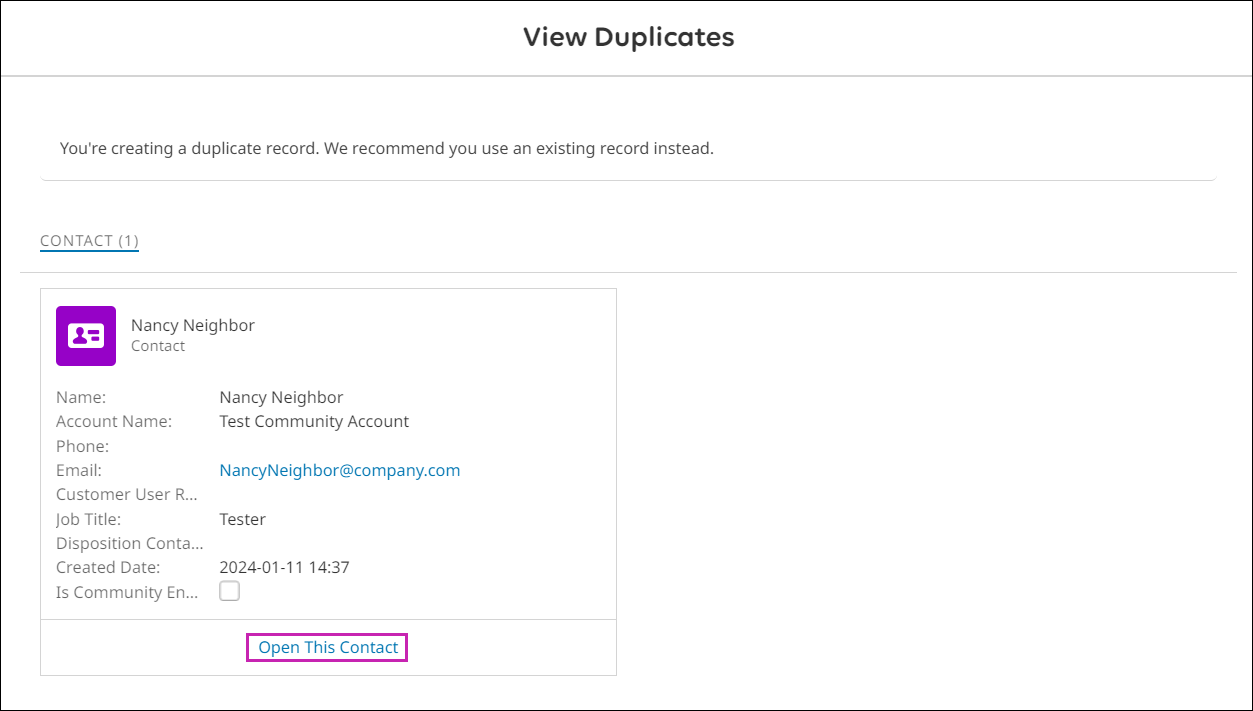
- Select Save.Note If the contact already exists, a warning message appears. To view the existing contact, select View Duplicates.
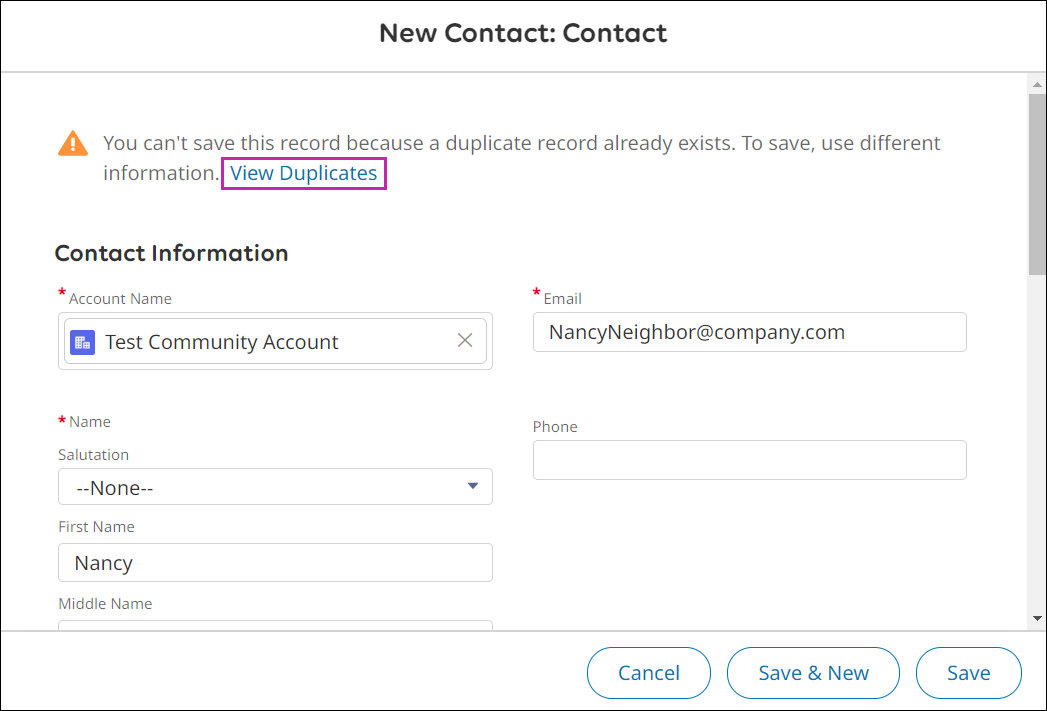
To view the contact's page, select Open This Contact.
From the contact's page, select Edit to update the contact's information. To send the contact a welcome email with UKG Community login details, select the appropriate levels of access and save the changes.
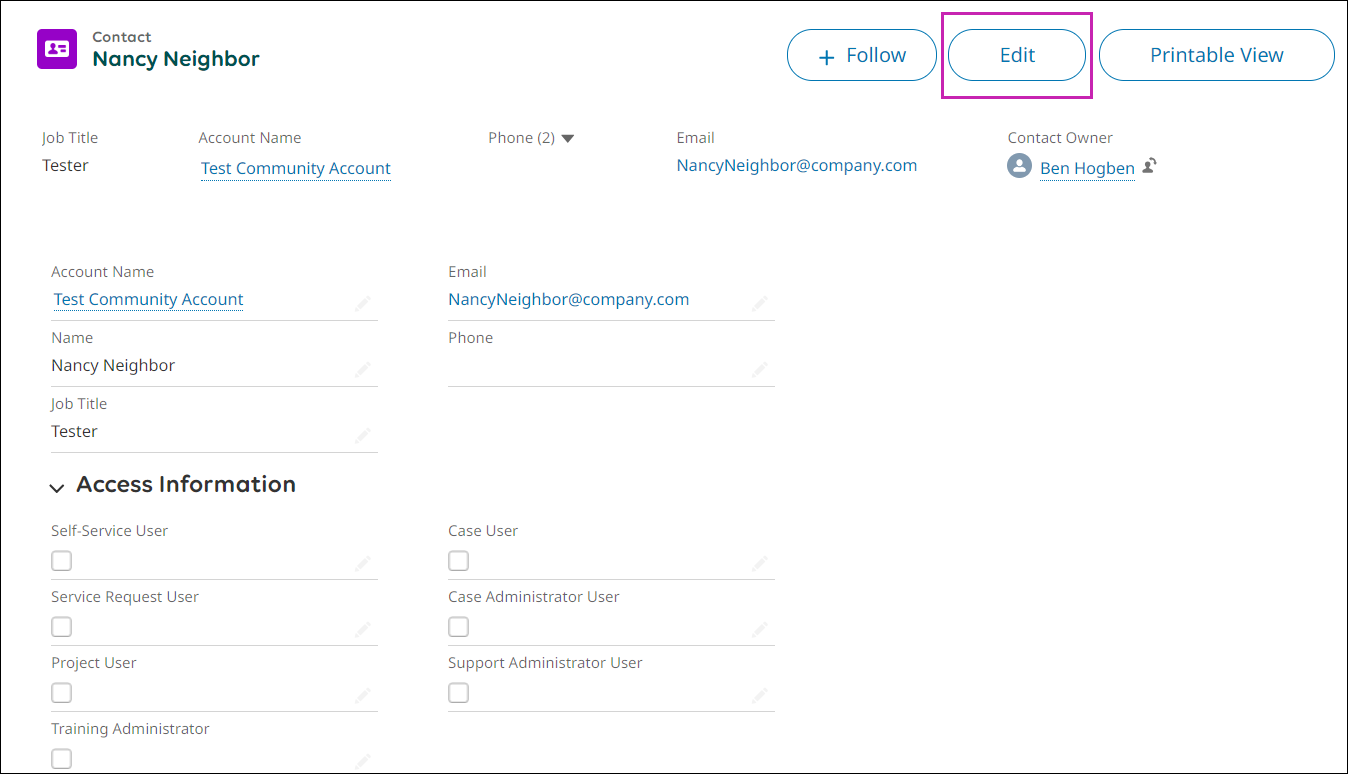 When a new contact is added, a welcome email from the UKG Community will be sent to the email you provided. A link to create the password is provided in the email.
Add Focal or Support Administrators
Every organization should have at least one focal administrator (for accounts with the UKG Pro solution) or support administrator (for accounts with UKG Pro WFM and all other solutions).
Find Product Resources
You can access product resources using the home page, the navigation, and the search. These resources can provide you with essential information about your UKG products.
My Products
Resources are organized by product. You can learn the names of your UKG products on the home page.
- From the home page, select the My Products tab.
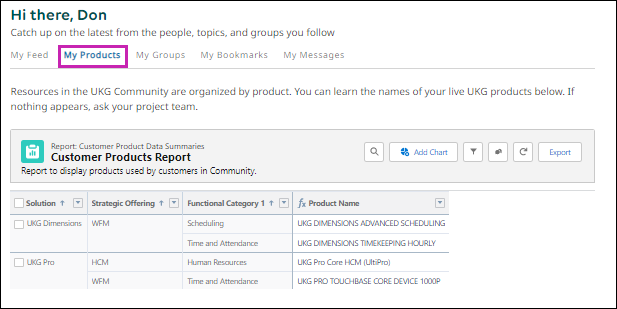
- Review the report with the list of products.
Search
Use the search bar to find the following resources: discussions, groups, ideas, knowledge articles, product documentation, cases, and people.
If you select Case, the Case Product Family filters appear
If you select Knowledge Article, the Knowledge Article Type filters appear
If you select Product Documentation, the Product Documentation Type filters appear
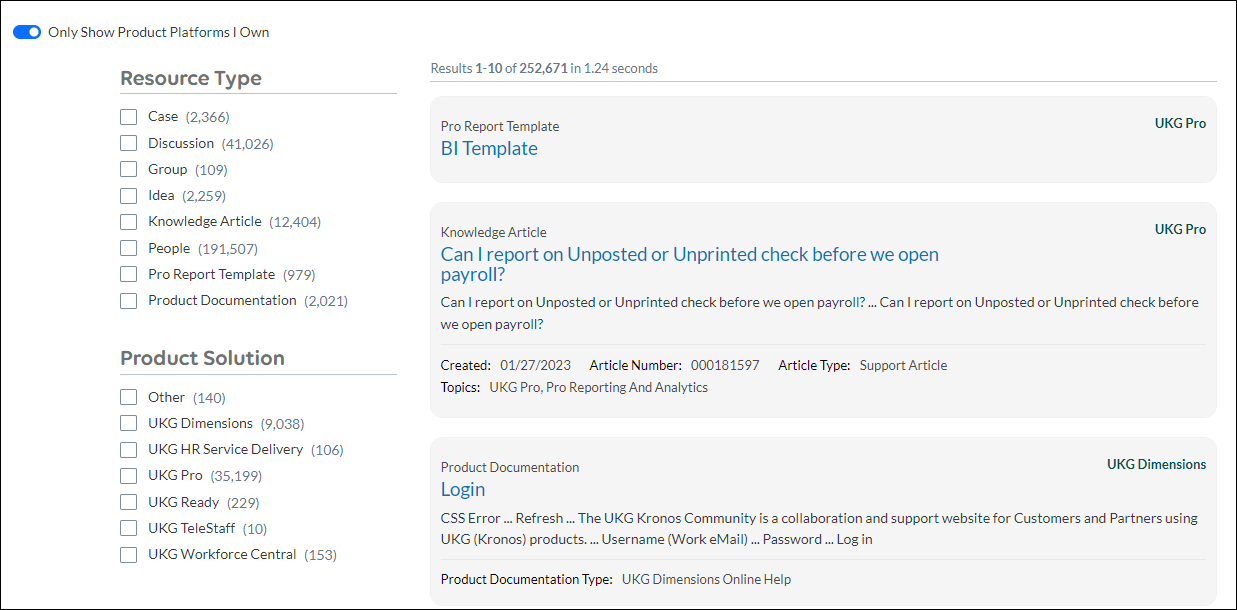
Resource Types
The following table includes the available resource types. Understanding the different resource types can help you narrow your search and find the results you're looking for.
| Resource Type | Created By | Description | Actions |
|---|---|---|---|
| Case | UKG Community members | A request for support submitted by a customer to UKG Note Your permissions determine the cases you can access. You can submit an additional access request to your administrator to update your permissions. |
|
| Discussion | UKG Community members | A question or post that other members can interact with – these can be found in groups and topics |
|
| Ideas | UKG Community members | Suggested updates to UKG products and services |
|
| Knowledge Article | UKG | Publications that typically address specific product questions |
|
| Product Documentation | UKG | Publications created by UKG that have been reviewed for accuracy (includes job aids, guides, and reference materials) |
|
| Group | Areas to discuss specific topics, products, or industries |
| |
| People | UKG Community members |
|
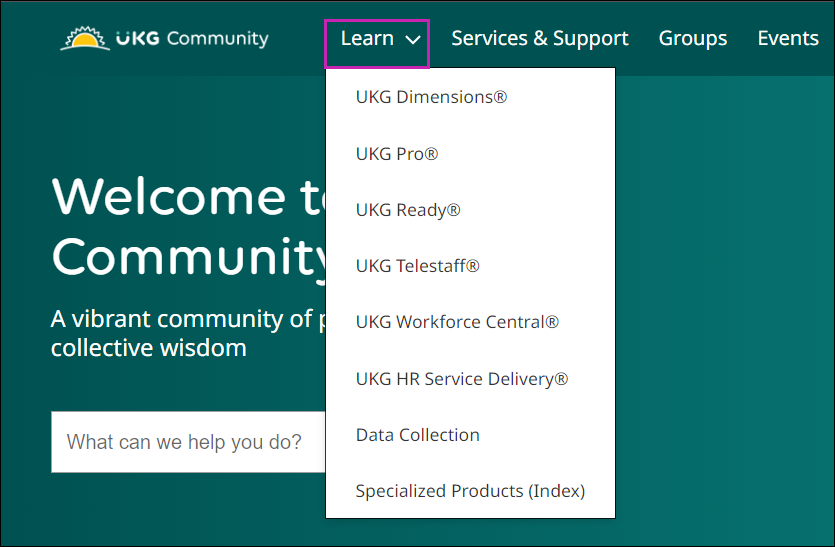
Learn Product Pages
Learn product pages bring together all relevant resources organized by product solutions. Learn product pages direct you to Library documentation, release information, training, help articles, groups, and more.
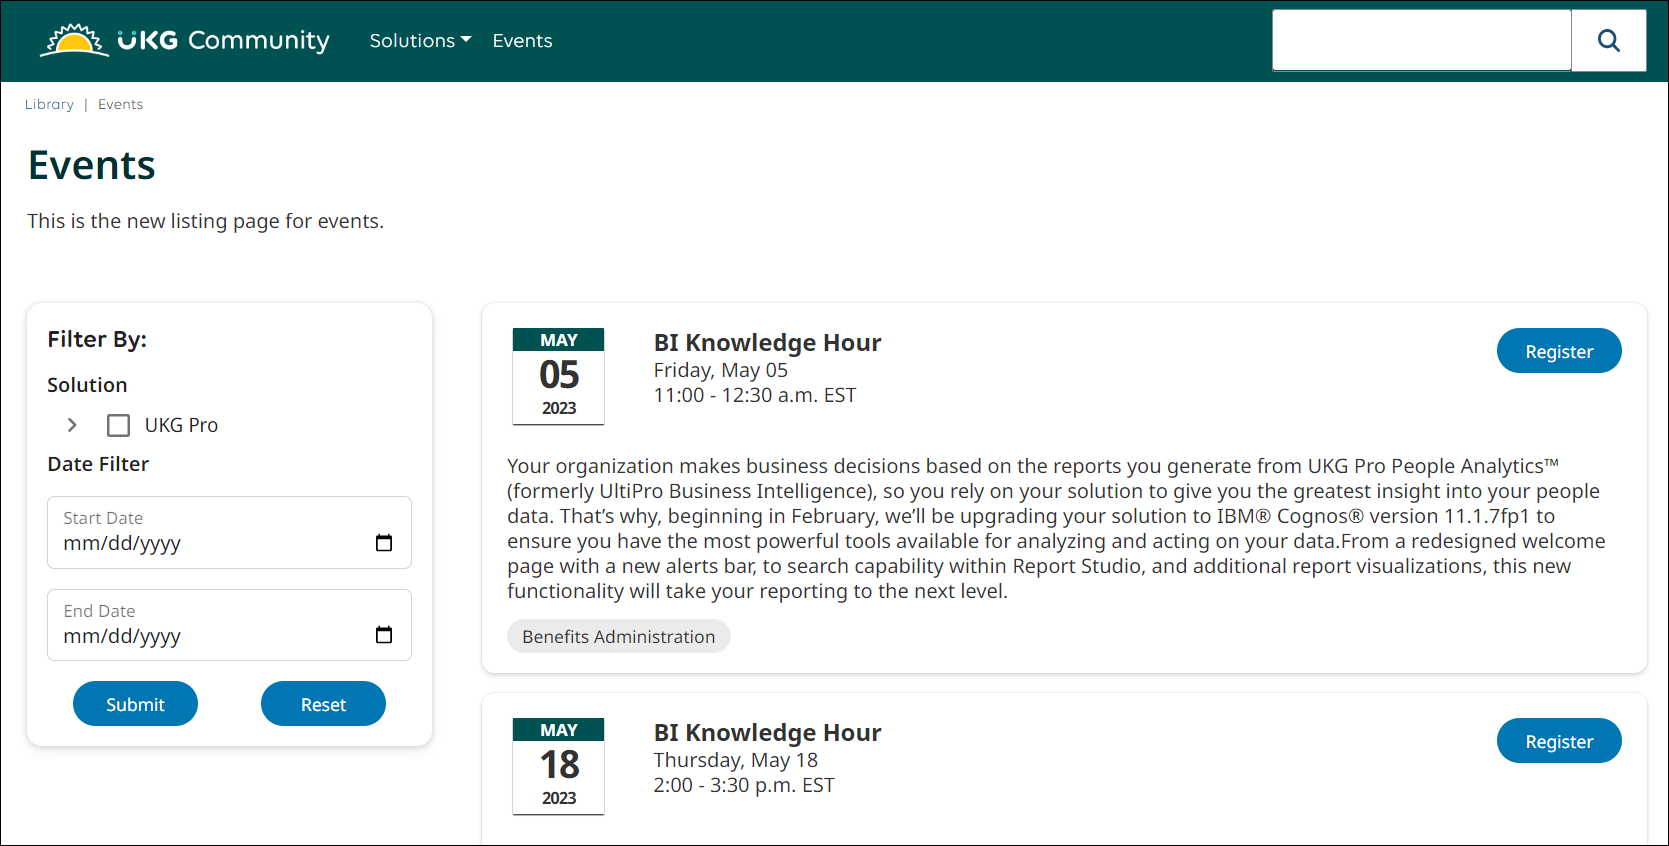
Events
If you want to find learning events such as webinars and knowledge hours, go to the Events page. From the Events page, you can register for upcoming events.
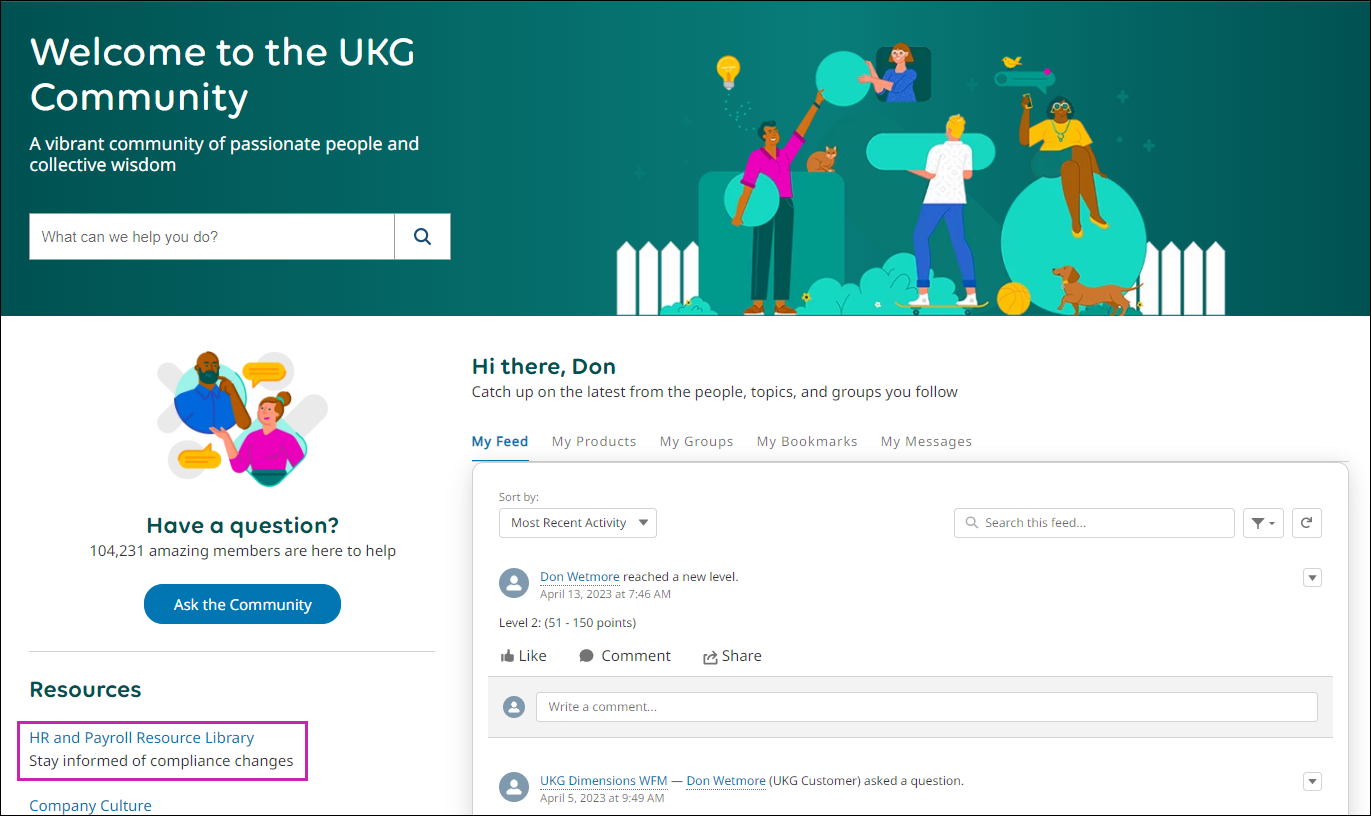
HR and Payroll Resource Library
The HR and Payroll Resource Library is a third-party research tool where you can find up-to-date international, state, and local compliance content and industry news.
Knowledge Articles
Knowledge articles are published by UKG and provide specific information. For more in-depth information about a product or feature, review product documentation.
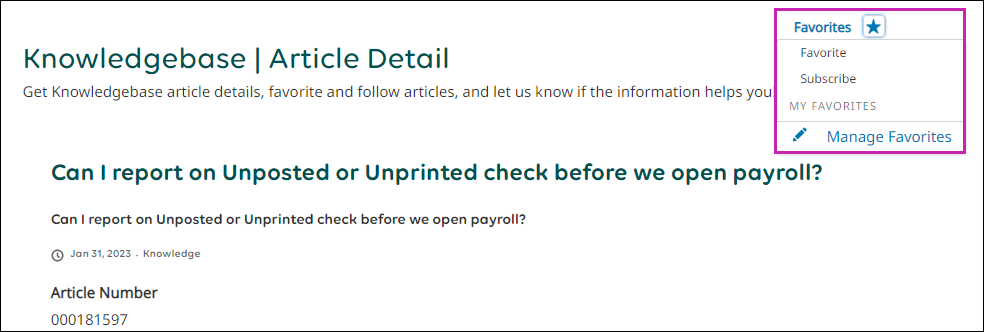
Favorite an Article
To save an article you find useful, you can favorite it. You can only access the favorites list from an article.
- Select an article.
- Select Favorites.
- Select Favorite. The article is now available from My Favorites.
Subscribe to an Article
To receive update email notifications for an article, you can subscribe to it.
- Select an article.
- Select Favorites.
- Select Subscribe. You are now subscribed and receive email notifications when the article is updated.
Manage Article Favorites
From any article, you can access a list of your favorites and manage your favorites list.
- Select an article.
- Select Favorites.
- Select Manage Favorites. The Edit Favorites window appears.
- From the Edit Favorites window, you can:
- Access a list of your favorite articles
- Remove articles from your favorites
- Rename the articles in your list
- Select Done.
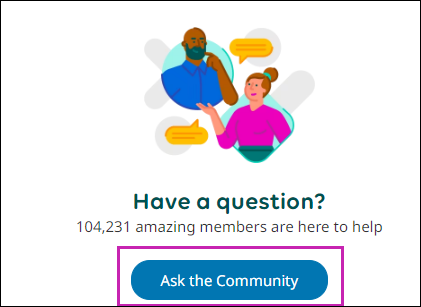
Find Answers
If you need input from other members, you can ask your UKG Community peers a question.
If you ask a question and get a great response from another member, select a best answer.
Ask a Question
You can ask your peers a question in the UKG Community. As you enter text in the question form, you are provided potential answers in existing articles.
- Select Ask the Community. A window appears with the question form and the suggested articles list.
- Complete the question form.
- Select where you want to post the question.
- Enter your question.
- Optionally, provide additional details.
- Optionally, upload files.
Note As you complete the question form, the View Suggested Articles list updates, providing existing articles that may answer your question.
Select the Best Answer
If you get a great response to your question, you can select the best answer. Only you can select the best answer for your question.

Marking the best answer moves the response to the top, where it is highly visible to other members.

Engage in Discussions
Discussions include questions and posts, which can be found on member profiles, groups, and learn product pages. Discussions are a good way to connect with knowledgeable peers, learn and stay up to date.
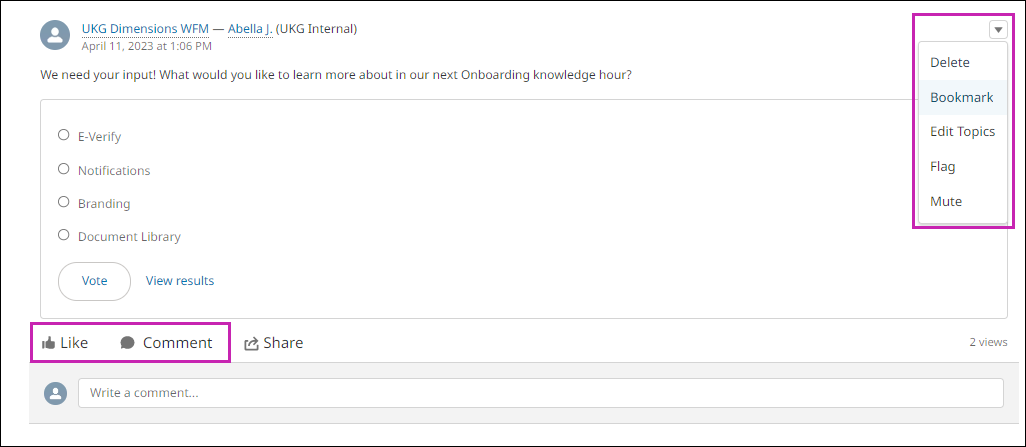
Like and Follow Posts
When you like a post, you receive update email notifications. You can also like comments on a post.
- Go to a post.
- Select Like. You are now following the post and receive email notifications when the post is updated.
Comment on Posts
If you want to respond to a post, you can leave a comment. You can also reply to other comments on a post.
- Go to a post.
- Select Comment.
- Enter text. Optionally, you can format the text and attach a file.
- Select Comment. You will receive email notifications when new comments are added.
Bookmark Posts
You can bookmark posts to easily access them later. When you bookmark a post, it appears on the My Bookmarks list on the home page.
- Go to a post.
- Select the drop-down icon.
- Select Bookmark. The post now appears in the My Bookmarks tab on the home page.
Flag a Post
If a post does not meet the UKG Community guidelines, you can report it for a moderator to review. You can also flag comments on a post.
- Go to a post.
- Select the drop-down icon.
- Select Flag. The What's wrong? window appears.
- From the What's wrong? window, select an option to indicate the issue.
- Optionally, enter a note for the moderator.
- Select Save.
Mute Posts
If you no longer want to receive email notifications for a post, you can mute the post.
- Go to a post.
- Select the drop-down icon.
- Select Mute. You no longer receive email notifications when the post is updated.
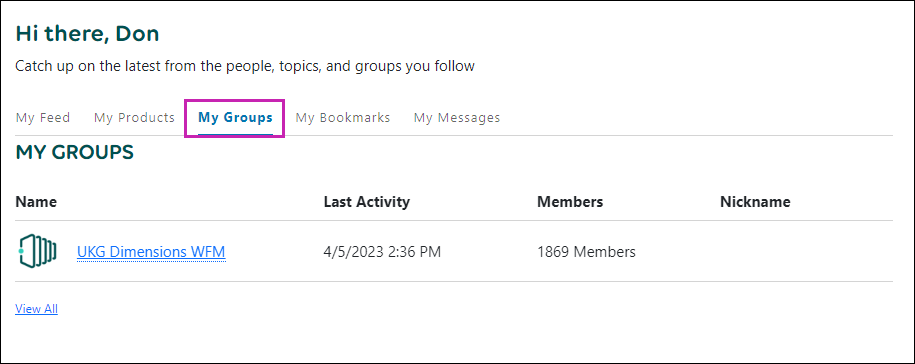
Engage with Groups
Groups allow you to connect and collaborate about specific topics, such as product and industry. You can use groups to engage with other members and receive critical product alerts.
To find a group, use the search. To browse a list of groups, select Groups from the top navigation bar.
To view groups you belong to, from the home page, select the My Groups tab.
Join a Group
When you join a group, the group updates appear in your feed.
- Select a group.
- From the group page, select Join Group.
Update Group Notifications
You can control the frequency of the email notifications you receive from a group.
Ask a Question in a Group
You can ask a question directly in a group to get responses from the appropriate members. For example, if you want to know how other customers use a product, you can ask a question in a group that focuses on that product.
- Select a group.
- From the group page, go to Feed tab > Question tab.
- From the Question tab, select Ask.
- Enter a question. Optionally, add details.
- Select Ask. The question now appears in the group and other group members can respond.
Post in a Group
If you want to share information or resources with a group, you can make a post. If you want answers to a specific question, ask a question rather than make a post.
- Select a group.
- From the group page, go to Feed tab > Post tab.
- From the Post tab, enter text.
- Select Share.
Poll a Group
If you want to know how members of a group respond to a question from a list of options, you can create a poll. Members can still like and comment on polls to provide more feedback.
- Select a group.
- From the group page, go to Feed tab > Poll tab.
- From the Poll tab, enter a question and choices. Optionally, add more choices.
- Select Ask.
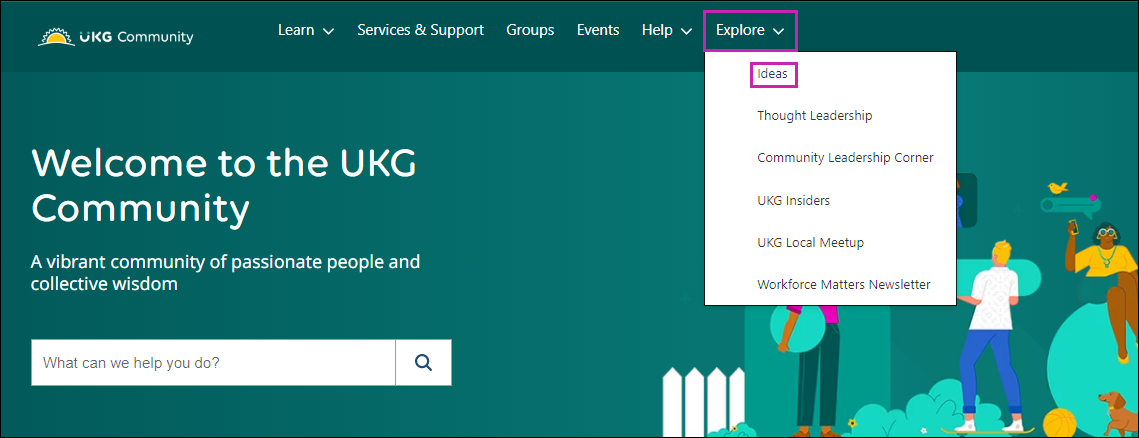
Engage with Ideas
From the Ideas portal, you can submit, comment on, and vote for new features and enhancements to UKG products and services. You can even submit enhancement ideas for the UKG Community itself.
Add an Idea
If you have a suggestion for how we can improve our products, services, or community, submit an idea. Before you add an idea, check for similar ideas that already exist in the ideas portal.
- Select Add a New Idea.
- Select a product.
- Enter a title. Similar ideas will be suggested. If the same idea is suggested, vote on the existing idea instead of creating a new idea.
- Enter details and success criteria.
- Select a category.
- Select Add Idea.
Vote on an Idea
If you want to support an idea, you can vote for it. Voting lets UKG know that the idea is important to you. When you vote for an idea, you are subscribed to it and will receive notifications if the idea is updated.
- Select an idea.
- Select Vote. You are now subscribed to the idea and will receive notifications of updates.
Comment on an Idea
If you want to engage in conversation about an idea, you can comment.
- Select an idea.
- Select Add a comment.
- Enter text.
- Select Post comment.
Idea Point Threshold and Statuses
Once an idea reaches the minimum point threshold based on the amount of votes, the product management team reviews the idea and updates the status. The status indicates if the idea will be added to the product roadmap.
The minimum point threshold helps us manage the volume of ideas we receive from the UKG Community. An idea does not have to reach a minimum point threshold to get put on the roadmap.
When ideas are submitted, they can have one of the following statuses:Under Point Threshold: The idea has not received enough votes to meet the minimum point threshold (ideas have this status until they reach the minimum point threshold)
Needs Review: The idea is being reviewed by the product management team
Clarification Needed: The idea has been reviewed by the product management team and more information or clarification is needed
Future Consideration: The idea may be considered for a future release
Planned: The idea is currently under development and is targeted for general availability
Delivered: The idea has been delivered and is generally available
Existing Functionality: The idea already exists in the product
- Not Currently Planned: The idea is not under consideration for our roadmapNote An idea with the Not Currently Planned status can still receive votes and may move out of this status.
Manage Community Profile and Notifications
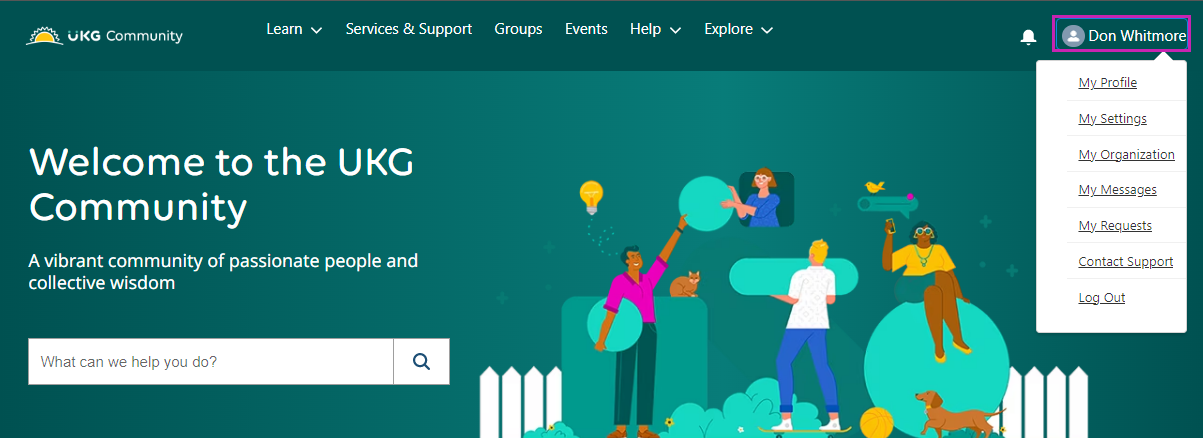
You can update your UKG Community profile and customize your notification preferences. To access your profile, settings, organization, messages, and requests, select your name from the top navigation bar.
Update Community Profile
You can update your UKG Community profile. Your profile includes your contact information, profile picture, and any additional information you want to share with other members.
- From the top navigation bar, select your name > My Profile > Edit. The Edit User window appears.
- From the Edit User window, you can update your personal information and contact information.
- Select Save.
Update Settings
From your settings, you can select how often you want to be notified and how much of your information is visible in the UKG Community.
Create and Manage Cases
In the UKG Community, if you have access, you can create and manage cases to engage with our support teams.
For information about how to manage cases for Partners, review the Case Creation and Case Management for Partners job aid.
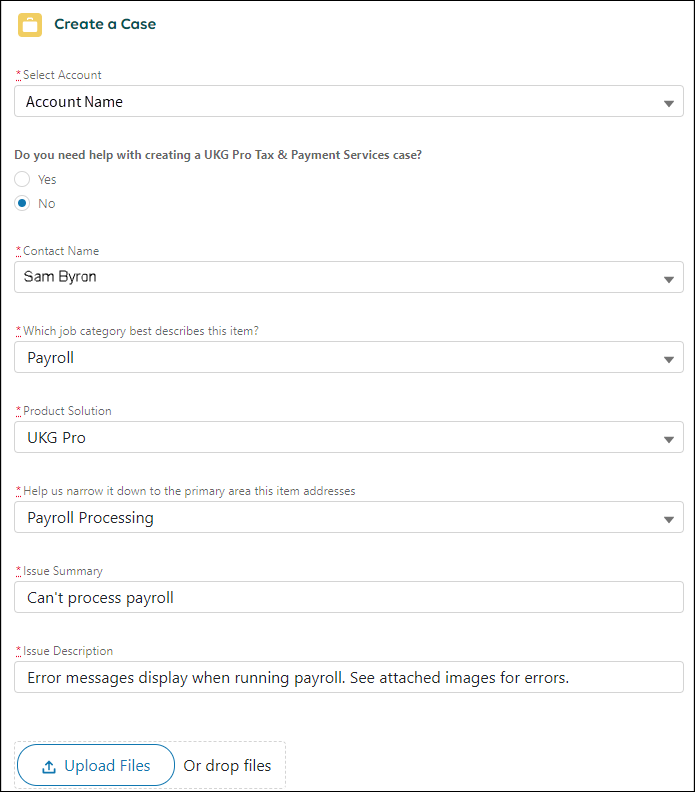
Create a Case
Create a case in the UKG Community to get support for your issue. Before creating a case, be sure to complete the recommended training and search our product documentation, knowledge articles, and community discussions for answers.
- Select Submit. Your case will be routed to an internal support representative, who will contact you if further information is needed.
Manage a Case
You can manage open cases in the UKG Community to view information about the current status, communicate with the case owner, and accept or reject a resolution.
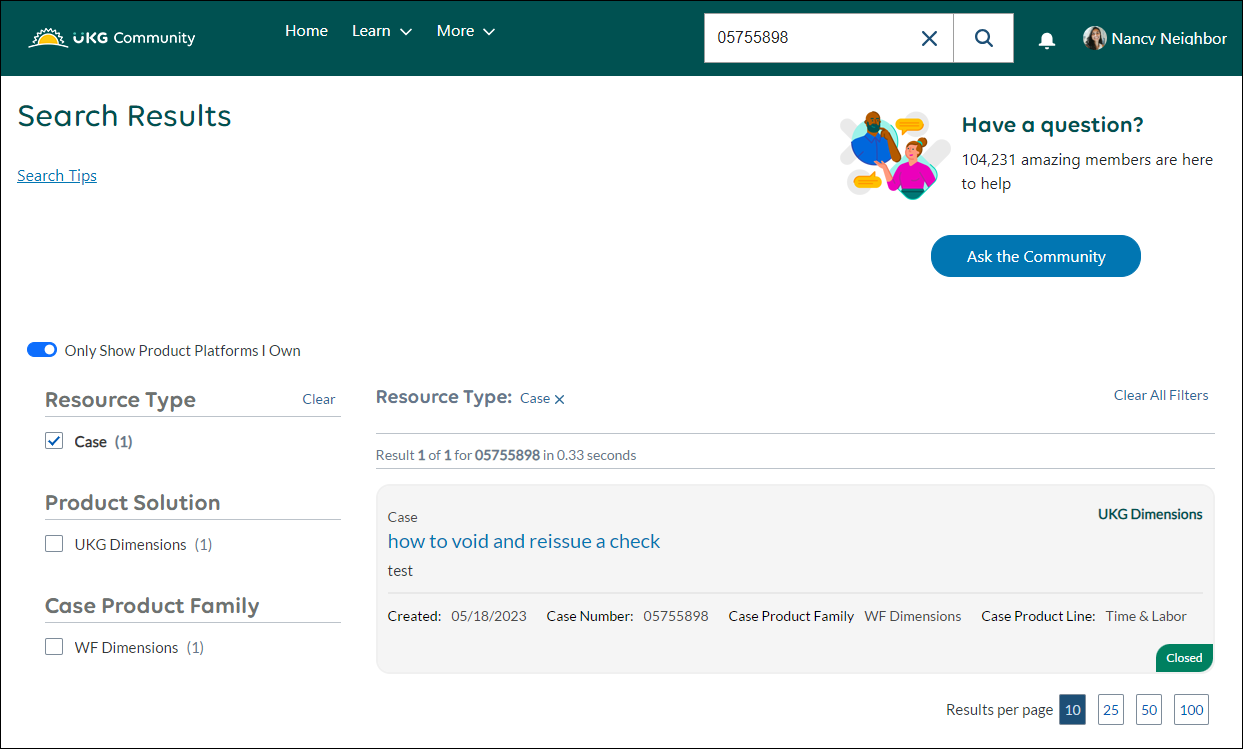
- From the Welcome page, use one of the following methods to navigate to the appropriate case:
- To search for a specific case, in the UKG Community search bar, enter the appropriate Keyword or Case Number, and then press Enter.Note If you are a UKG Pro Payment Services customer, the Case Number that appears in the search results may not match the Case Number you received by email after opening the case. If the numbers don't match, verify that the subject of the case is correct. If the subject is correct, then you found the correct case.
- To view all available cases, from the Navigation bar, select Services and Support, and then select Manage Cases from the Support box.Tip You can use the fields in the Search Cases section to filter the table by owner, Solution ID, Contact Name, and Date Range. To sort the cases that appear in the table in ascending or descending order, select a column header.
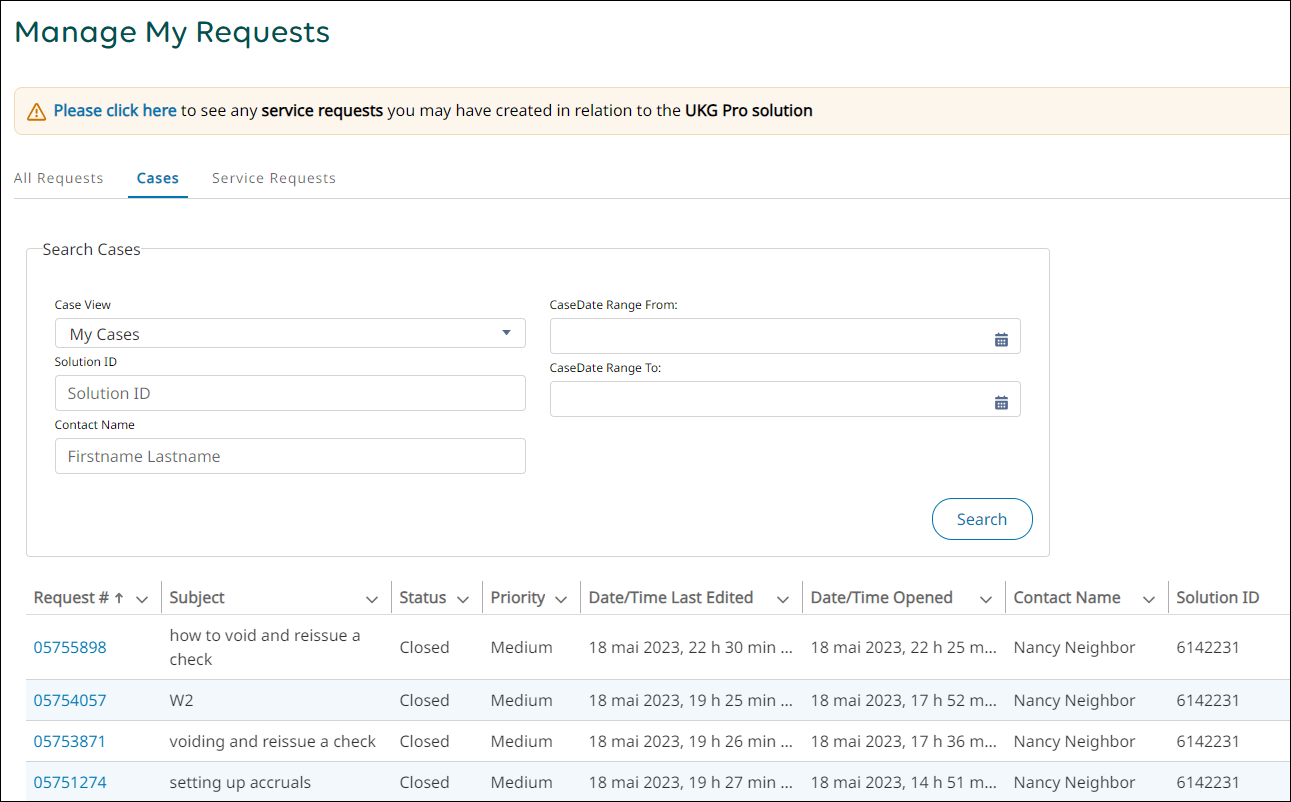
- To search for a specific case, in the UKG Community search bar, enter the appropriate Keyword or Case Number, and then press Enter.
- (Optional) Select the Show More icon beside the progress bar to view more information about the current status.

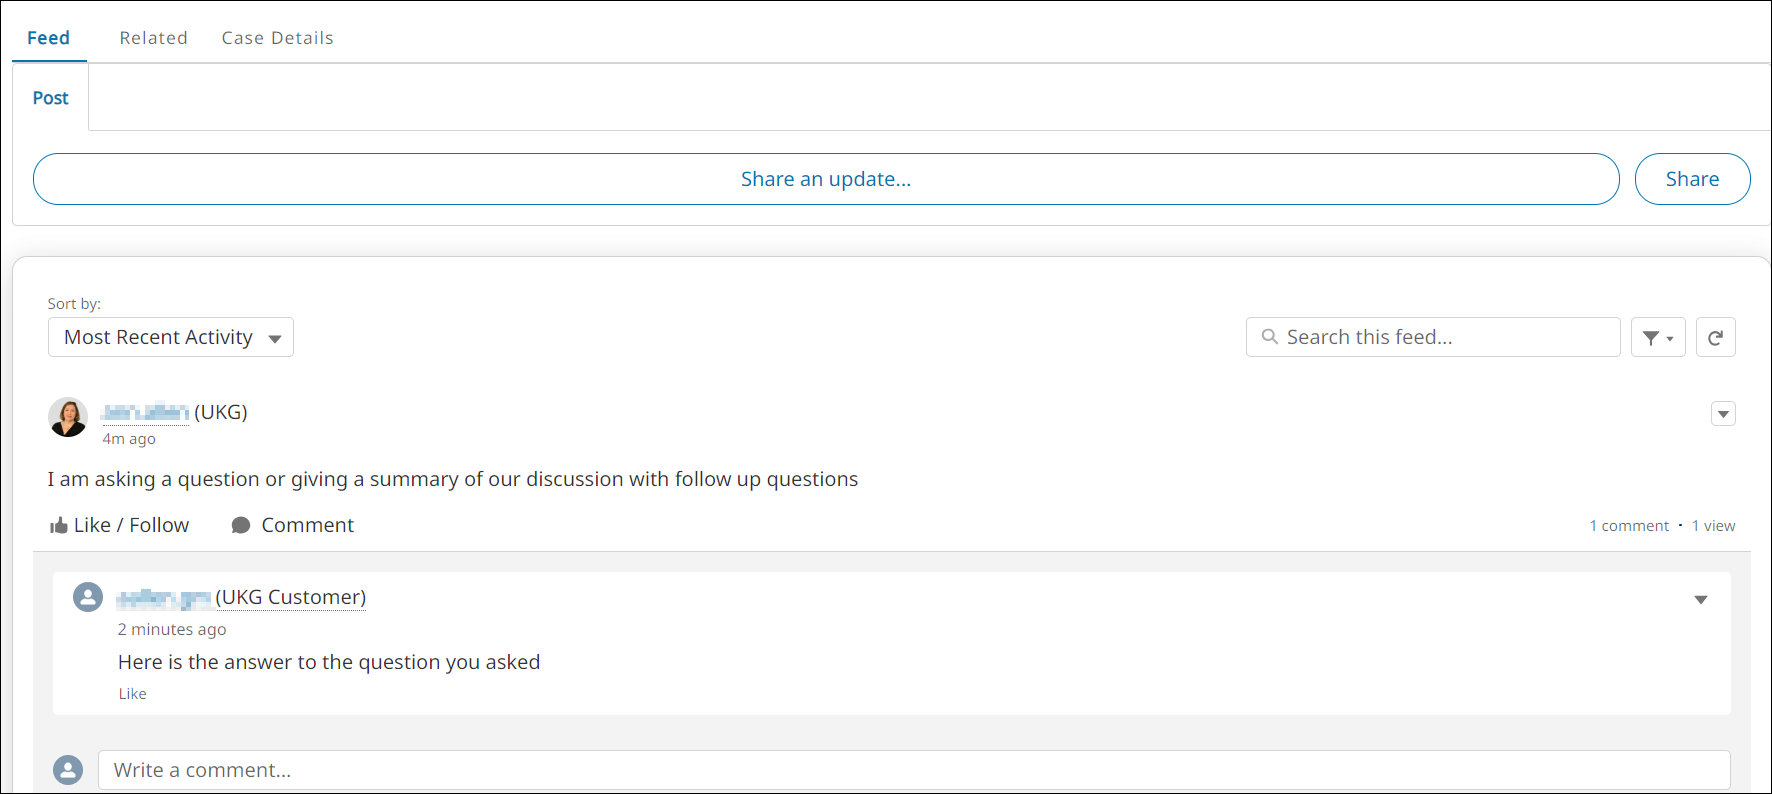
- (Optional) Use the Feed, Related, and Case Details tabs to communicate with the case owner.
- Select the Feed tab to post updates and read comments from the case owner.Note If you need to close a case that is not in the Resolved Pending Confirmation status, you can post a comment on the Feed tab. The case owner will close the case for you.
- Select the Related tab to access or share files, emails, and articles.
- Select the Case Details tab to view all the case details.
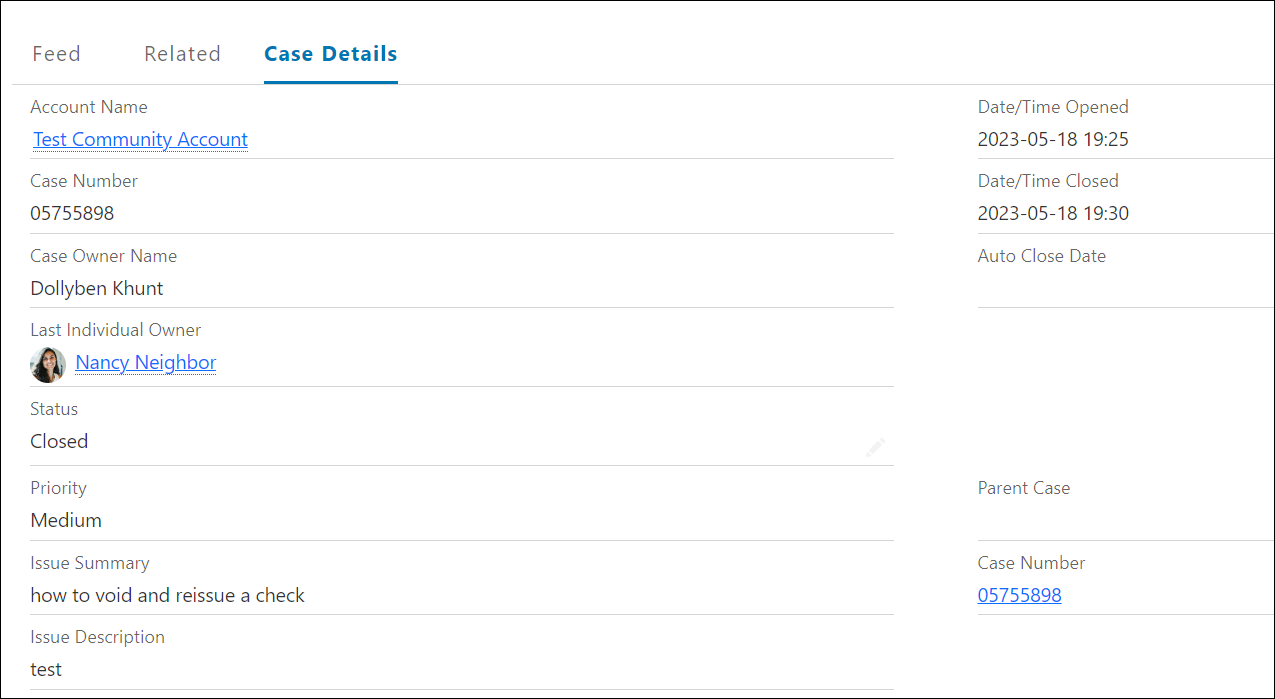
- Select the Feed tab to post updates and read comments from the case owner.
- When your case is in the Resolved Pending Confirmation status, review the most recent feed post from the case owner, and then select the Case Resolution button below the progress bar to accept or reject the resolution:
 Important If you do not accept or reject the resolution, the case will automatically close on the date specified in the Auto Close Date field on the Details tab.
© 2024 UKG Inc. All rights reserved. For a full list of UKG trademarks, visit https://www.ukg.com/trademarks. All other trademarks, if any, are the property of their respective owners.
This document and all information contained herein are provided to you "AS IS" and UKG Inc. and its affiliates (collectively "UKG") make no representation or warranties with respect to the accuracy, reliability, or completeness of this document, and UKG specifically disclaims all warranties, including, but not limited to, implied warranties of merchantability and fitness for a particular purpose. The information in this document is subject to change without notice. The document and its content are confidential information of UKG and may not be disseminated to any third party. No part of this document or its content may be reproduced in any form or by any means or stored in a database or retrieval system without the prior written authorization of UKG. Nothing herein constitutes legal, tax, or other professional advice. All legal, tax, or other questions or concerns should be directed to your legal counsel, tax consultant, or other professional advisor. All company, organization, person, and event references are fictional. Any resemblance to actual companies, organizations, persons, and events is entirely coincidental.